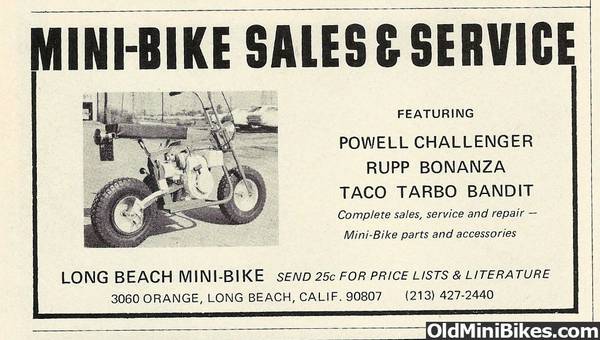
2015 BUILDOFF ENTRY Open Class Powell Challenger
- Thread starter Havasu Dave
- Start date
- Tags challenger class powell test vintage
Someone had cut off the tail light mount, so I fab'd up a replacement. The original stop lamp switch hung off of the inboard mount stud, but that was before China was offering these awesome plastic replacements. :wink: Spring sits a bit canted, but it will work fine.

Metal 428S off of Ebay

More bead is better, right? :laugh:
Metal 428S off of Ebay
More bead is better, right? :laugh:

Someone had cut off the tail light mount, so I fab'd up a replacement. The original stop lamp switch hung off of the inboard mount stud, but that was before China was offering these awesome plastic replacements. :wink: Spring sits a bit canted, but it will work fine.
Metal 428S off of Ebay
More bead is better, right? :laugh:
Metal 428S off of Ebay
More bead is better, right? :laugh:
Dave where did you find the rear light ? I have the original switch but need a light .


I could not locate the AP-4600 SAE M67 bottom mount head lamp with it's integral switches. And I needed to maintain Powell's quick disconnect design for the front end. I also wanted to install an electrical kill switch, and not rely on a shorting bar. Trying to put two switches anywhere on this frame took me four tries of fabricated crap.
Here is the switch base I came up with. Uses existing wire clamp hole on the bike. Also made a headlamp harness with plug.

This is the surround piece which installs from the bottom and attaches to the switch base. The entire unit will sport type 56 plugs and will be removable as a unit by removing a 7/16 nut from inside the frame. It will be chromed. (I think)

A 3-gang terminal board is mounted in the back. The stop lamp switch, tail light power for both brake and lamp as well as red power wire from engine will go here. This will allow each electrical component to be removed individually without bullet connectors. Just unscrew a terminal and remove the component. I also remounted the rear lamp plate to a more forward position.

Here is the switch base I came up with. Uses existing wire clamp hole on the bike. Also made a headlamp harness with plug.
This is the surround piece which installs from the bottom and attaches to the switch base. The entire unit will sport type 56 plugs and will be removable as a unit by removing a 7/16 nut from inside the frame. It will be chromed. (I think)
A 3-gang terminal board is mounted in the back. The stop lamp switch, tail light power for both brake and lamp as well as red power wire from engine will go here. This will allow each electrical component to be removed individually without bullet connectors. Just unscrew a terminal and remove the component. I also remounted the rear lamp plate to a more forward position.
Thanks for the comments folks. I took the photos because it was time for my monthly update, and aware they're pretty ugly, and don't show what's going on. :laugh: I did a lot of other things with the bike as well, fabrication-wise.
Yesterday I read several posts from Powell restorers on getting the front forks apart. Thanks to that information, I was able to do that this morning, although I have to admit it wasn't as easy as all that. I used a half-copper pipe to nudge the top bushings down enough to get at the "snap ring," which is a piece of .032 spring steel wire. It doesn't come easy, then suddenly it's in your hand.
Six inches down into the tube is another bronze bushing. I used a blind bearing puller at an angle and it took a lot of whacks with the slide hammer to get it out. I don't know how you'd get this out without that tool, unless you cut it with a bare hacksaw blade. (Bad idea) That bushing retains a longer spring with a washer between. You "could" send it out to chrome with it all together.
There is also a welded steel collar on the lower, which is 5" from the end. That needs to be removed, so the chromer can get around the smaller spring and bushing it retains. (This boring information is for my own edification when I reassemble it)
Side note: The theme of the bike would lend itself to lowering it slightly. I'm thinking about bringing the lowers up one inch by extending the steel retaining collar an inch on reassembly. Then I could cut an inch off of that nice powder coated rear spring I got off of mini bike paul.
Please vote for me, because I need cheap parts from Hent for the next stellar build. :thumbsup:

Nice build so far Dave! And very informative info along with it!
Can you show a pic of the belt? I've have a few incomplete Powell's that are missing the belts!
I'll be paying close attention to your build! Thanks Mike
Can you show a pic of the belt? I've have a few incomplete Powell's that are missing the belts!
I'll be paying close attention to your build! Thanks Mike

The lighted HS40 pretty much mocked up. Toycartony parted with his Powell spark arrestor as a gift. Thank you sir. I added a slash cut tail pipe which clears the frame and should burn my leg pretty good.
That awesome velocity stack is one made my Kustomkartkid. I really like it. It sits right in the middle of the frame almost to the swing arms, but clears everything. For an informative and interesting thread on how he machined it, click here.
The metal tank replaces a white plastic one I was going to use, and is more in keeping with what Powell had on these. I got the tank from Johnny Tillotson. I'll paint it white.

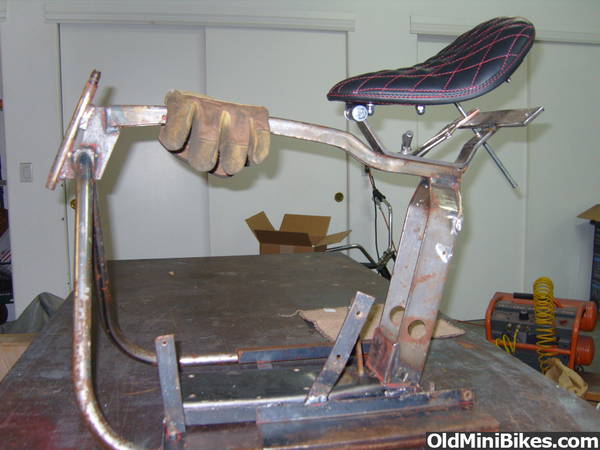
Something else I have been toying with for quite some time is this Le Pere solo seat. Front mount is on bronze bushings. Temporarily supported now, it will have two 3" coil springs. My thought was to keep the seat mount in some semblance of the original Powell tacky, yet unrefined, with a utilitarian look. I dismantled the original seat mount to build this. They're simple to reproduce, so I am not concerned with losing this piece.
Once the springs are in, I will see how much (if any) flex is there and gusset as required. It feels pretty strong.
That awesome velocity stack is one made my Kustomkartkid. I really like it. It sits right in the middle of the frame almost to the swing arms, but clears everything. For an informative and interesting thread on how he machined it, click here.
The metal tank replaces a white plastic one I was going to use, and is more in keeping with what Powell had on these. I got the tank from Johnny Tillotson. I'll paint it white.
Something else I have been toying with for quite some time is this Le Pere solo seat. Front mount is on bronze bushings. Temporarily supported now, it will have two 3" coil springs. My thought was to keep the seat mount in some semblance of the original Powell tacky, yet unrefined, with a utilitarian look. I dismantled the original seat mount to build this. They're simple to reproduce, so I am not concerned with losing this piece.
Once the springs are in, I will see how much (if any) flex is there and gusset as required. It feels pretty strong.