Hey,
Another minibike project from me for a Norway customer; a Norway themed mini bike.
I came in contact with him through social media; he had seen some of my video's and asked if I could build something like it for him. That's when I told him that I was willing to sell him my "Herbie" mini bike. We agreed a price and "Herbie goes to Monte Carlo Norway" (as a Norway themed minibike).
I have used my earlier build "Herbie" mini bike for this project.
There are about 14 pictures in this post, so while the pictures are loading.... you might want to get a cup of coffee or a sixpack of beer. I'll have the coffee!
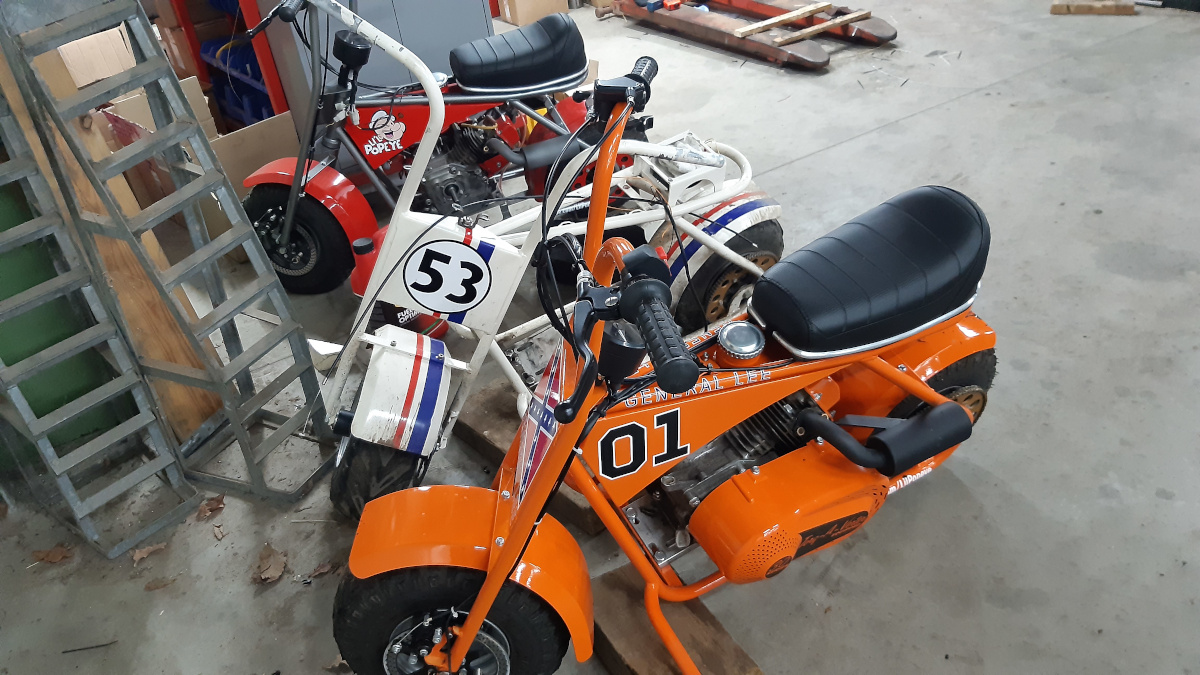
^ January 8th: "Herbie" mini bike between "General Lee" and "Li'l Popeye". I have used Herbie for this project as it needed to be repainted, because the paint used was not gasoline proof. Lesson learned... Also the fenders were cracked and needed to be welded.

^ Dismantling Herbie. The frame was still in good shape, except for the paint. When I made these fenders I only welded them on the outside, now I also weld them on the inside.

^ The end for this Herbie, plans are being made to build another Herbie; full suspension. Stay tuned on that.
The gastank got an extra hole for a fuel level sensor.

^ After all decals and paint was removed and the fenders had been repaired, it was time to spray paint the frame. Here I have used grey primer.

^ After primer I have sprayed this paint. It costs about $20,-/can, but it's nice paint.

^ As it was cold outside and in the workshop, I took all parts inside the house to apply the decals that I have made.

^ Assembly started.

^ Herbie's tires were not worn out, but if I sell a minibike "as good as new" it gets new tires and rims.
I always had trouble with getting tires on the rims. Now I have done it like this. The lathe is only used to keep the rim in place. This worked really well for me. It could also be that these tires are new to me.
These are "Kings tire" in size 15x6.00-6 tubeless, 4PR.

^ Herbie used to run with #219 chain. Now I have installed a 60 tooth 1/2" rear sprocket. And ASA40 chain.

^ The engine; I have used the engine of "Li'l Popeye" minibike, as that was the latest build engine (least hours of runtime on it). And I didn't have any new performance parts as they are ordered almost 2 months ago, payed for but not delivered, yet...
It has flat top piston, billet connecting rod, 18lbs valve springs, thin metal head gasket, VM22 Mikuni replica, aluminium flywheel, homemade exhaust and intake.
The engine oil has now been replaced, ignition timing was set at 30-32 degrees btdc, valve lash was set and I have done some work to the carb, as the float level was not set correct.
The exhaust got filled with insulation again and an extra support was added, too.

^ A new torque converter installed, new thumb throttle, new grips, new brake levers, new tacho- speedometer powered by 3 li-ion batteries. A batterycharger for these 18650 cells, aluminium weights and a spare belt for the torque converter will be shipped along with the minibike to Norway.
^ January 29th: Finished! That must be one happy customer, once he gets to open the box it will be shipped in.

^ This was again a fun build/remake and again I have learned some things along the way.

^ Ready to rumble in Norway.
The testdrive this afternoon was a great succes.
A video of this build/remake is coming soon.
What to do next? Well, I still have my road legal moped that needs to be rebuild.
Li'l Popeye minibike has no engine on, right now.
I have ordered performance parts for 5 GX160's, that I have for future projects.
I recently purchased a mini Willy's jeep (bodywork only) with a peerless differential, some quad wheels and other small parts, all in one buy for $300,-.
Enough to do and I still have to go to work, too....
Another minibike project from me for a Norway customer; a Norway themed mini bike.
I came in contact with him through social media; he had seen some of my video's and asked if I could build something like it for him. That's when I told him that I was willing to sell him my "Herbie" mini bike. We agreed a price and "Herbie goes to Monte Carlo Norway" (as a Norway themed minibike).
I have used my earlier build "Herbie" mini bike for this project.
There are about 14 pictures in this post, so while the pictures are loading.... you might want to get a cup of coffee or a sixpack of beer. I'll have the coffee!
^ January 8th: "Herbie" mini bike between "General Lee" and "Li'l Popeye". I have used Herbie for this project as it needed to be repainted, because the paint used was not gasoline proof. Lesson learned... Also the fenders were cracked and needed to be welded.
^ Dismantling Herbie. The frame was still in good shape, except for the paint. When I made these fenders I only welded them on the outside, now I also weld them on the inside.
^ The end for this Herbie, plans are being made to build another Herbie; full suspension. Stay tuned on that.
The gastank got an extra hole for a fuel level sensor.
^ After all decals and paint was removed and the fenders had been repaired, it was time to spray paint the frame. Here I have used grey primer.
^ After primer I have sprayed this paint. It costs about $20,-/can, but it's nice paint.
^ As it was cold outside and in the workshop, I took all parts inside the house to apply the decals that I have made.
^ Assembly started.
^ Herbie's tires were not worn out, but if I sell a minibike "as good as new" it gets new tires and rims.
I always had trouble with getting tires on the rims. Now I have done it like this. The lathe is only used to keep the rim in place. This worked really well for me. It could also be that these tires are new to me.
These are "Kings tire" in size 15x6.00-6 tubeless, 4PR.
^ Herbie used to run with #219 chain. Now I have installed a 60 tooth 1/2" rear sprocket. And ASA40 chain.
^ The engine; I have used the engine of "Li'l Popeye" minibike, as that was the latest build engine (least hours of runtime on it). And I didn't have any new performance parts as they are ordered almost 2 months ago, payed for but not delivered, yet...
It has flat top piston, billet connecting rod, 18lbs valve springs, thin metal head gasket, VM22 Mikuni replica, aluminium flywheel, homemade exhaust and intake.
The engine oil has now been replaced, ignition timing was set at 30-32 degrees btdc, valve lash was set and I have done some work to the carb, as the float level was not set correct.
The exhaust got filled with insulation again and an extra support was added, too.
^ A new torque converter installed, new thumb throttle, new grips, new brake levers, new tacho- speedometer powered by 3 li-ion batteries. A batterycharger for these 18650 cells, aluminium weights and a spare belt for the torque converter will be shipped along with the minibike to Norway.
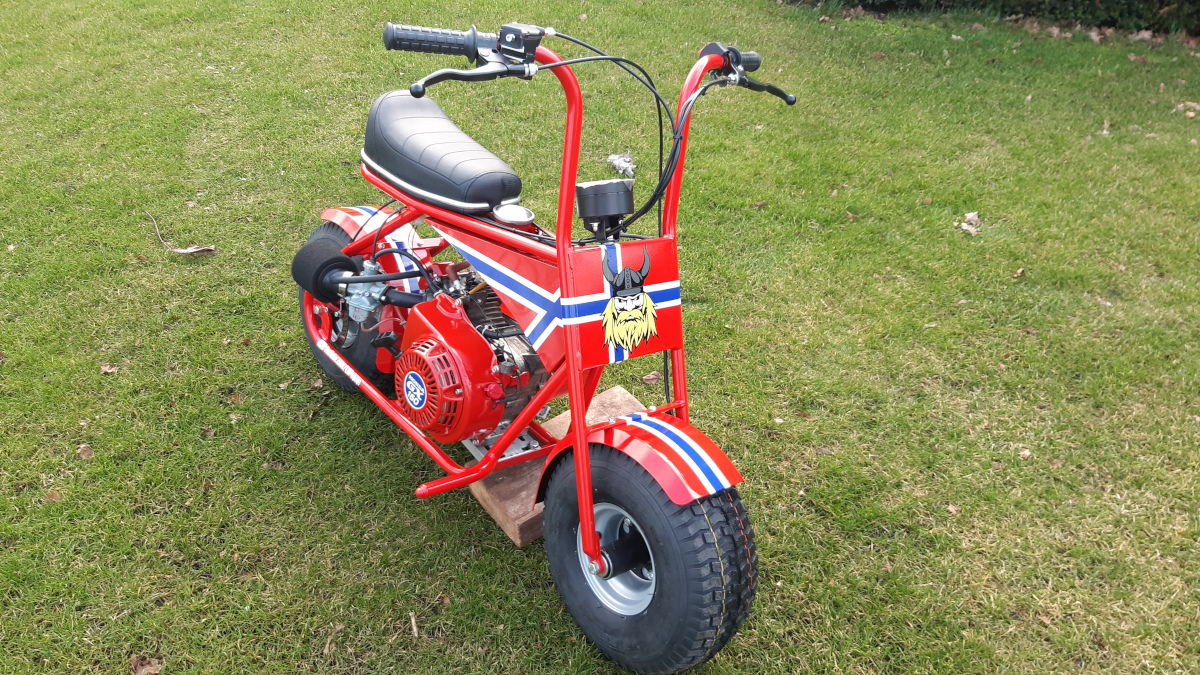
^ January 29th: Finished! That must be one happy customer, once he gets to open the box it will be shipped in.
^ This was again a fun build/remake and again I have learned some things along the way.
^ Ready to rumble in Norway.
The testdrive this afternoon was a great succes.
A video of this build/remake is coming soon.
What to do next? Well, I still have my road legal moped that needs to be rebuild.
Li'l Popeye minibike has no engine on, right now.
I have ordered performance parts for 5 GX160's, that I have for future projects.
I recently purchased a mini Willy's jeep (bodywork only) with a peerless differential, some quad wheels and other small parts, all in one buy for $300,-.
Enough to do and I still have to go to work, too....
