Ohlsson & Rice Powered BMX Bike ?

#1
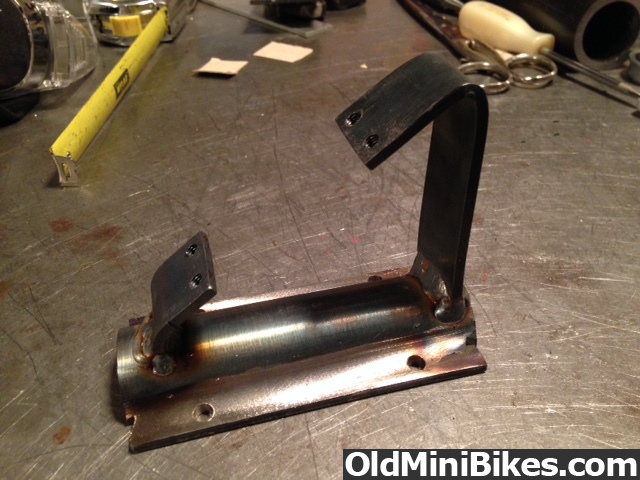
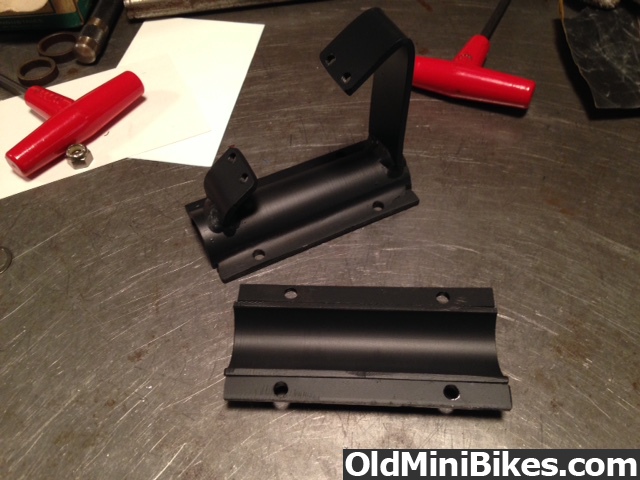
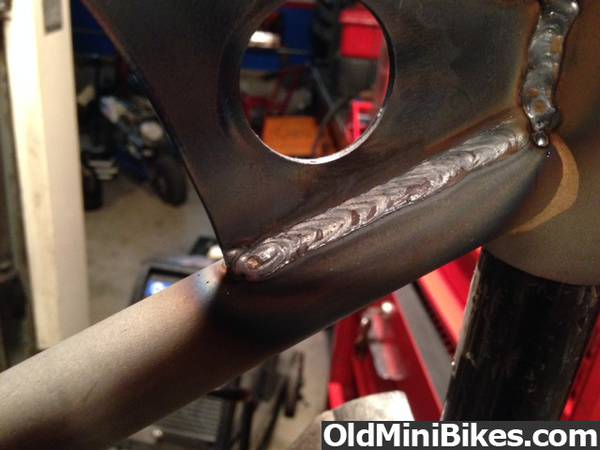
This started out as one of those ideas where my son and I just sat around wondering if it would work and sketching it out...the next thing I knew we were building it !

We've all seen the Tom Thumb and Micro Bikes...not very practical being 6 inches off the ground. Or the 26" cruiser bikes powered by the 50cc import engines...cool but it's been done a million times. We wanted to try something a little different. The aim is to build a lightweight, small frame bike to ride around the school campus. There are some pretty stringent rules as to what will qualify as a "motorized bike" vs a street legal machine that needs to be registered and tagged. Your not going to bolt a West Bend 580 into a Schwinn and go ripping down the bike lane and get away with it. Campus police are hip to people bending the rules.

My son thought an old BMX bike might be an interesting platform...and the Ohlsson and Rice being a vintage made in the USA engine should be enough to keep my attention at least for a while. The biggest challenge will be wringing every bit of that 1 HP from what is essentially an oversized model airplane engine.

It may end up being an exercise in futility...but it will be an exercise in backyard mechanical engineering none the less and hopefully we'll both have some fun and learn stuff along the way.
 
#2
First order of business was to locate a suitable 2-wheeled candidate. A trip to the local Re-Cycle center turned up this forlorn looking mid-80's Huffy BMX in need of a good home.


Hey at least it was made in the USA out of American steel and my SAE wrenches even fit it ! After some tense negotiating and arm wrestling it was acquired for the princely sum of $40 and tossed into the truck.
 
#3
Next I sourced an engine from Joe Webber out of Missouri. He is one of the O&R guru's but he is slowly backing out of the hobby and I got a great deal from him on this motor.


Looks clean...like NOS.
 
#4
When I was younger. My friend had a BMX with a small 2 stroke on it. It had a lever that would lower the engine so that a small spool that was about the size of a roll of thread would make contact with the rubber on the tire. The spool had grooves that would cause the friction with the tire. Of course if you revved it up from a stop it would literally grind the tire tread. But if you were moving and lowered the engine and gave it the throttle it would move you right along. I cant remember if the spool was right on the crank or if there was a gearbox or something so it sat under the motor. I just remember it ran well and would move you along.
 
#5
When I was younger. My friend had a BMX with a small 2 stroke on it. It had a lever that would lower the engine so that a small spool that was about the size of a roll of thread would make contact with the rubber on the tire. The spool had grooves that would cause the friction with the tire. Of course if you revved it up from a stop it would literally grind the tire tread. But if you were moving and lowered the engine and gave it the throttle it would move you right along. I cant remember if the spool was right on the crank or if there was a gearbox or something so it sat under the motor. I just remember it ran well and would move you along.
I've seen something similar to that online. O&R even made a "Chicken Power" bike that used friction drive on the front wheel and COX made a bolt on friction drive engine. This one will be chain driven with the crank pedal intact so you can give it a few pumps to get it rolling before employing the engine...at least that's the plan.
 
#7
Motivating this thing is going to take some serious leverage given the lack of HP and torque. We're shooting for a final drive ratio somewhere in the neighborhood of 20:1. There's a company called Stanton that makes all sorts of engine powered bike accessories including this rear hub with LH and RH threads on each end. One side gets a freewheel flange made to accept the (#35 chain) drive sprocket ...the other side gets a freewheel bike chain sprocket so you can stop peddling when the engine takes over.


The drive sprocket is the largest they offer...72T

We also swapped out the stock crankset sprocket for a small 25T that should give the bike a quick hole-shot with just a few pedal turns:

 
#8
Working on the floor or bench wasn't going to cut it. We turned down a piece of black pipe and clamped it in the vise. Then we could drop the front fork neck over it and it conveniently allows us to swing the frame around from side to side. It would work better if we squared the bottom end to clamp it...instead we just cranked on it hard enough to flatten the pipe lol...


Here you see the new hub laced into the rear wheel and the 72T sprocket mounted...


markus

Well-Known Member
#10
Hey Gerry now that I see what you are doing with the O&R why not just use a bike brake handle for the the throttle. alot of them have a spring return built in :shrug:
 
#12
Thanks I kind of needed a project to "un-retire" myself from the couch...I was really getting lazy.


.

Hey Gerry now that I see what you are doing with the O&R why not just use a bike brake handle for the the throttle. alot of them have a spring return built in :shrug:
I tried suggesting a trigger type throttle early on because I had seen some on the Tom Thumbs...but my son was not real keen on it since there will already be a brake lever on each side (had to ditch the coaster brake with the new hub).
As you suggested there are some spring loaded Domino throttles out there, I just have to zero in on the right one.
 
#13
Decided we better fire the motor and see what it sounded like. We made a temporary motor mount and clamped it to the old truck-hitch dyno lol.


HA!... it looks lost on the plate compared to a Tec or Briggs.


I gotta say I was surprised at how snappy this little motor sounds...this thing has a bad attitude!! It's really responsive and it actually torques the hitch over in the receiver so maybe not as anemic as I thought it would be. Thinking about it some of those big clunky Power Products engines with the square gas tanks on top are only 1/2- 1HP.....but, we shall see.

Quick Video:

 
#14
For the actual engine mount in the bike we had to get a little creative. We made a "saddle mount" out of some 1" I.D. DOM tubing.

We split the tube and welded a flange along each edge. By loosening the 4 screws you can slide the motor fore and aft to adjust the chain tension...then lock it down.


#16
Looking at pictures of vintage BMX bikes online, we noticed a lot of the high end bikes of the day had a gusset behind the fork neck.

Of course we had to have one too....


KK Jr making sparks....


#17
Next up was the jackshaft tube....again made from DOM tubing bored on the ends to accept the bearings.


With 3 different chains running within such a small space there's not a lot of room for error. In this case it was "measure 10 times and cut once..." and we still had to cut it off and re-weld it to get it in the best spot.


More gussets added to "box it in" for strength:


#18
Bent up a fuel tank bracket and plug welded it to the frame behind the seat...


Put a strip of self stick foam padding on it and clamped the tank into place...


#19
Took a break from the heat and visited the OldMiniBikes Warehouse to pick up some parts. Keyed jackshaft, mini hub and sprocket, bearings, chain, cables, fuel line, etc etc...all in stock. One stop shopping with first rate counter service. :thumbsup:

Got to see Chad detailing the OldMiniBikes Jet ....and even got to see the boss man hisself. Dude was sweating bullets he was working so hard :eek:hmy:

Anyway we got the mini jackshaft and 300 Series Comet clutch mounted. I have a service kit for these clutches since its the same ones used on the Spitler Bonanza. Since the jackshaft is turning less than 1/3 crank speed (3.6:1) we installed the lightest engagement spring available (1100 RPM). This is still a bit of a concern but haven't thought of a way around it yet. Mounting a clutch to the 1/2" engine pto is just not practical.


#20
Off camera we had to bend the arms on the pedal crank outward to clear the works...sort of a "Z" shape bend, out and then back parallel again. The local bike shop actually had a special tool with a long cheater bar on it designed especially for bending the arms (cold) that we borrowed. It's really made for making small tweaks on a bike that's been laid over or crashed. We needed a full 2" offset. I could not believe the steel arms would bend that much without heating them up but they did with a lot of persuading.

I said we did it "off camera" because there was a lot of swearing going on hahaha...
 
Top