Tav2 install help.....chain and sprocket alignment

#1
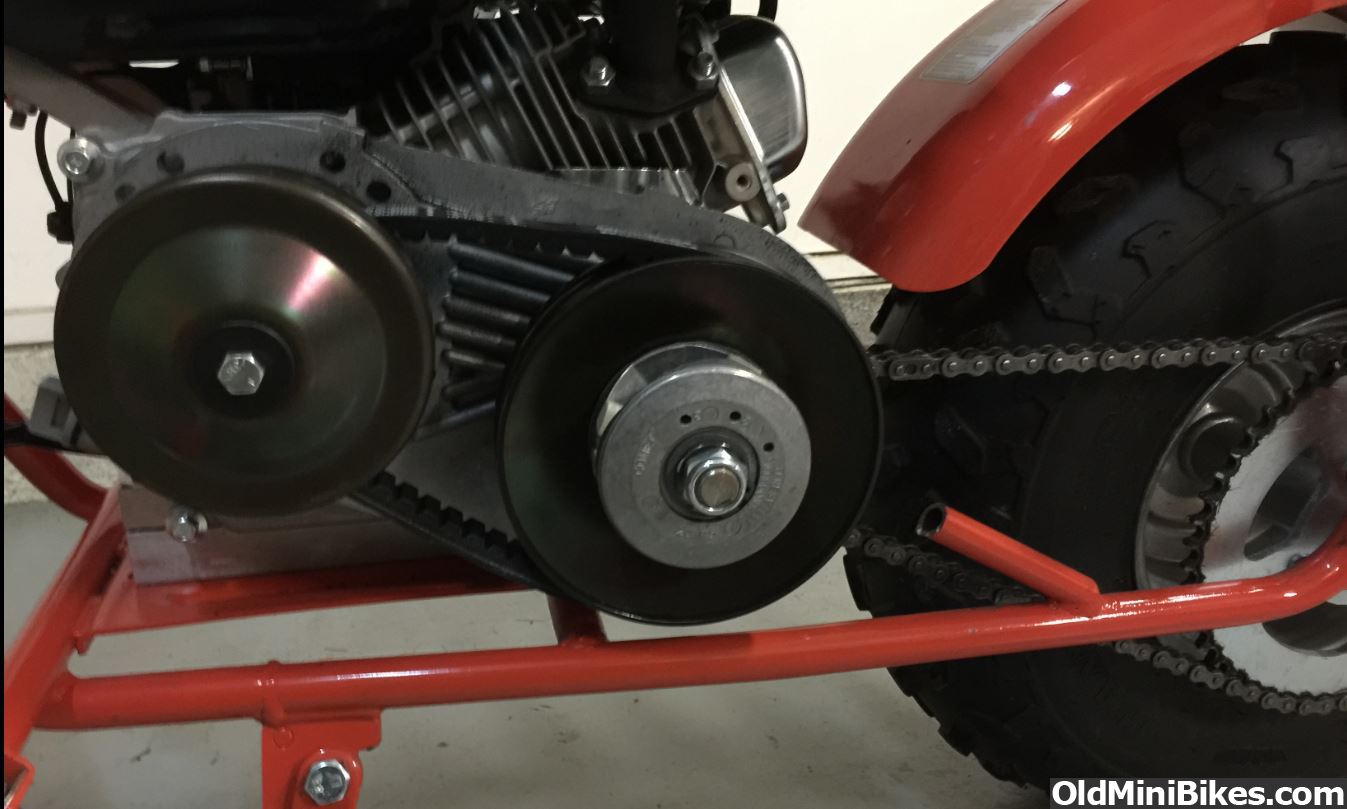
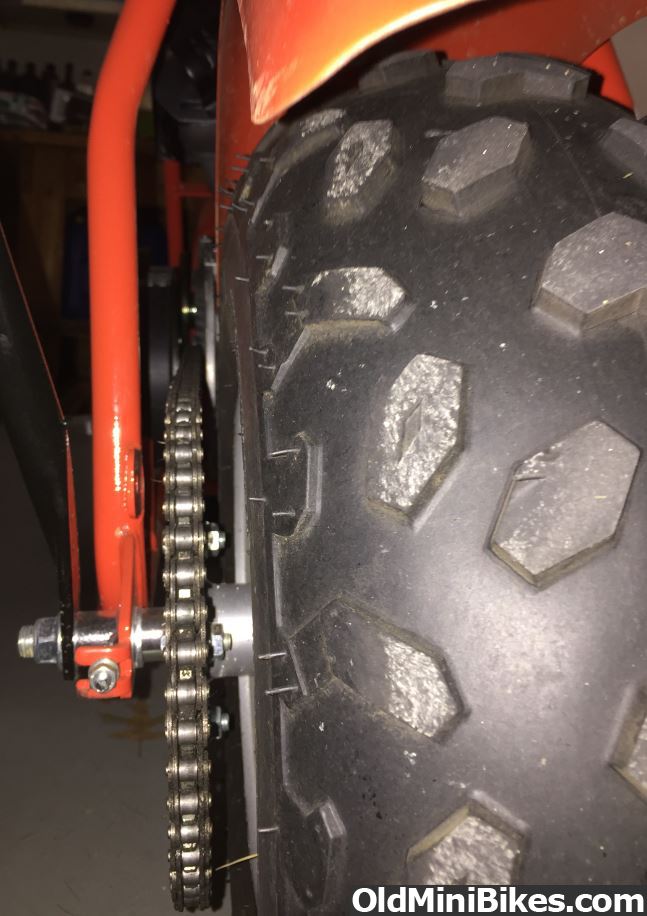
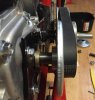
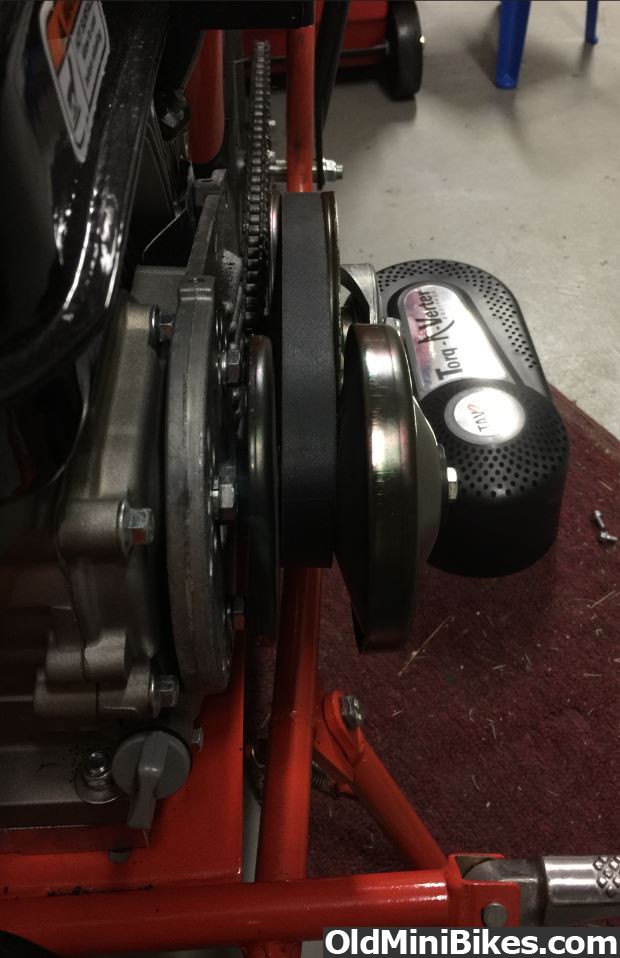
So I am test fitting everything, installed drive and driven nice to realize the rear sprocket and jackshaft sprocket don't line up.

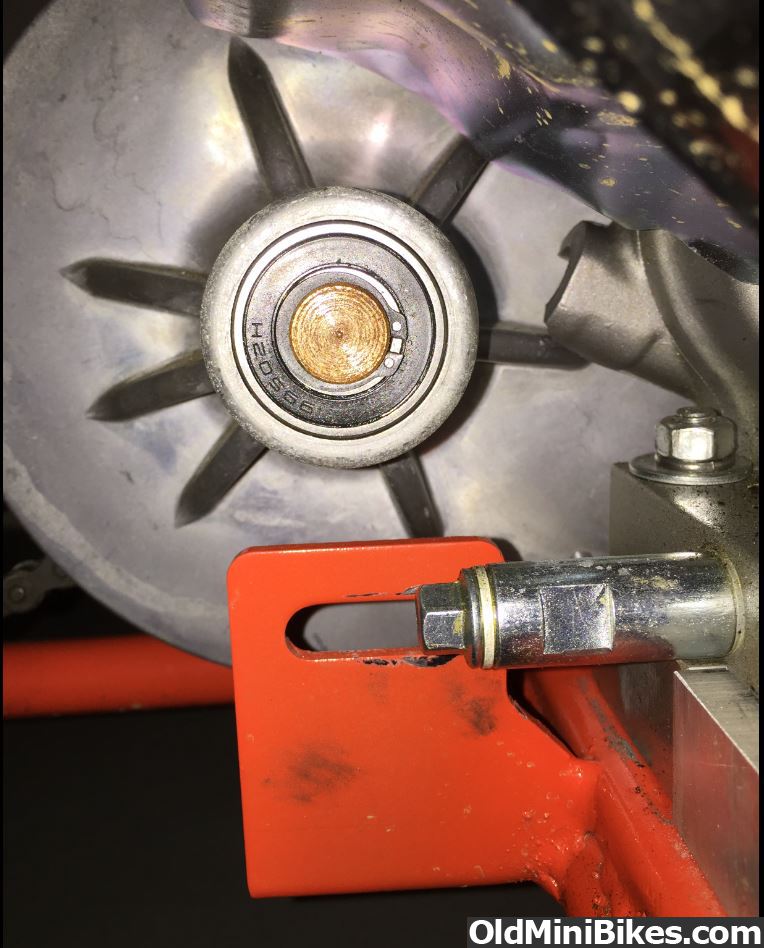
Now if I space out the jackshaft sprocket to match the rear wheel sprocket,then the driven pulley moves forward, then the drive pulley has to move forward which doesn't leave space on the crank for the collar to go on.

Motor is gx200 clone.

Can you space the rear sprocket off the wheel flange with spacers?

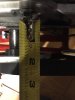
Also what's the best way to perfectly align the 2 sprockets together? I will try a straight edge that's thin to get in there but not sure if that's 100% accurate.
 

mcirmn

New Member
#2
Mine lined up perfectly. make sure the Tav plate is resting completely flat on the motor. I had to grind the unused Oil fill plug on the rear of the motor in order to achieve this.

Also i did put a plate under my motor to help with the clearance.
I'll try and add a couple of Pics tonight.
 
Last edited:
#3
Mine lined up perfectly. make sure the Tav plate is resting completely flat on the motor. I had to grind the unused Oil fill plug on the rear of the motor in order to achieve this.

Also i did put a plate under my motor to help with the clearance.
I'll try and add a couple of Pics tonight.
That's a good start :thumbsup: pic's of what you have going on might help :thumbsup: I haven't had a driver yet on a clone that I didn't need to make a crank spacer for :shrug:
 

mcirmn

New Member
#4
here is three pics. ( hope i do this right, never done pics before )
You will notice i raised the engine with a 1" Aluminum plate, and i also cut the chain guard support.
I also shaved the front of the oil fill plug.
The back chain is the original length, no adjustments needed.

One day i might re-weld the chain guard support back in to make it pretty again :)

you'll see by the last pic, the chain is pretty straight, i didn't have to do any adjustments

Oh, By the way, this Mod will change the model # of your CT200U to CT200F.... For "fun" LOL.
 
Last edited:
#6
Is that a real comet or knockoff from eBay? Even with a 6" driven you had to raise the engine?

I don't have that backing plate, I was reusing the oem plate but of course the top and bottom trimmed. With a 6" driven I have a 1/2" clearance from belt to frame.
I can't seem to get your backing plate on its own, a whole kit on eBay is $80 so I was hoping to find a backing plate very cheap but no luck.
 

mcirmn

New Member
#7
Is that a real comet or knockoff from eBay? Even with a 6" driven you had to raise the engine?

I don't have that backing plate, I was reusing the oem plate but of course the top and bottom trimmed. With a 6" driven I have a 1/2" clearance from belt to frame.
I can't seem to get your backing plate on its own, a whole kit on eBay is $80 so I was hoping to find a backing plate very cheap but no luck.
yes, that's a comet Tav that i ordered here from OldMiniBikes.
I lifted the engine so i did not have to modify the Tav plate. I went 1" with mine, and the Tav just clears the frame.
I could have just notched the Tav plate to clear the frame, but i felt it would have been a little too much cutting of the backing plate.
 
#8
yes, that's a comet Tav that i ordered here from OldMiniBikes.
I lifted the engine so i did not have to modify the Tav plate. I went 1" with mine, and the Tav just clears the frame.
I could have just notched the Tav plate to clear the frame, but i felt it would have been a little too much cutting of the backing plate.
That's why I want to use the factory backplate, it supports the jackshaft and no lifting of the engine as the 6" driven clears the frame.
BUT I think it might stick further away than the tav because the driven sprocket needs spacing to line up with rear sprocket. Also the tav is longer because I am a link short with factory chain and 50t. Not that I'm using it but wanted to compare it to yours.

According to the calculations , a 72t rear sprocket would work wonders compared to factory 50t.
 
Last edited:
#9
That's a good start :thumbsup: pic's of what you have going on might help :thumbsup: I haven't had a driver yet on a clone that I didn't need to make a crank spacer for :shrug:
This is the problem, chain aligned with a spacer, now it kicked the drive pulley forward leaving no space for the driver hub.

image.jpeg

image.jpeg
 
Last edited:
#10
wow, i see what your saying now. I didn't have that problem. I'm going to include a picture from the same angle that you have. Not sure if it will help. But i'll do it anyway.


With my setup, it's got a ton of low end torque. i was actually thinking of going to a lower count gear to get more top end. ( if i'm thinking correctly on gear workings.)

Now that winter is here, I'm thinking on doing some of the jets/intake/exhaust mods.
 
#11
wow, i see what your saying now. I didn't have that problem. I'm going to include a picture from the same angle that you have. Not sure if it will help. But i'll do it anyway.


With my setup, it's got a ton of low end torque. i was actually thinking of going to a lower count gear to get more top end. ( if i'm thinking correctly on gear workings.)

Now that winter is here, I'm thinking on doing some of the jets/intake/exhaust mods.
It might be the pic but your chain looks like it goes in towards the motor. Did you use a spacer behind the sprocket gear?
We have the same motor so shaft should be same length. I the oem spacer behind the sprocket like the bike was from the factory.
 
#12
Also, your backplate is thick, mine is thin which gets me more room on the crank, so what can be different ?
Is my sprocket behind the driven wider? Is your crank longer?
Just thinking out loud how it's possible that you fit everything on the crank since we both have same rear wheel spacing.

Since the driven sprocket determines location, everything should be the same, unless you have a thin sprocket and no spacer against the jackshaft bearing, that might move everything 1/4" towards motor.
 
#13
I re-verified, my chain looks straight, and not headed towards motor. I think that was just from being off center of the photo.

The Driven is all one piece from the manufacturer pressed into the back plate, and the driver is the only thing i assembled. When i look at your photo, it looks like there is more space between the chain sprocket, and the driven. The Belt sticks out further in your photo, than mine does. It looks like yours sticks out past the frame.

Can i get a close up shot of your Driven ? from the top down, and from the front.
 
#14
I re-verified, my chain looks straight, and not headed towards motor. I think that was just from being off center of the photo.

The Driven is all one piece from the manufacturer pressed into the back plate, and the driver is the only thing i assembled. When i look at your photo, it looks like there is more space between the chain sprocket, and the driven. The Belt sticks out further in your photo, than mine does. It looks like yours sticks out past the frame.

Can i get a close up shot of your Driven ? from the top down, and from the front.
Sure I'll take a pic tonight, from the bearing of jackshaft , I have a spacer (had to use to keep chain straight like factory did)
Then the sprocket , the. Driven right up against sprocket.

Are you thinking my driven is wider than normal? I got them off a go kart.

My driven is one piece but it's removable, you said it's pressed into back plate? So your sprocket and driven is not removable?
 
Last edited:
#15
wow, i see what your saying now. I didn't have that problem. I'm going to include a picture from the same angle that you have. Not sure if it will help. But i'll do it anyway.


With my setup, it's got a ton of low end torque. i was actually thinking of going to a lower count gear to get more top end. ( if i'm thinking correctly on gear workings.)

Now that winter is here, I'm thinking on doing some of the jets/intake/exhaust mods.
I'm thinking maybe the pulleys are slightly different ?
Here are my measurements, what are yours?

Here is driven pulley with tape resting against head, says 2"
image.jpeg


Here is Drive tape resting on bolt head, about 1.5"
image.jpeg
 
Last edited:
Top