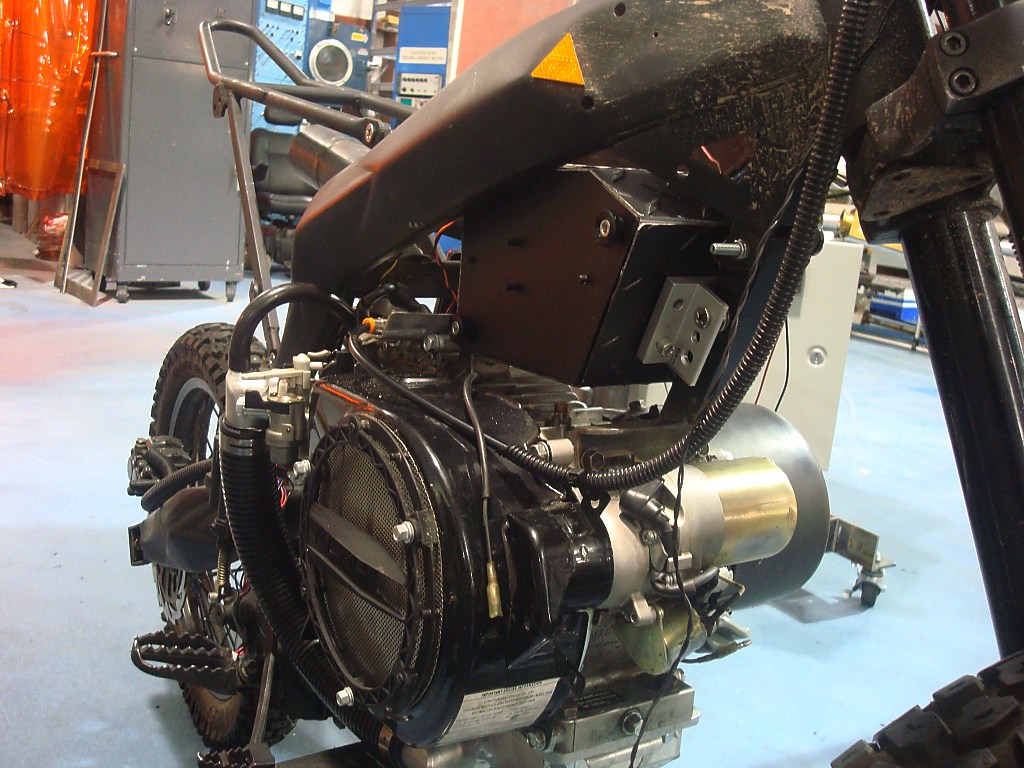
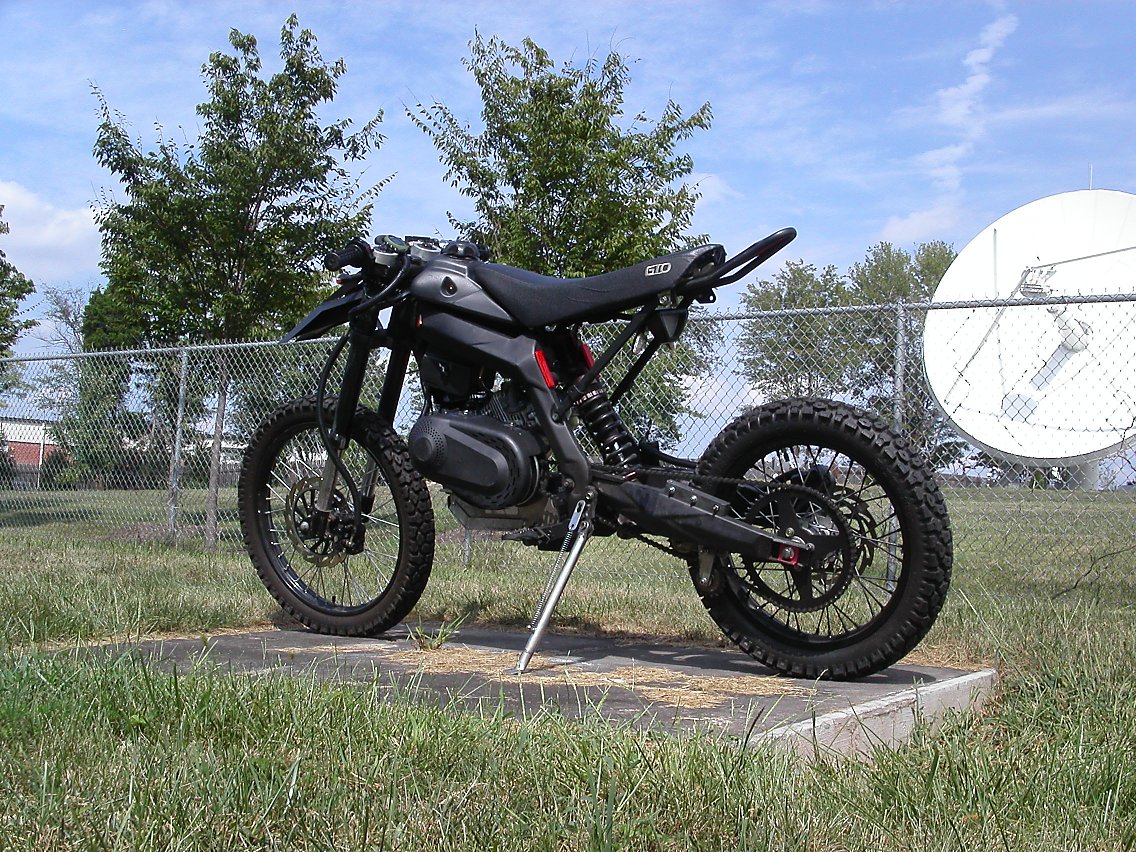
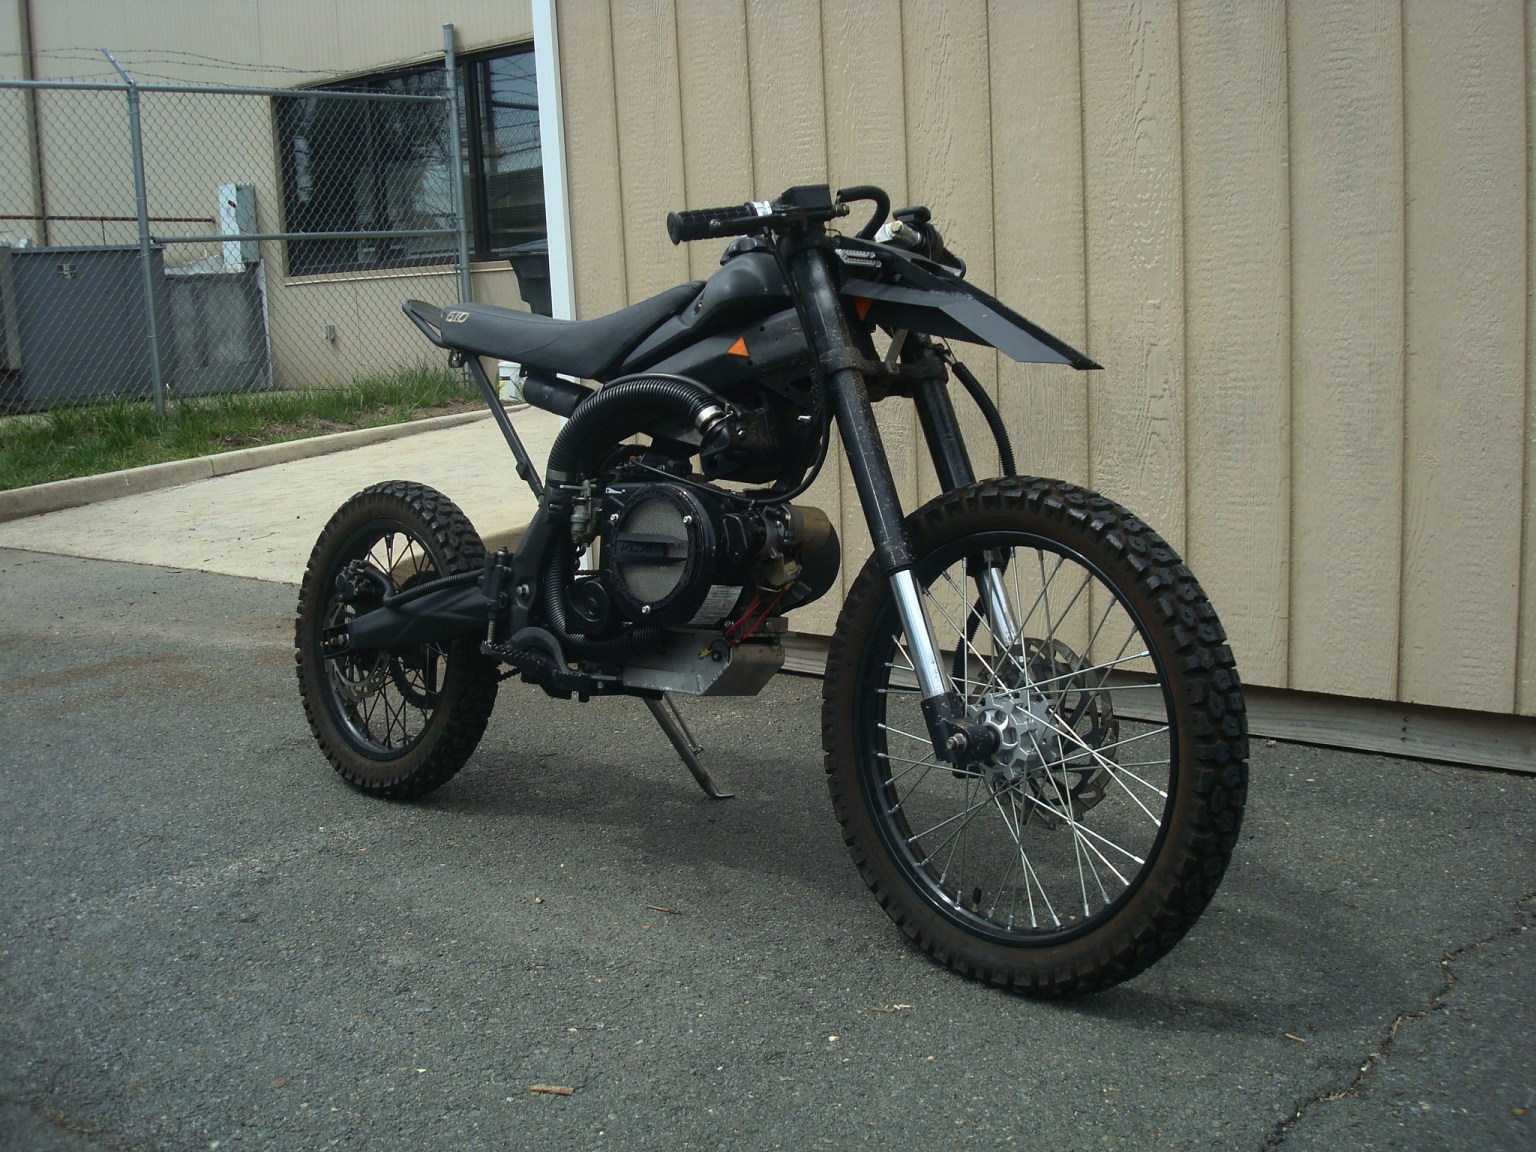
I wanted a go-kart, but I also had a dirt bike rolling frame sitting around from an earlier project. So why not both?
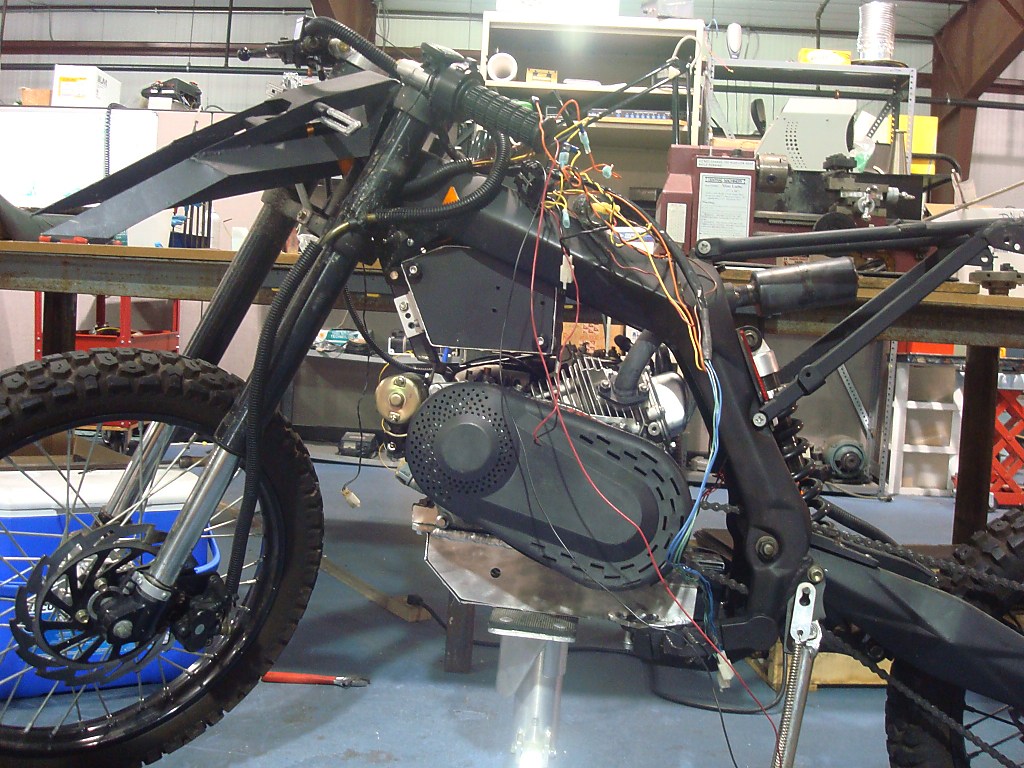
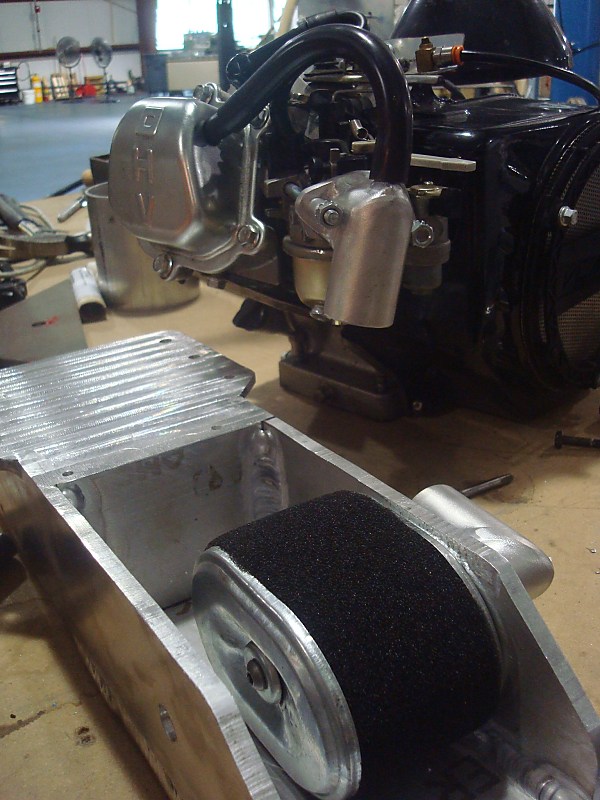
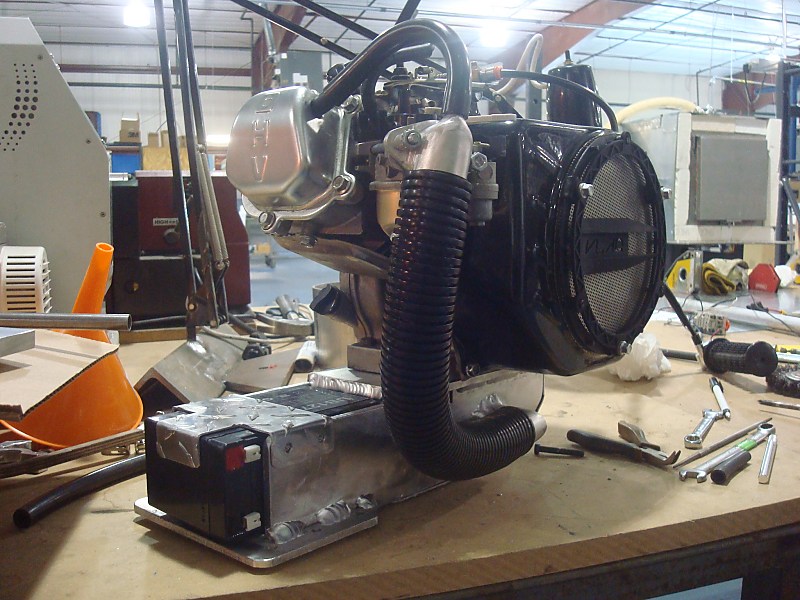
Photos are in chronological order. The beginning of the build saw a lot of part improvisation, including a pool vacuum hose intake line.
http://www.captainslug.com/temp/vlad_002.jpg
http://www.captainslug.com/temp/vlad_003.jpg
http://www.captainslug.com/temp/vlad_005.jpg
http://www.captainslug.com/temp/vlad_007.jpg
http://www.captainslug.com/temp/vlad_008.jpg
http://www.captainslug.com/temp/vlad_009.jpg
http://www.captainslug.com/temp/vlad_010.jpg
http://www.captainslug.com/temp/vlad_011.jpg
http://www.captainslug.com/temp/vlad_013.jpg
http://www.captainslug.com/temp/vlad_014.jpg
http://www.captainslug.com/temp/vlad_016.jpg
http://www.captainslug.com/temp/vlad_017.jpg
http://www.captainslug.com/temp/vlad_018.jpg
http://www.captainslug.com/temp/vlad_019.jpg
http://www.captainslug.com/temp/vlad_021.jpg
http://www.captainslug.com/temp/vlad_022.jpg
http://www.captainslug.com/temp/vlad_023.jpg
http://www.captainslug.com/temp/vlad_024.jpg
http://www.captainslug.com/temp/vlad_025.jpg
http://www.captainslug.com/temp/vlad_026.jpg
http://www.captainslug.com/temp/vlad_028.jpg
http://www.captainslug.com/temp/vlad_029.jpg
http://www.captainslug.com/temp/vlad_030.jpg
http://www.captainslug.com/temp/vlad_031.jpg
http://www.captainslug.com/temp/vlad_032.jpg
http://www.captainslug.com/temp/vlad_033.jpg
http://www.captainslug.com/temp/vlad_034.jpg
http://www.captainslug.com/temp/vlad_035.jpg
http://www.captainslug.com/temp/vlad_036.jpg
http://www.captainslug.com/temp/vlad_037.jpg
http://www.captainslug.com/temp/vlad_038.jpg
http://www.captainslug.com/temp/vlad_039.jpg
http://www.captainslug.com/temp/vlad_041.jpg
http://www.captainslug.com/temp/vlad_042.jpg
http://www.captainslug.com/temp/vlad_043.jpg
http://www.captainslug.com/temp/vlad_044.jpg
http://www.captainslug.com/temp/vlad_045.jpg
http://www.captainslug.com/temp/vlad_046.jpg
http://www.captainslug.com/temp/vlad_047.jpg
http://www.captainslug.com/temp/vlad_048.jpg
http://www.captainslug.com/temp/vlad_050.jpg
This project took 2 months of work in the summer of 2012 to get running. I've worked on it one weekend a month for the past year.
I took it to a small car show 2 months after I finished it and placed in the Top 10 out of 40 motorcycles.
Photos are in chronological order. The beginning of the build saw a lot of part improvisation, including a pool vacuum hose intake line.
http://www.captainslug.com/temp/vlad_002.jpg
http://www.captainslug.com/temp/vlad_003.jpg
http://www.captainslug.com/temp/vlad_005.jpg
http://www.captainslug.com/temp/vlad_007.jpg
http://www.captainslug.com/temp/vlad_008.jpg
http://www.captainslug.com/temp/vlad_009.jpg
http://www.captainslug.com/temp/vlad_010.jpg
http://www.captainslug.com/temp/vlad_011.jpg
http://www.captainslug.com/temp/vlad_013.jpg
http://www.captainslug.com/temp/vlad_014.jpg
http://www.captainslug.com/temp/vlad_016.jpg
http://www.captainslug.com/temp/vlad_017.jpg
http://www.captainslug.com/temp/vlad_018.jpg
http://www.captainslug.com/temp/vlad_019.jpg
http://www.captainslug.com/temp/vlad_021.jpg
http://www.captainslug.com/temp/vlad_022.jpg
http://www.captainslug.com/temp/vlad_023.jpg
http://www.captainslug.com/temp/vlad_024.jpg
http://www.captainslug.com/temp/vlad_025.jpg
http://www.captainslug.com/temp/vlad_026.jpg
http://www.captainslug.com/temp/vlad_028.jpg
http://www.captainslug.com/temp/vlad_029.jpg
http://www.captainslug.com/temp/vlad_030.jpg
http://www.captainslug.com/temp/vlad_031.jpg
http://www.captainslug.com/temp/vlad_032.jpg
http://www.captainslug.com/temp/vlad_033.jpg
http://www.captainslug.com/temp/vlad_034.jpg
http://www.captainslug.com/temp/vlad_035.jpg
http://www.captainslug.com/temp/vlad_036.jpg
http://www.captainslug.com/temp/vlad_037.jpg
http://www.captainslug.com/temp/vlad_038.jpg
http://www.captainslug.com/temp/vlad_039.jpg
http://www.captainslug.com/temp/vlad_041.jpg
http://www.captainslug.com/temp/vlad_042.jpg
http://www.captainslug.com/temp/vlad_043.jpg
http://www.captainslug.com/temp/vlad_044.jpg
http://www.captainslug.com/temp/vlad_045.jpg
http://www.captainslug.com/temp/vlad_046.jpg
http://www.captainslug.com/temp/vlad_047.jpg
http://www.captainslug.com/temp/vlad_048.jpg
http://www.captainslug.com/temp/vlad_050.jpg
This project took 2 months of work in the summer of 2012 to get running. I've worked on it one weekend a month for the past year.
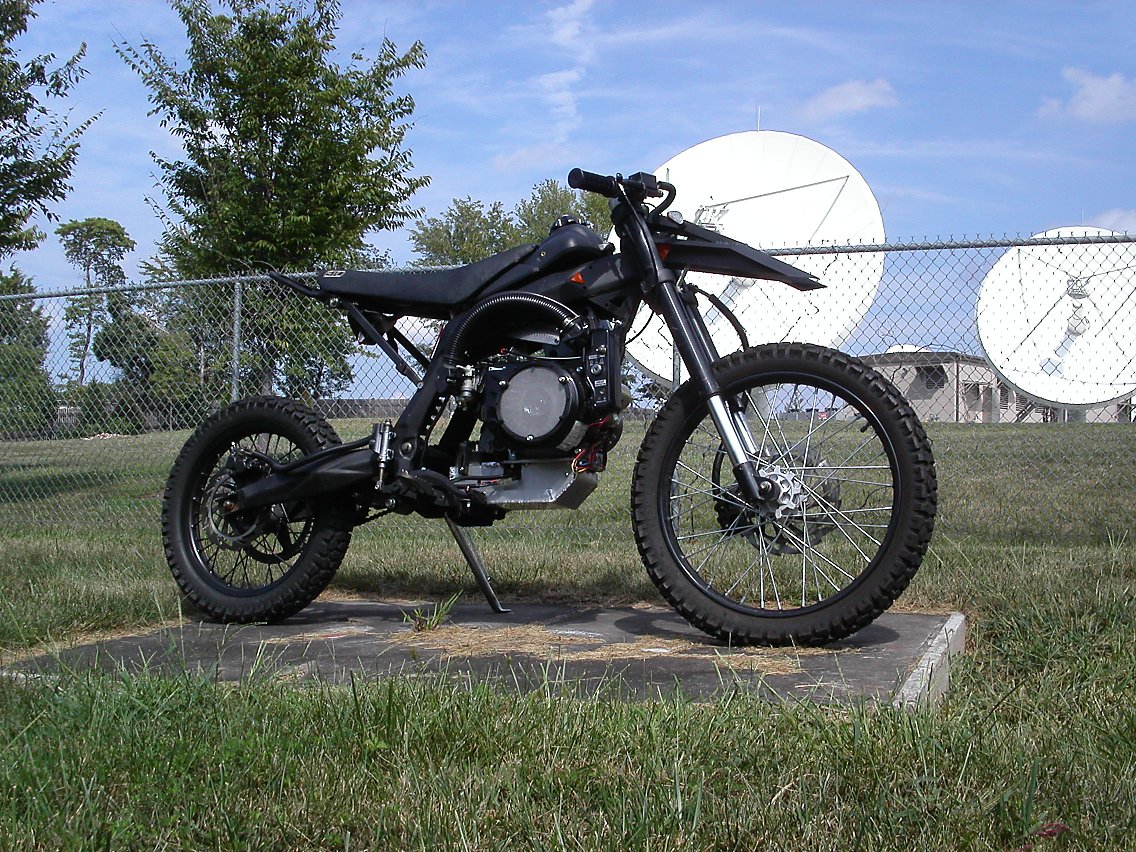
- The top speed is 45mph.
- Wet Weight is 180lb.
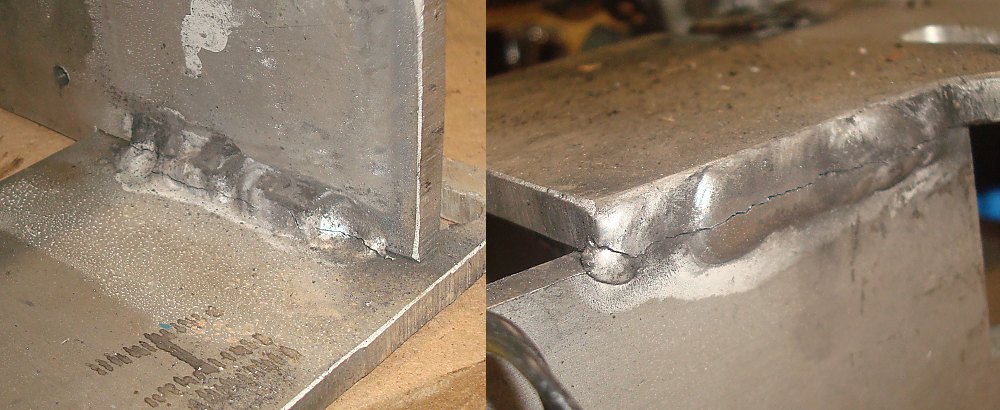
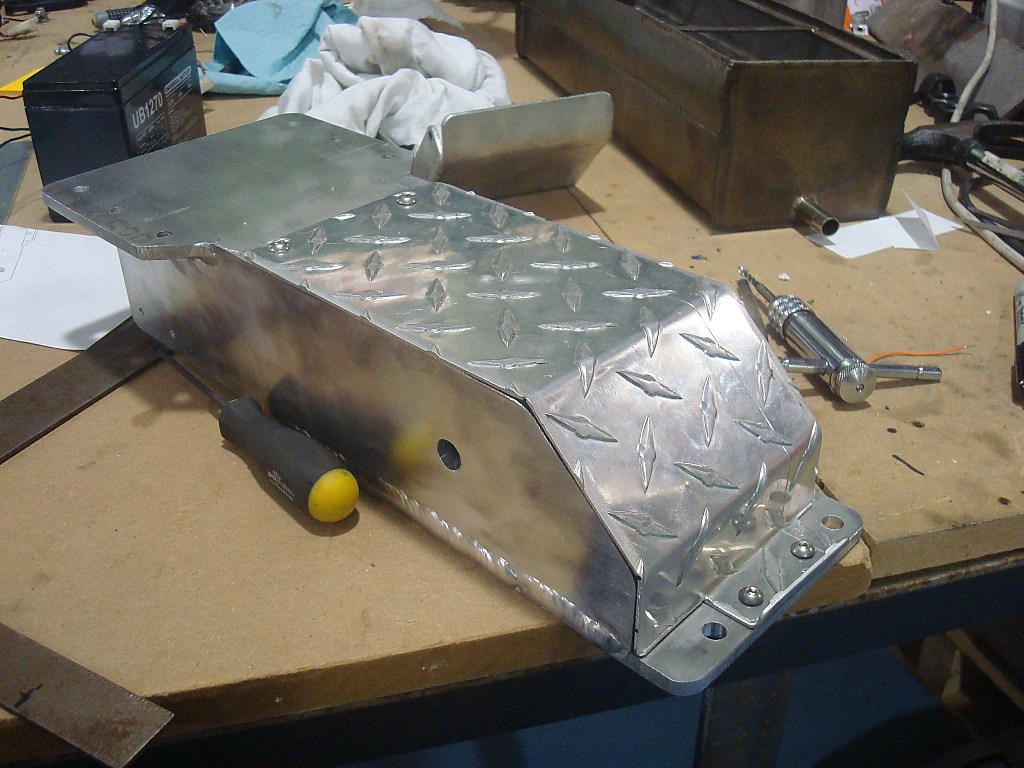
- The fender\headlight is made out of 22ga stainless steel that I cut and welded together.
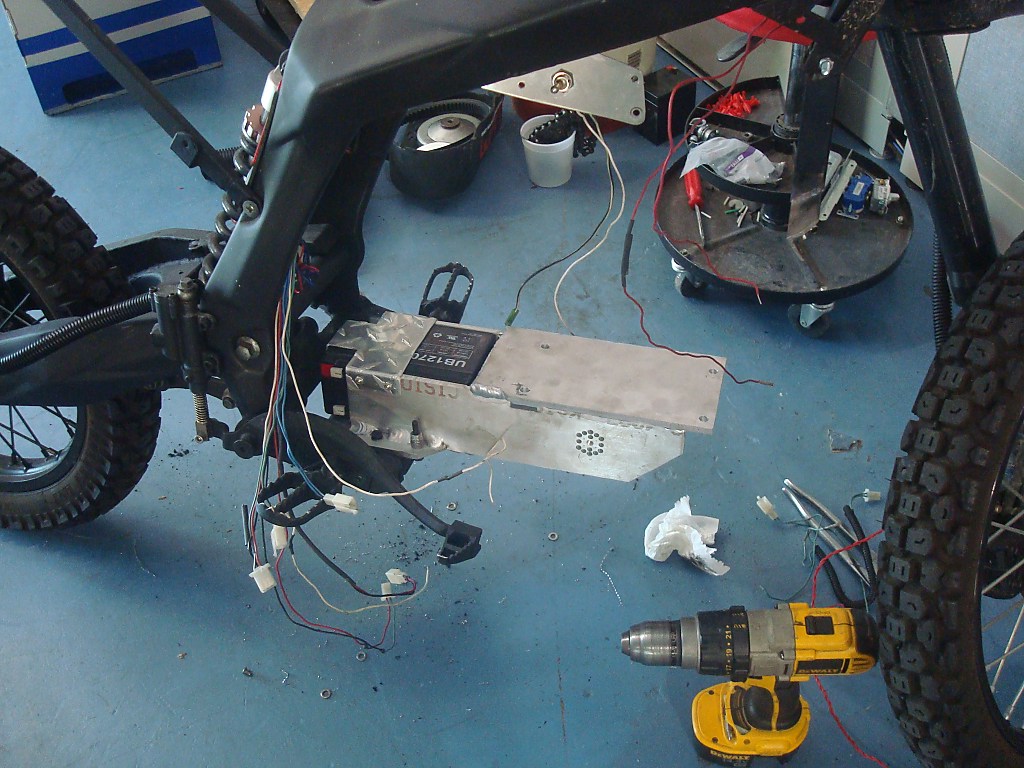
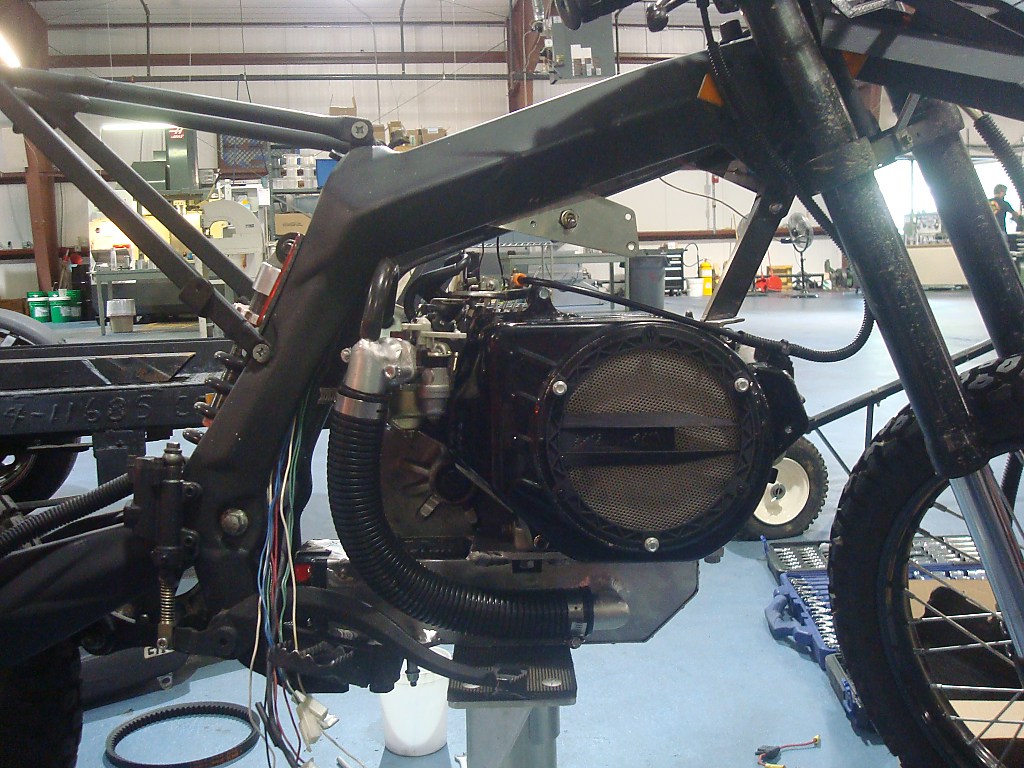
- The frame is from an X-Motos XB-31 (Chinestraulian Honda knockoff)
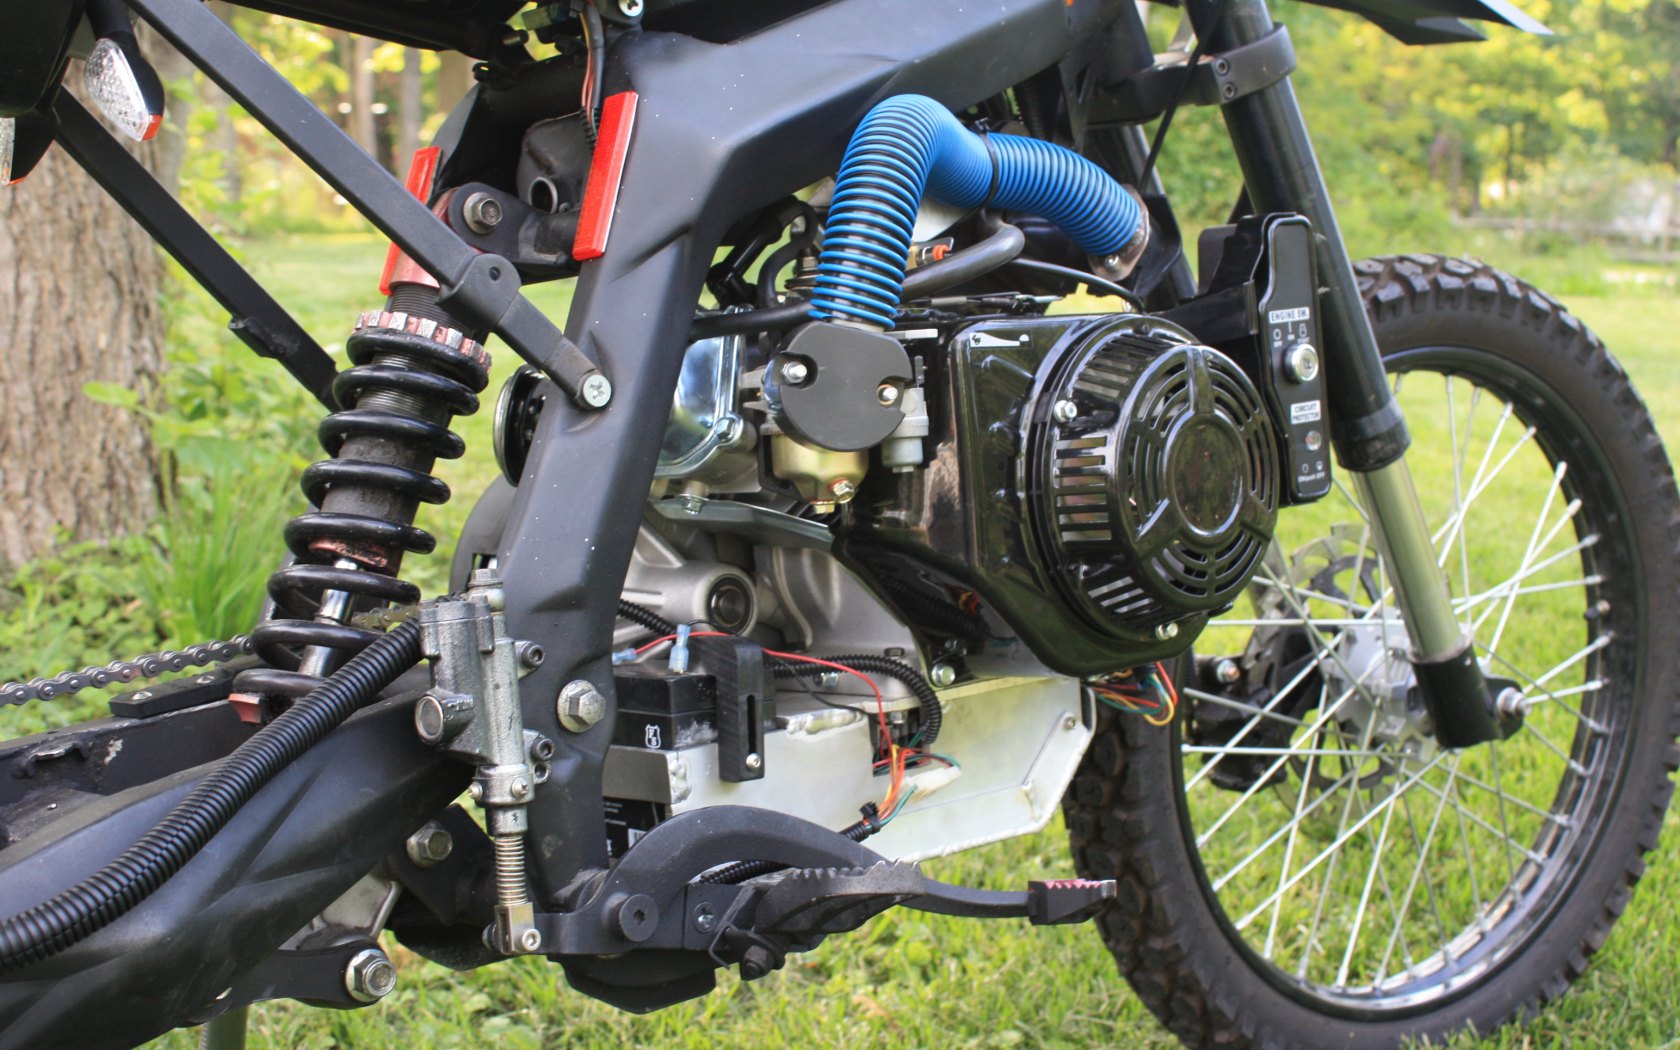
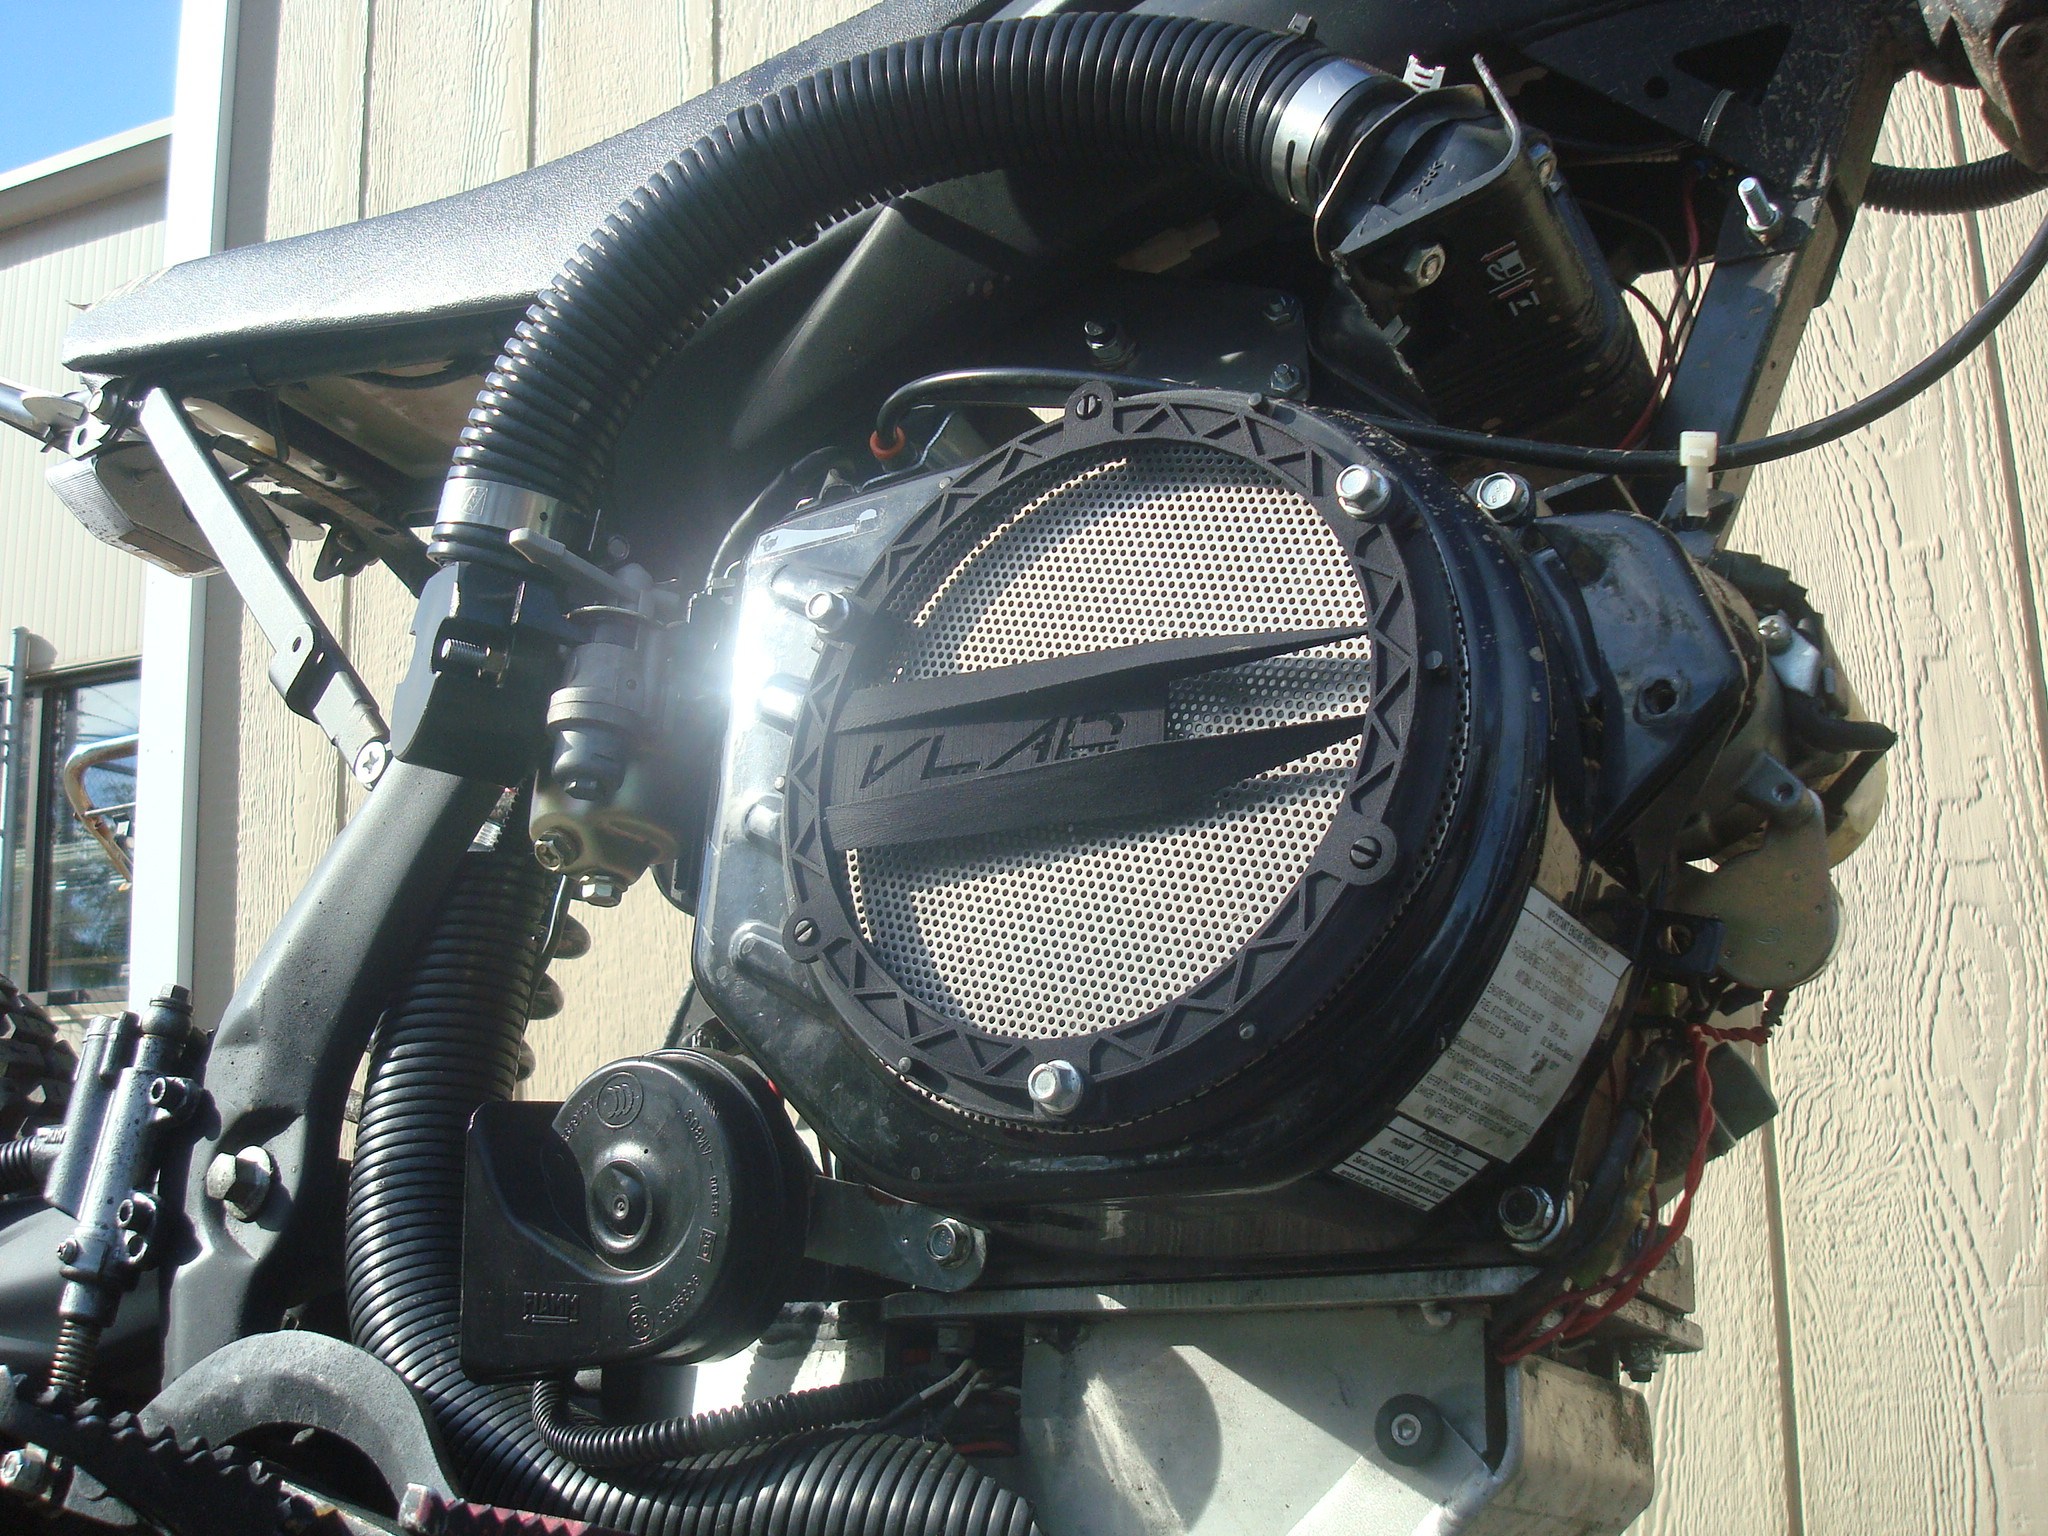
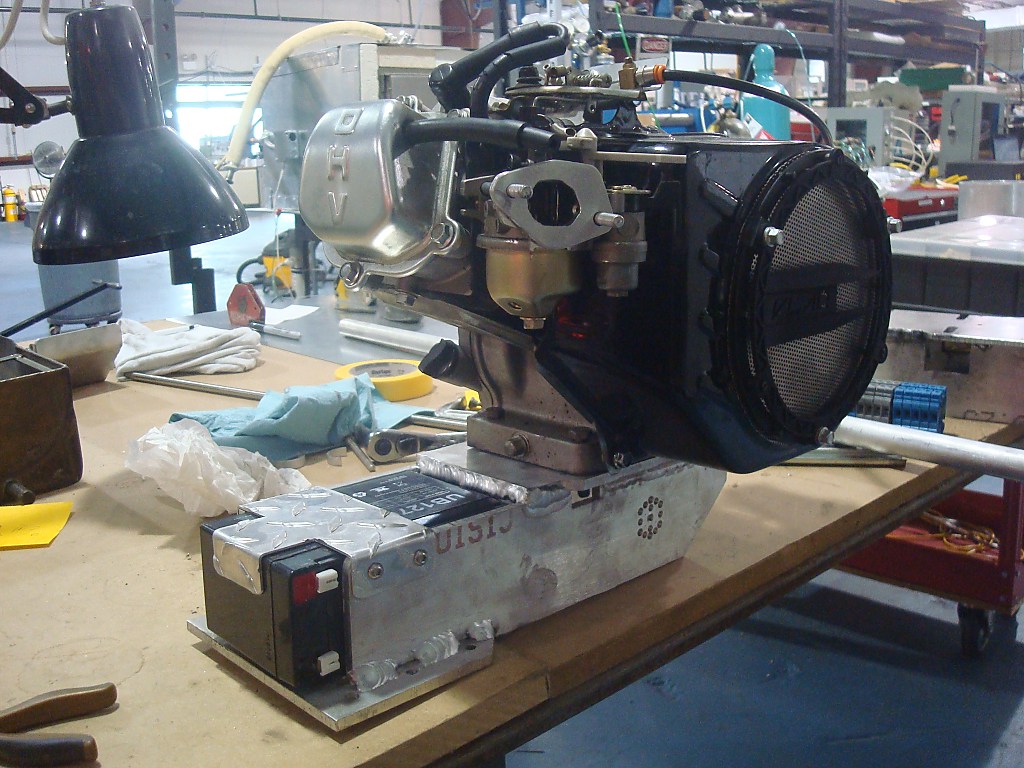
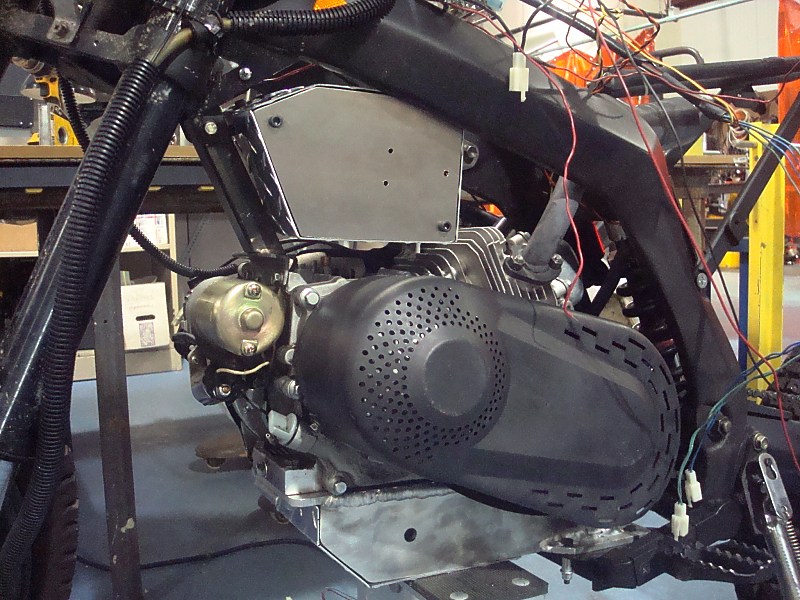
- The motor is a 196cc LiFan clone of the Honda GX200 with electric start. I haven't removed the governor on it yet.
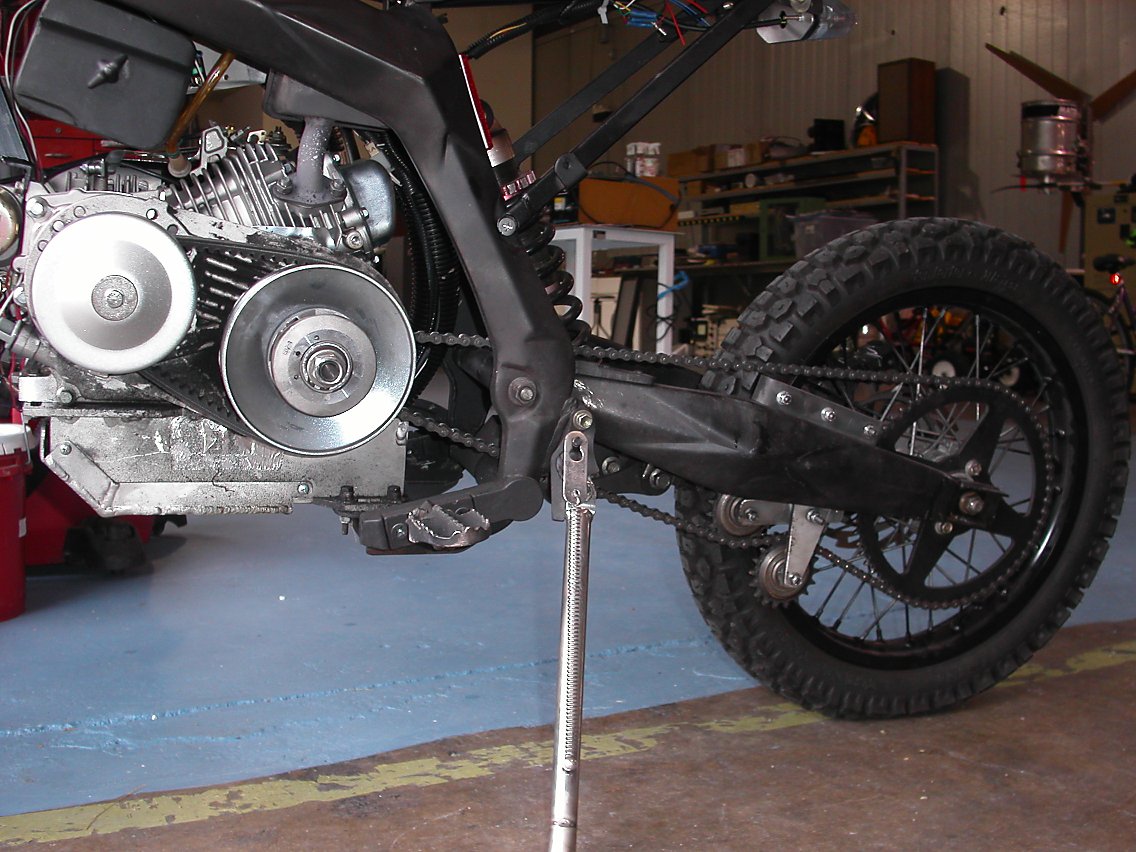
- Primary reduction is a TAV2 Torq-a-verter CVT
- 11-inch clearance mini bike header from OldMiniBikes Warehouse w/ a Briggs & Stratton muffler.
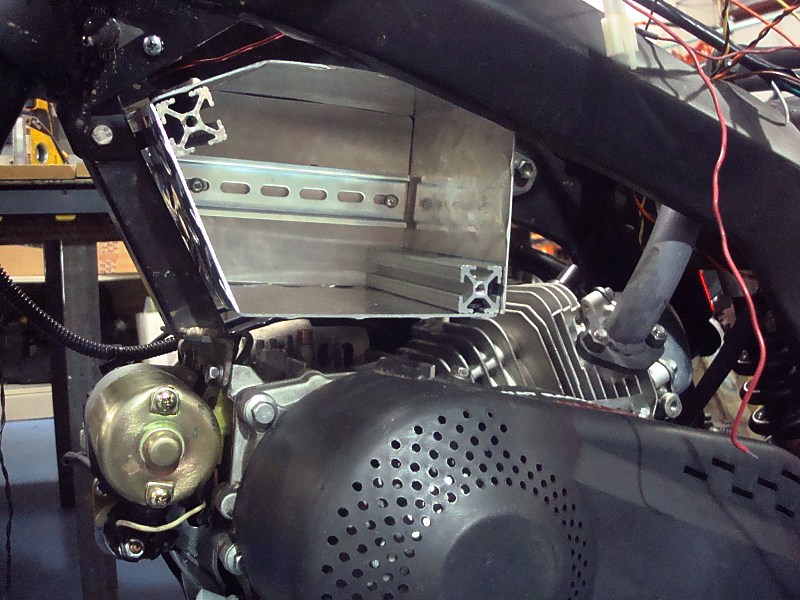
- The electrical system was added from scratch.
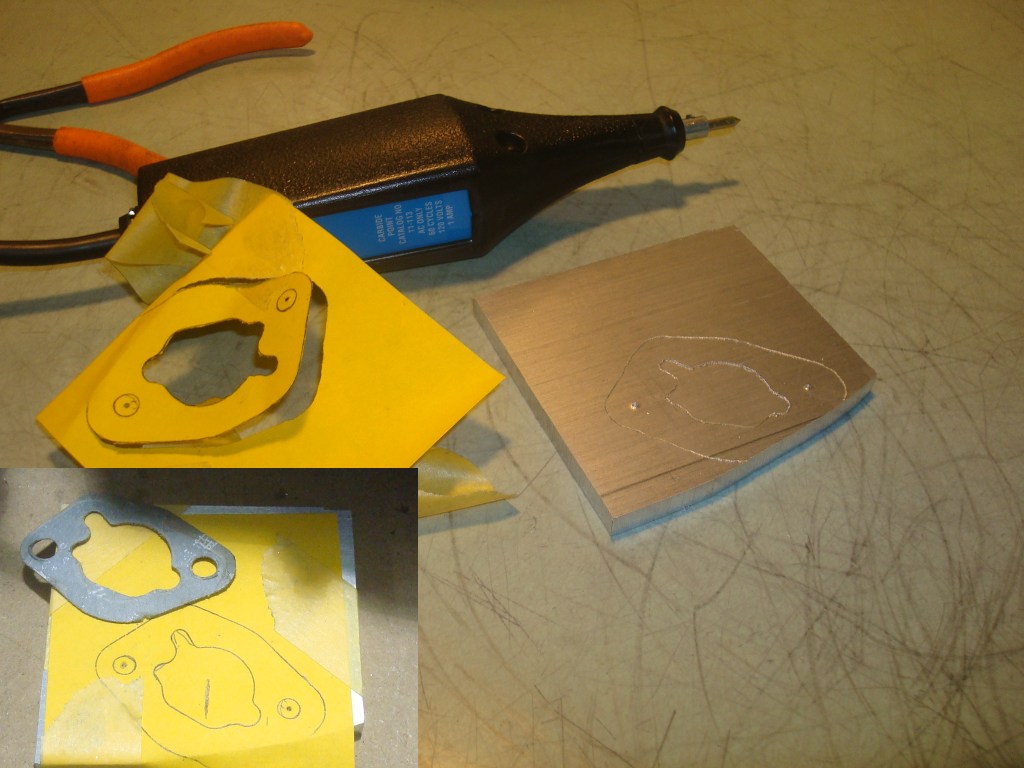
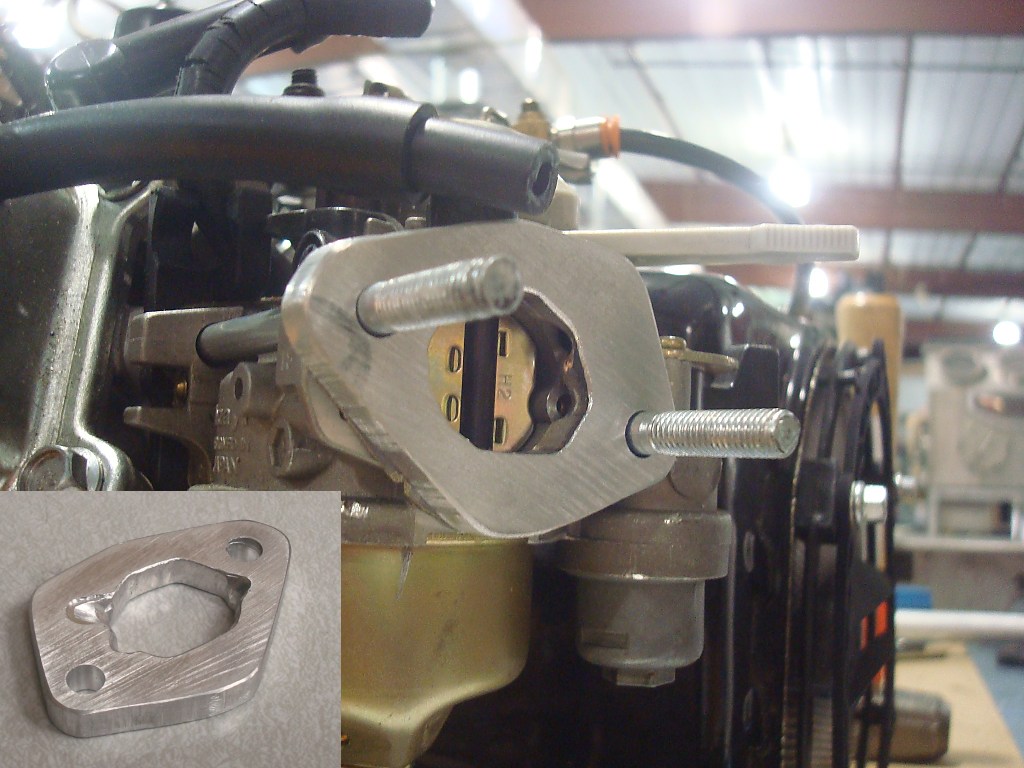
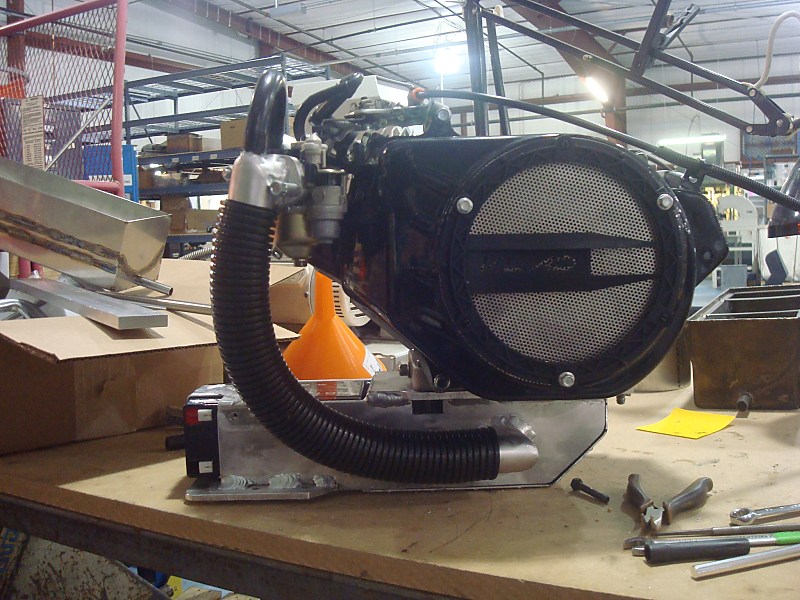
- The air cleaner had to be moved and reoriented so I made a hose adapter for the carb.
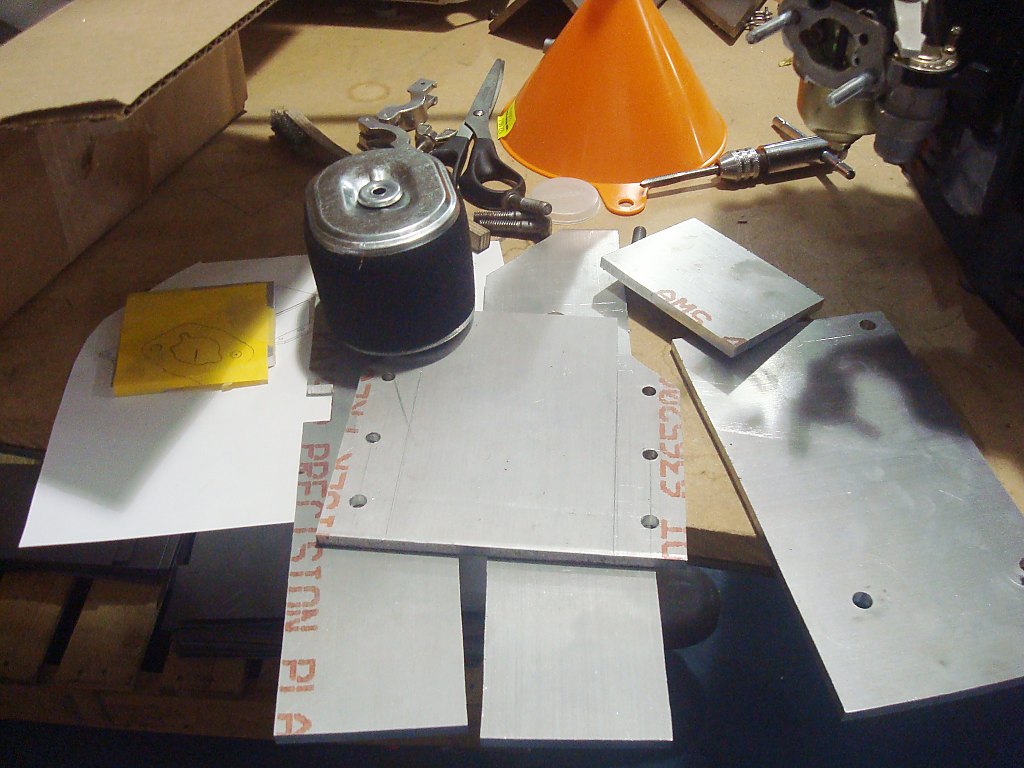
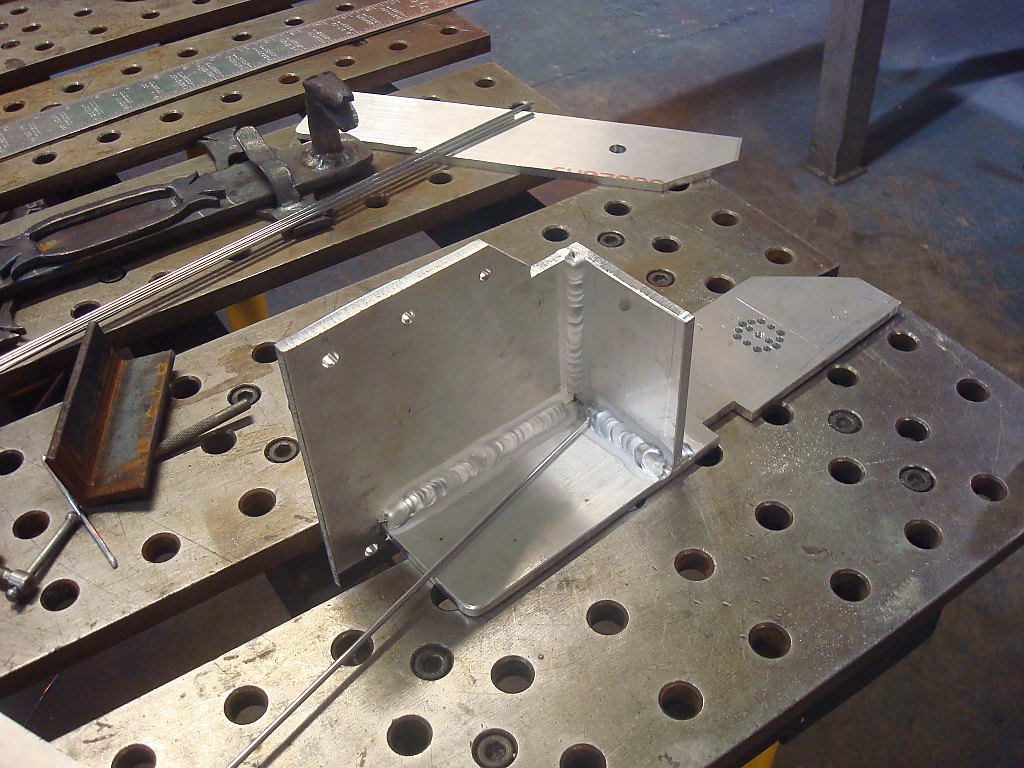
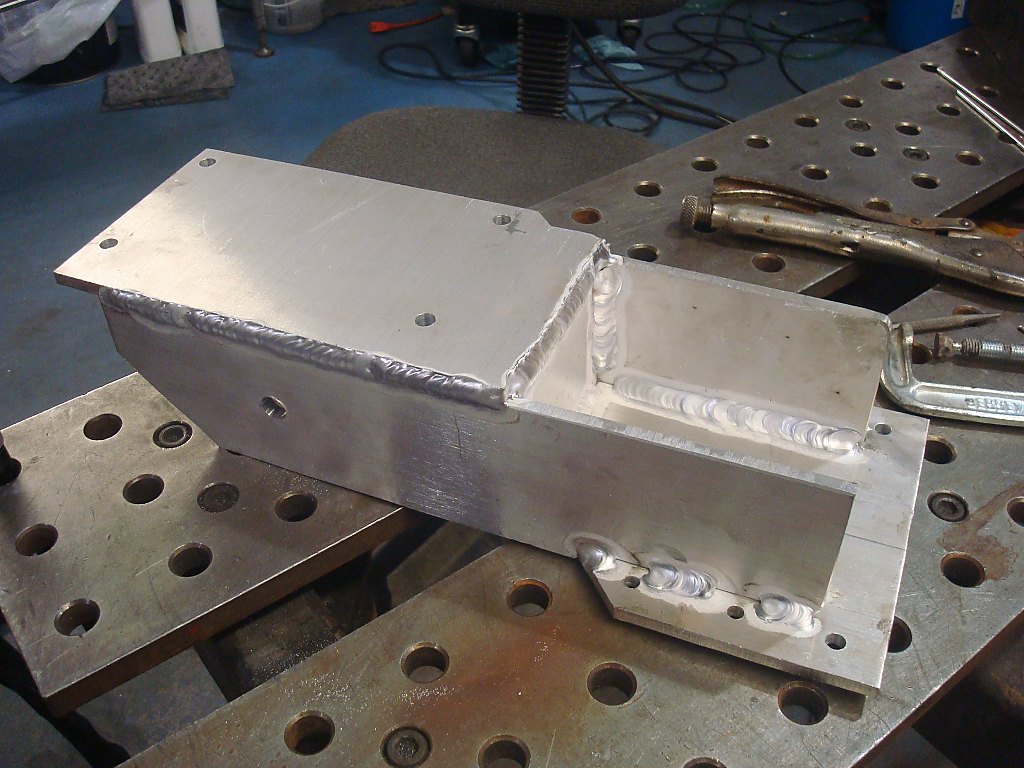
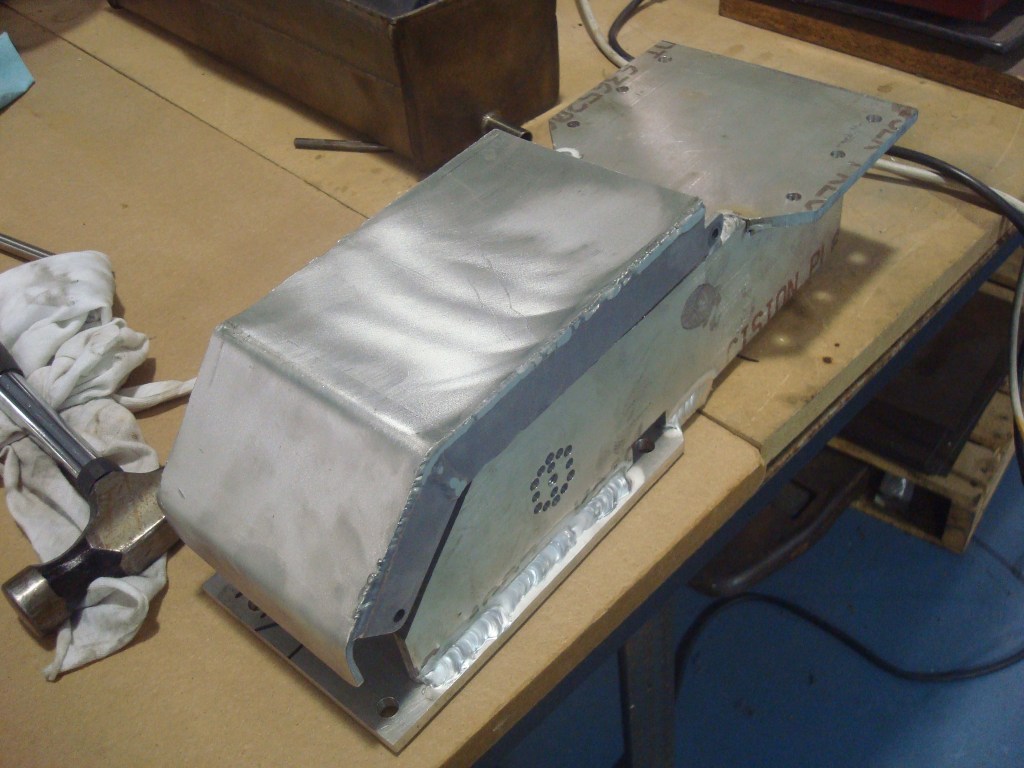
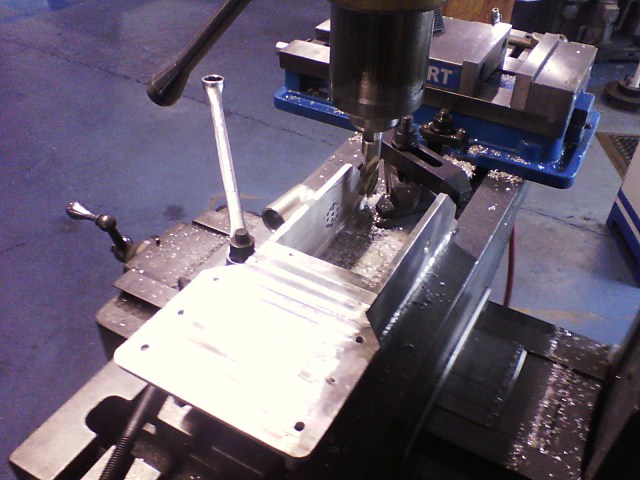
- The aluminum motor mount was made from scratch and double as an enclosure for the electrical system which is all DIN-rail mount components.
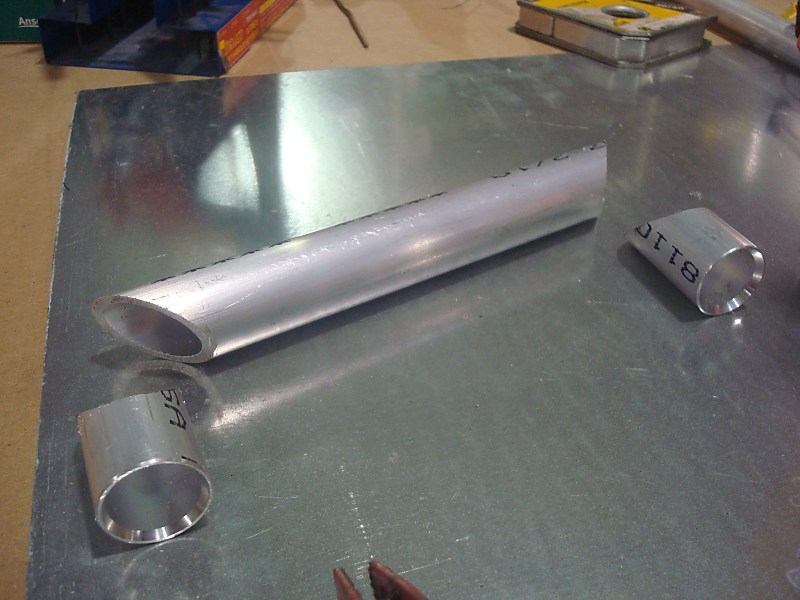
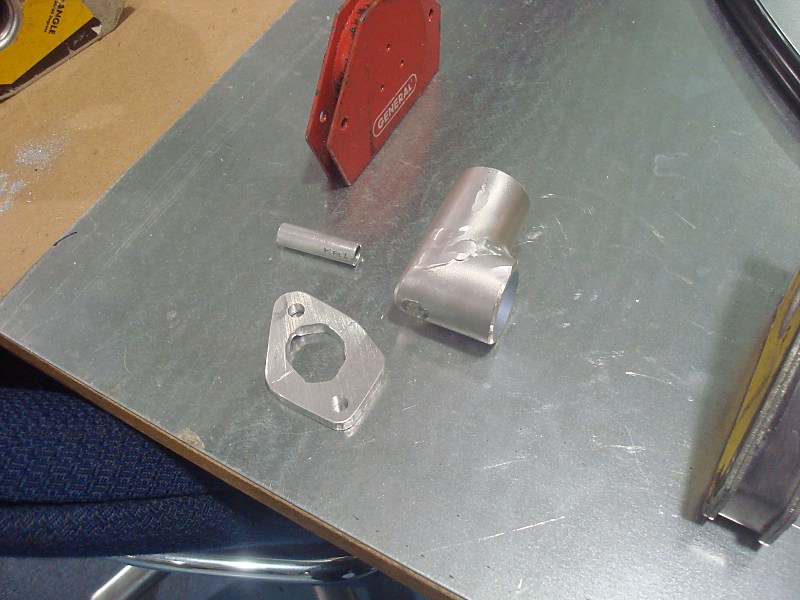
- The downtube adapter is from scratch
- The most recent pictures show that I went from having a chain tensioner to redoing all of the rear wheel adjustment components.
- The rear sprocket was milled out to match the rear hub bolt pattern and to reduce weight. It's the only custom part on the bike that I didn't make myself
- The fan cover which replaced the old recoil start cover was 3D printed.
- The push-button switch shown on the bracket above the fan housing that holds the air cleaner is the hidden push-button start.
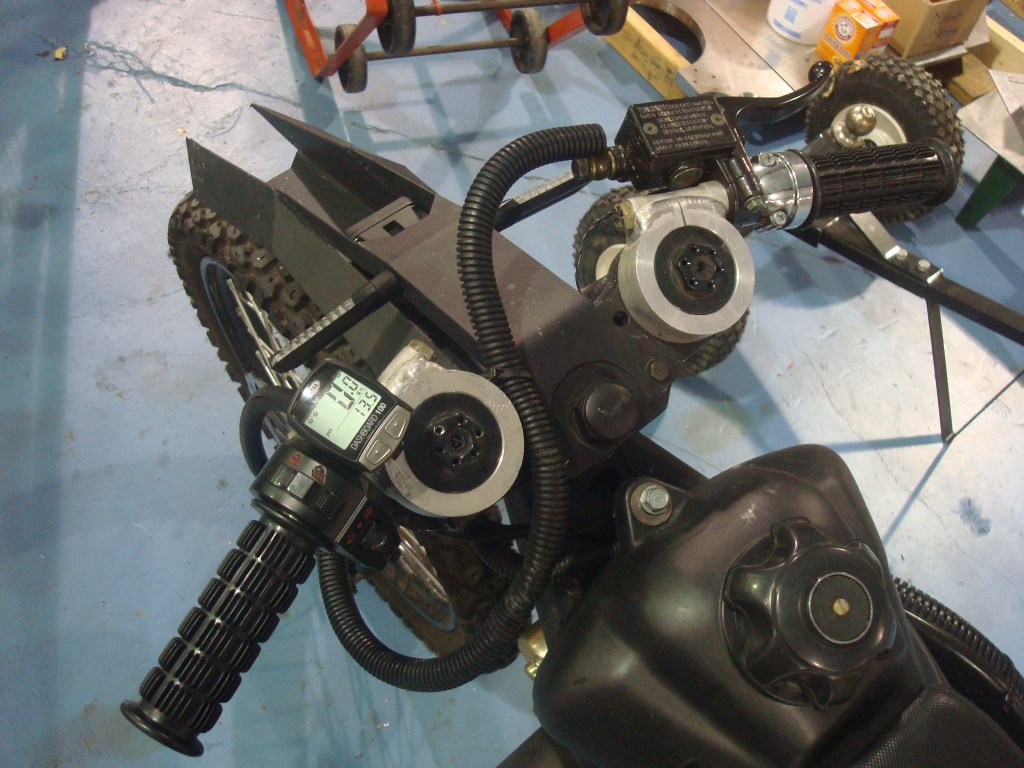
- Aluminum clip-on handlebars are from scratch. The core of them is a 5-inch long 1/2-13 bolt.
- Speedometer is a cheap $35 GPS unit.
- Headlight is a Vision-X Solstice 800 lumen LED spotlight
I took it to a small car show 2 months after I finished it and placed in the Top 10 out of 40 motorcycles.
Last edited:


")