This project came together somewhat by chance, as the result of my finding the main parts over a period of about 8 years.
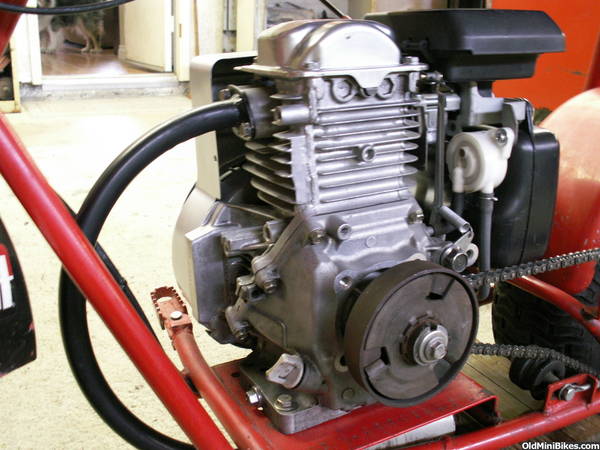
Back in 2004 I was in the Marines, stationed at MCAS Cherry Point, NC. I had a storage unit out in town and I was in the habit of digging through the dumpster for goodies whenever I went to my unit. I found a lot of great stuff over the year or two that I had the unit there, but most importantly, I found a Karcher pressure washer. The washer itself didn't work, but the Honda GC160, 5.0 hp motor ran great. I scrapped the washer but kept the motor thinking that I'd build a mini-bike with it someday.
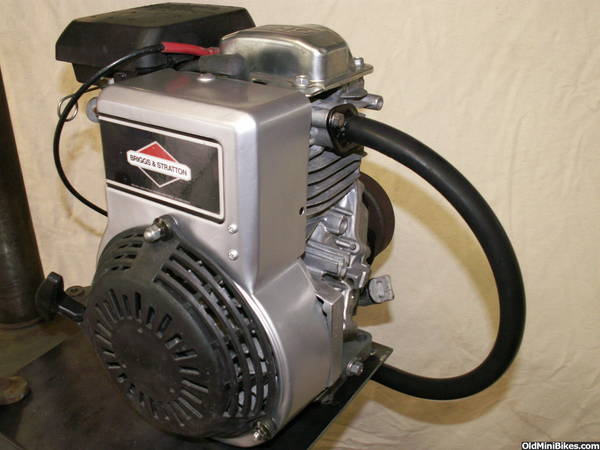
I collected various rusty minibike parts over the years, but I never really got the drive to build one. I was spending most of my time working on and riding vintage Japanese motorcycles and I never really felt the need for a minibike. I ended up using the GC160 to power a home made generator with a car alternator, battery, and power inverter. It worked just fine, but I ended up buying a real generator so the home made unit just sat around for a few more years.
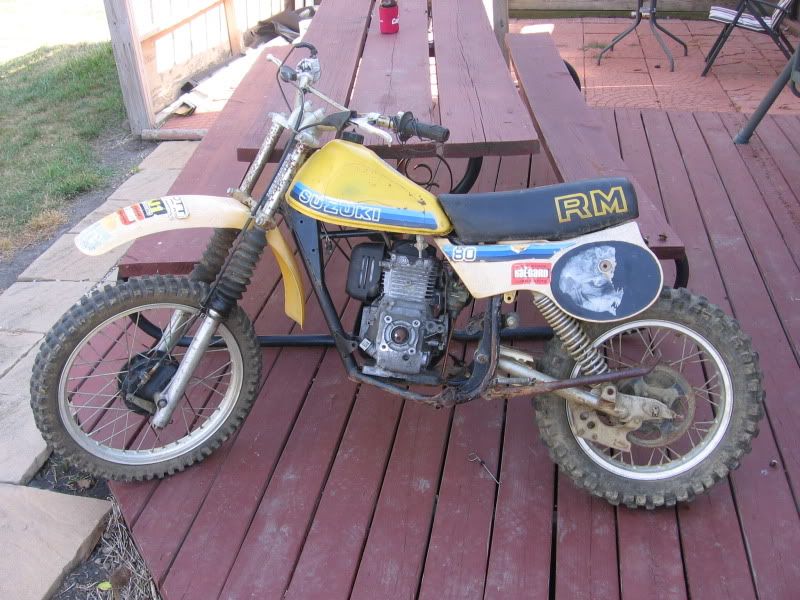
This brings us to the AMCA (Antique Motorcycle Club of America) National Meet in Wauseon, OH this year. It was the weekend of July 20th. I was looking for vintage Japanese treasure but wasn't having much luck since the AMCA caters mostly to antique American makes (which are cool too, but not really my favorite). I ended up coming across a rolling chassis from an '81 Suzuki RM80, which is a 2-stroke competition motocross bike. It was complete except for the motor and it was in pretty good shape. It was a bit rusty and worn, but the frame and wheels were straight and undamaged, the tank was clean inside, and it was very complete. I originally walked by it because I thought that I didn't have any need for it, but something kept pulling me back to it over the course of the weekend. I was looking it over once again when it occurred to me. I could put that GC160 in it and make a little runaround minibike! I gave the guy $40 and wheeled it back to camp.
One of the reasons that I really want to build this is that my 13 year old daughter and all of her friends always want to ride around on my Honda 3-wheeler and some have expressed interest in learning to ride one of my dirt bikes. However, nothing that I can do can make them understand the concept of shifting or using a clutch. They like the 3-wheeler since it's an auto clutch and they can just gas it and go. The problem is that while it has a centrifugal clutch, you still have to upshift and downshift it like a conventional motorcycle transmission. Since they can't (won't?) understand the concept of shifting, they just end up either bouncing it off the rev limiter or smoking the clutch out of it trying to start out from a stop in 5th gear. Ugh. I can't bear to watch my machines abused in such a way. I really tried to be patient and understanding, thinking that they just needed a bit of practice, but I swear it's like being in a parallel universe when you're trying to teach a young girl to do something technical.
Anyway, I figure that a single-speed, centrifugal clutch minibike will be an ideal thing for them to zip around on. I want to encourage the kids to get into motorcycles since they're not getting it anywhere else, but I don't want to sacrifice my machines in the process. With this bike, they'll just be able to hop on and go, no skills required.
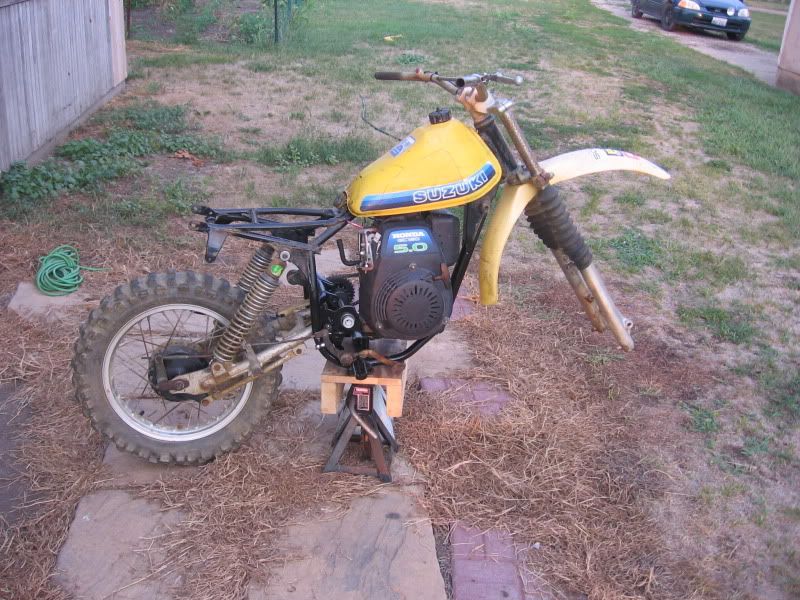
Sorry about the long winded intro. Here's a picture of the bike when I got it home with the GC set in the frame. Everything looks like it will work pretty well.
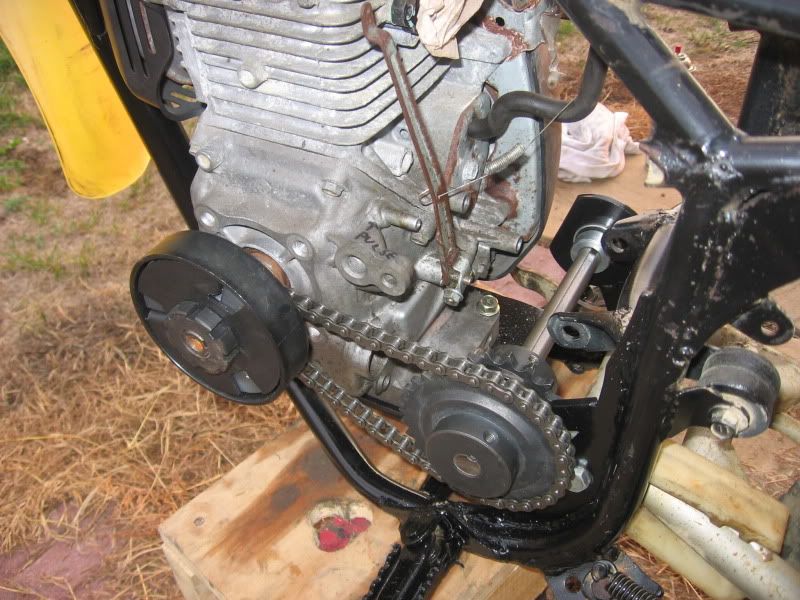
Since I'm new to the concept of a single-speed, centrifugal clutch machine, I did a lot of research on the gearing that I'd need. I figured that I'd need a HUGE rear sprocket in order to get the amount of gear reduction that I'd need, but it became obvious that not only was a sprocket that big not readily available, but also that even if I could find one, it wouldn't fit in the swingarm. I originally thought that there wouldn't be room for a jackshaft, but after I looked more closely and measured some things, I figured that I could make one work. With the help of some members of this forum I did all the math and came up with the following gearing combination:
Engine clutch sprocket: 12t
Jackshaft "in" sprocket: 32t
Jackshaft "out" sprocket: 15t
Rear wheel sprocket: 60t
I'll be using #35 chain for the clutch to jackshaft "in", and #41 chain from the jackshat "out" to the rear wheel. The main reason that I switched to a #41 chain to the wheel is that I needed the jackshaft "out" sprocket to be at least 2" in diameter in order for the drive chain to clear the swingarm pivot. Using the bigger #41 chain, I was able to get a much lower tooth count for a given sprocket diameter since I was trying to maximize the gear reduction. This gearing combo gives me a top speed of a bit more than 20mph. I think that this will be good for my purposes, and I'll have a lot of leeway as far as changing the gearing goes if I want to raise or lower the speed.
I placed an order through OldMiniBikes for the jackshaft parts, and I ordered the jackshaft pulleys through McMaster Carr since OldMiniBikes didn't have the 32t sprocket that I needed. When my parts arrived, I went out into the shop and started sending sparks flying.
Here's the frame before I started cutting it up. I needed to remove the cross bar below the main backbone to make room for the motor. I'll weld in another brace later. I also cut the coil mounting tabs and the front motor mounts off.
Here's another mockup of the motor in the frame.

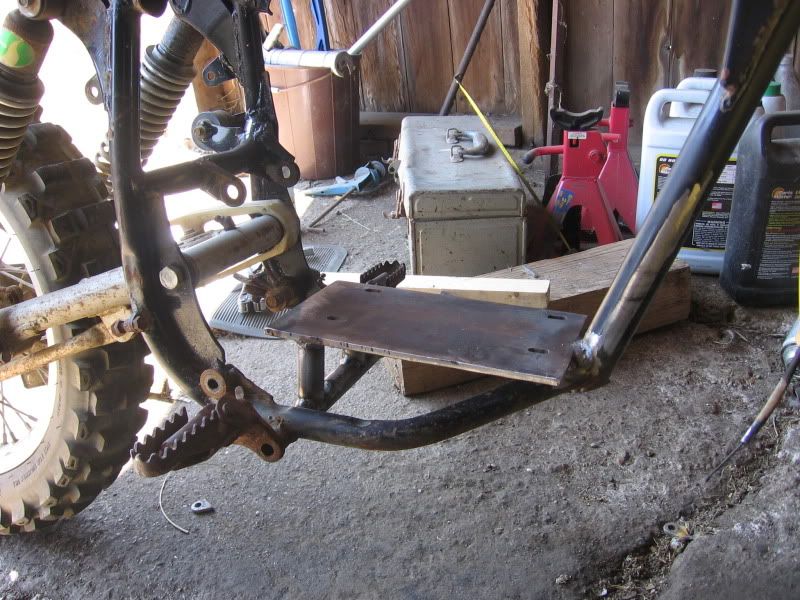
I welded a cross brace between the footpeg mounts that will serve as the rear mounting point for the motor mount plate.
For the motor mount plate, I just used a cutoff wheel in my angle grinder to cut a rectangular piece of 3/16 steel plate. To make adjustment slots so I'll be able to slide the motor back and forth to adjust the primary chain, I just drilled two holes close together and filed out the metal between them. Hard work, but it's all I had to work with. I tacked the plate to the front of the frame, leveled it, and made two standoffs to attach it to the rear cross bar that I had welded in.
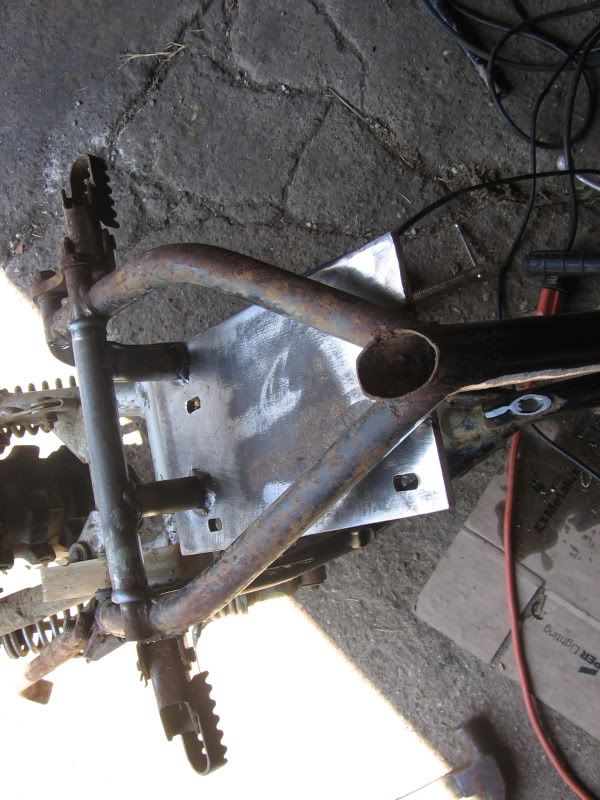
Here's the finished motor plate.
Next, I started on the jackshaft hangers. These are the bearing hangers that OldMiniBikes sells for jackshafts. I welded in some reinforcements, as well. While I was doing the welding, I had the actual jackshaft and bearings put together and installed in the hangers so everything would stay straight and aligned.

Here's the bike after I got all the bare metal painted and started putting it together for its initial fitment.
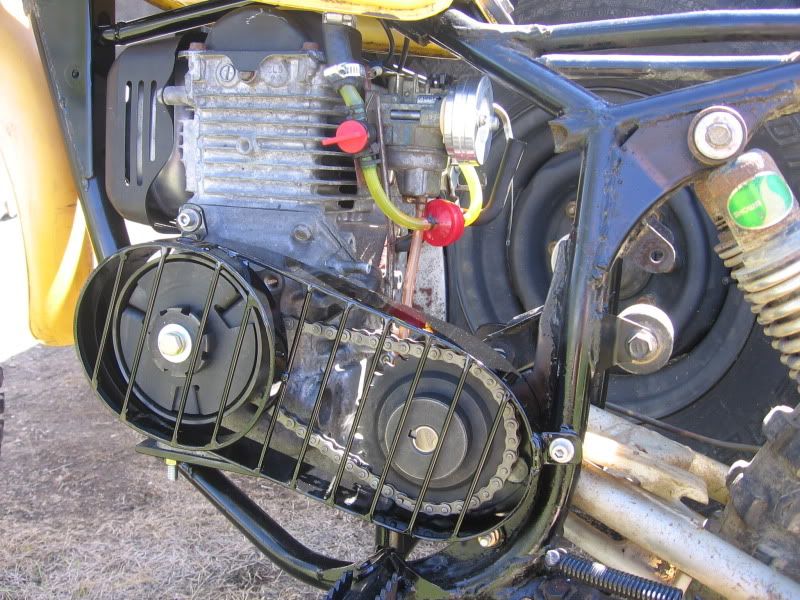
The jackshaft setup is working out quite well.
So far, I'm really happy with the way that the bike is coming together. I've been working on the throttle linkage the last few days. I'll post back with some more once I make enough progress.
Back in 2004 I was in the Marines, stationed at MCAS Cherry Point, NC. I had a storage unit out in town and I was in the habit of digging through the dumpster for goodies whenever I went to my unit. I found a lot of great stuff over the year or two that I had the unit there, but most importantly, I found a Karcher pressure washer. The washer itself didn't work, but the Honda GC160, 5.0 hp motor ran great. I scrapped the washer but kept the motor thinking that I'd build a mini-bike with it someday.
I collected various rusty minibike parts over the years, but I never really got the drive to build one. I was spending most of my time working on and riding vintage Japanese motorcycles and I never really felt the need for a minibike. I ended up using the GC160 to power a home made generator with a car alternator, battery, and power inverter. It worked just fine, but I ended up buying a real generator so the home made unit just sat around for a few more years.
This brings us to the AMCA (Antique Motorcycle Club of America) National Meet in Wauseon, OH this year. It was the weekend of July 20th. I was looking for vintage Japanese treasure but wasn't having much luck since the AMCA caters mostly to antique American makes (which are cool too, but not really my favorite). I ended up coming across a rolling chassis from an '81 Suzuki RM80, which is a 2-stroke competition motocross bike. It was complete except for the motor and it was in pretty good shape. It was a bit rusty and worn, but the frame and wheels were straight and undamaged, the tank was clean inside, and it was very complete. I originally walked by it because I thought that I didn't have any need for it, but something kept pulling me back to it over the course of the weekend. I was looking it over once again when it occurred to me. I could put that GC160 in it and make a little runaround minibike! I gave the guy $40 and wheeled it back to camp.
One of the reasons that I really want to build this is that my 13 year old daughter and all of her friends always want to ride around on my Honda 3-wheeler and some have expressed interest in learning to ride one of my dirt bikes. However, nothing that I can do can make them understand the concept of shifting or using a clutch. They like the 3-wheeler since it's an auto clutch and they can just gas it and go. The problem is that while it has a centrifugal clutch, you still have to upshift and downshift it like a conventional motorcycle transmission. Since they can't (won't?) understand the concept of shifting, they just end up either bouncing it off the rev limiter or smoking the clutch out of it trying to start out from a stop in 5th gear. Ugh. I can't bear to watch my machines abused in such a way. I really tried to be patient and understanding, thinking that they just needed a bit of practice, but I swear it's like being in a parallel universe when you're trying to teach a young girl to do something technical.
Anyway, I figure that a single-speed, centrifugal clutch minibike will be an ideal thing for them to zip around on. I want to encourage the kids to get into motorcycles since they're not getting it anywhere else, but I don't want to sacrifice my machines in the process. With this bike, they'll just be able to hop on and go, no skills required.
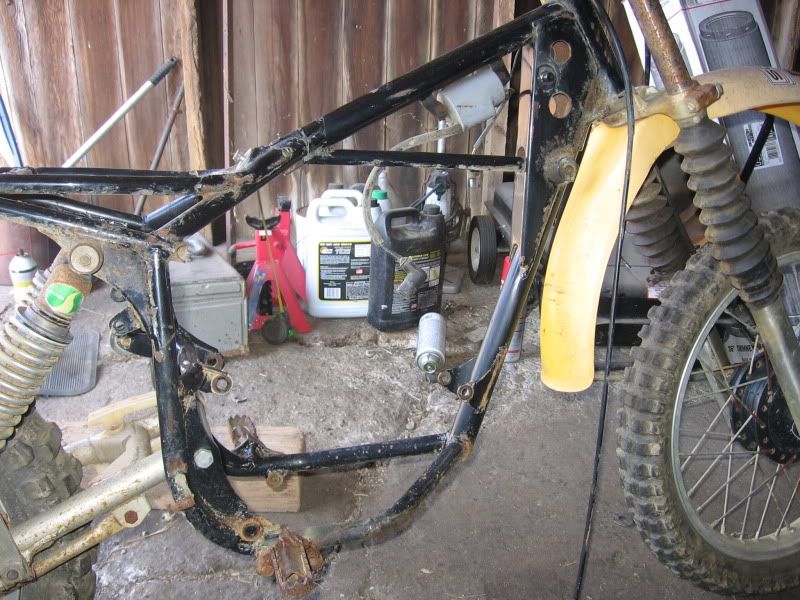
Sorry about the long winded intro. Here's a picture of the bike when I got it home with the GC set in the frame. Everything looks like it will work pretty well.
Since I'm new to the concept of a single-speed, centrifugal clutch machine, I did a lot of research on the gearing that I'd need. I figured that I'd need a HUGE rear sprocket in order to get the amount of gear reduction that I'd need, but it became obvious that not only was a sprocket that big not readily available, but also that even if I could find one, it wouldn't fit in the swingarm. I originally thought that there wouldn't be room for a jackshaft, but after I looked more closely and measured some things, I figured that I could make one work. With the help of some members of this forum I did all the math and came up with the following gearing combination:
Engine clutch sprocket: 12t
Jackshaft "in" sprocket: 32t
Jackshaft "out" sprocket: 15t
Rear wheel sprocket: 60t
I'll be using #35 chain for the clutch to jackshaft "in", and #41 chain from the jackshat "out" to the rear wheel. The main reason that I switched to a #41 chain to the wheel is that I needed the jackshaft "out" sprocket to be at least 2" in diameter in order for the drive chain to clear the swingarm pivot. Using the bigger #41 chain, I was able to get a much lower tooth count for a given sprocket diameter since I was trying to maximize the gear reduction. This gearing combo gives me a top speed of a bit more than 20mph. I think that this will be good for my purposes, and I'll have a lot of leeway as far as changing the gearing goes if I want to raise or lower the speed.
I placed an order through OldMiniBikes for the jackshaft parts, and I ordered the jackshaft pulleys through McMaster Carr since OldMiniBikes didn't have the 32t sprocket that I needed. When my parts arrived, I went out into the shop and started sending sparks flying.
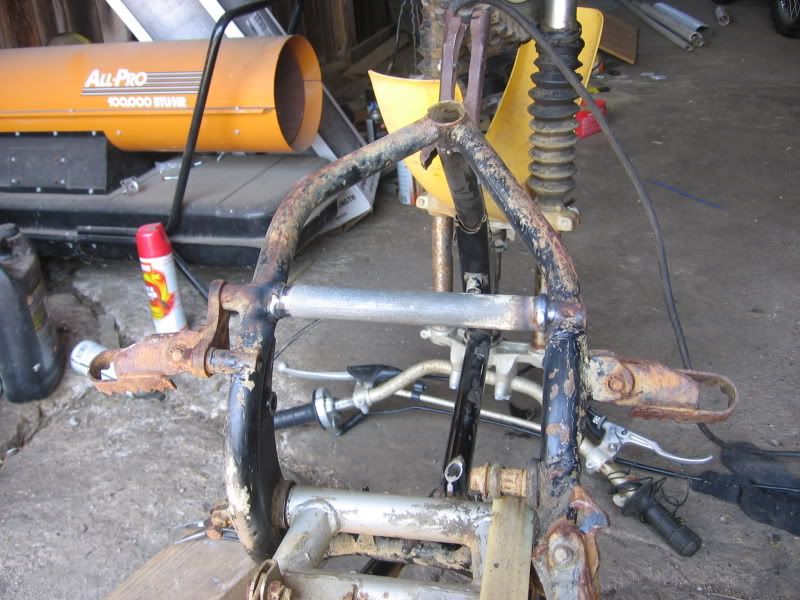
Here's the frame before I started cutting it up. I needed to remove the cross bar below the main backbone to make room for the motor. I'll weld in another brace later. I also cut the coil mounting tabs and the front motor mounts off.
Here's another mockup of the motor in the frame.
I welded a cross brace between the footpeg mounts that will serve as the rear mounting point for the motor mount plate.
For the motor mount plate, I just used a cutoff wheel in my angle grinder to cut a rectangular piece of 3/16 steel plate. To make adjustment slots so I'll be able to slide the motor back and forth to adjust the primary chain, I just drilled two holes close together and filed out the metal between them. Hard work, but it's all I had to work with. I tacked the plate to the front of the frame, leveled it, and made two standoffs to attach it to the rear cross bar that I had welded in.
Here's the finished motor plate.
Next, I started on the jackshaft hangers. These are the bearing hangers that OldMiniBikes sells for jackshafts. I welded in some reinforcements, as well. While I was doing the welding, I had the actual jackshaft and bearings put together and installed in the hangers so everything would stay straight and aligned.
Here's the bike after I got all the bare metal painted and started putting it together for its initial fitment.
The jackshaft setup is working out quite well.
So far, I'm really happy with the way that the bike is coming together. I've been working on the throttle linkage the last few days. I'll post back with some more once I make enough progress.
 unk: Rock on! I like it.