Tom thumb build

#1
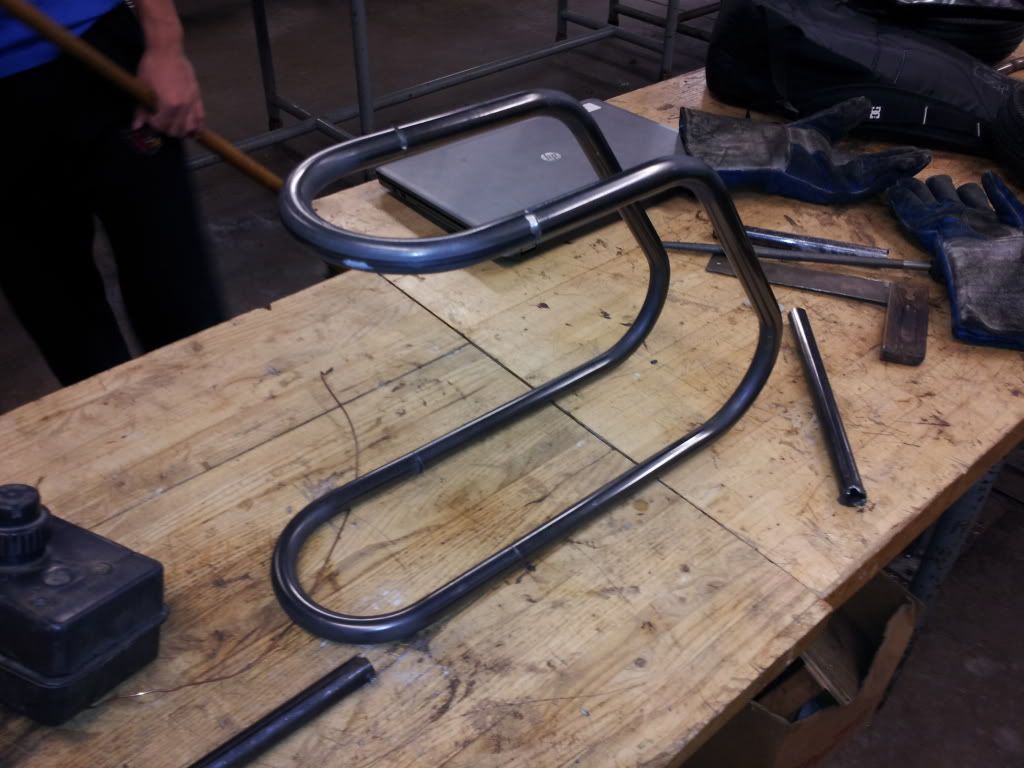
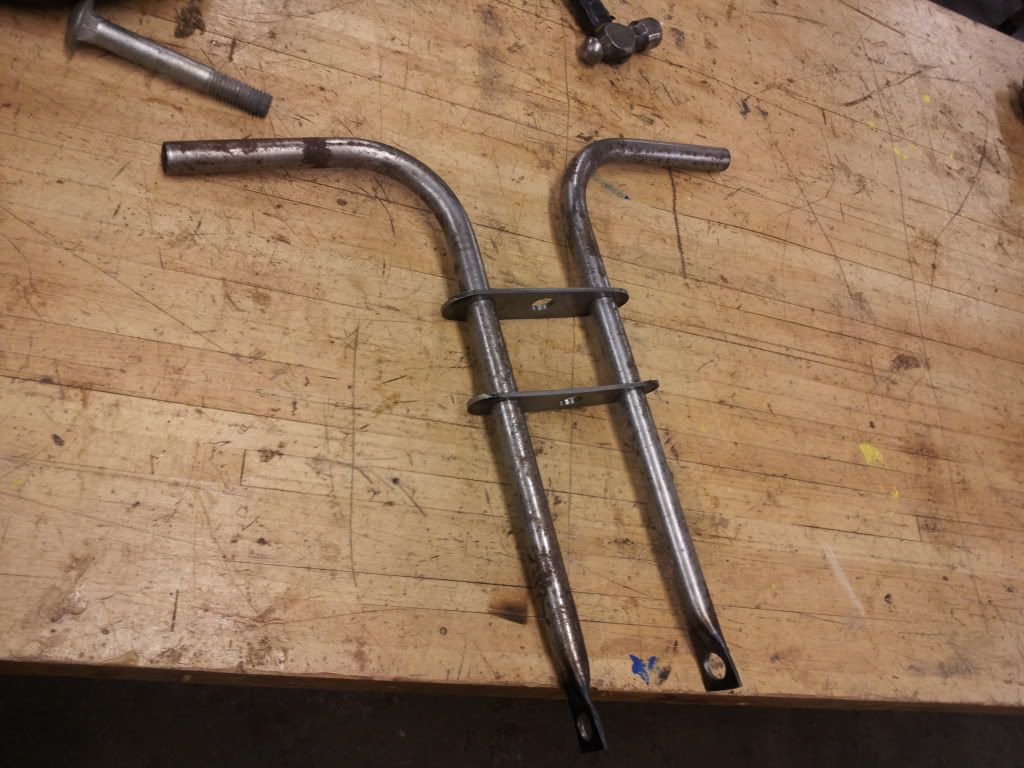
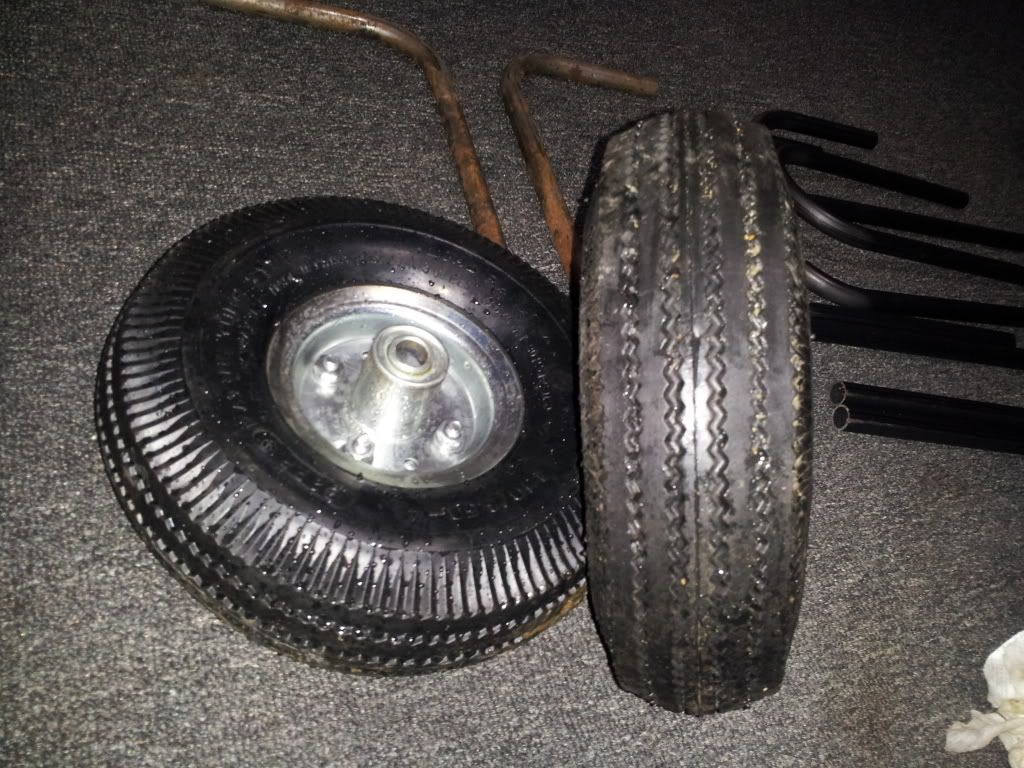
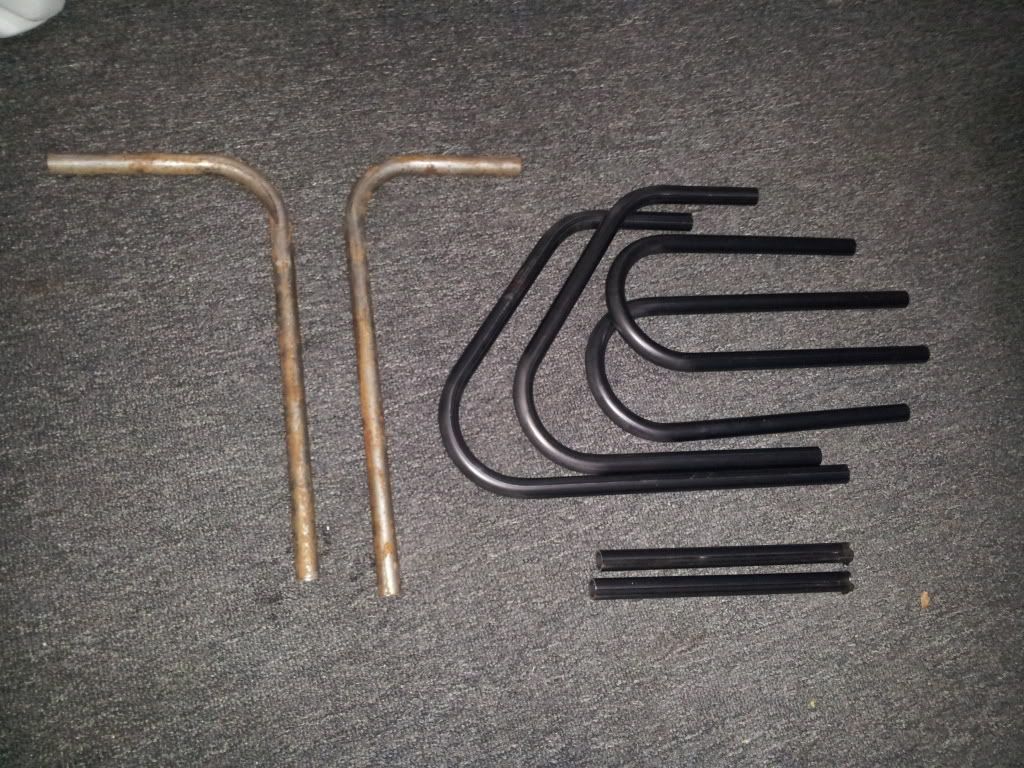
Not much to say, I've made some changes to the original plans, substituting the o&r for an old homelite chainsaw, and also I've made the height of the frame 11 inches. I used 3/4 inch 16 gauge tubing to make these frame parts. I got the wheels and tires for 5$ each on clearance at northern tool, and not pictured is all of the sprockets I've acquired as.well. I'll let the few pics I've got do the speaking from.here, and I'm building this as a school welding project.

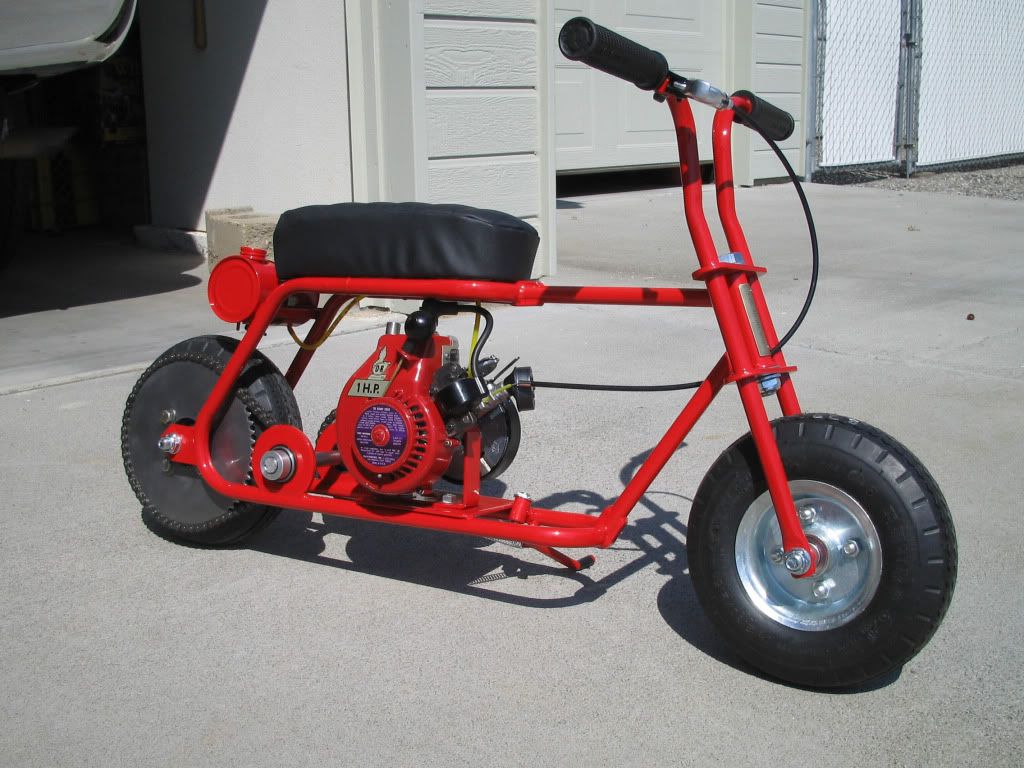
What it might end up looking like


Ccd
 
#7
I hope you have time to keep us updated with such a short deadline!
Keep up the good work!!!
And I am sure if you have any questions on the build, Manchester will come to the rescue. :wink:
 
#9
i certaintly will have enough time, i get to work on the project for four hours in the shop a day, then i have two more hours of class time to do a report on the history of mini bikes, and also a powerpoint presentation on how ive built the whole bike. i should in theory be able to get the rear half of the frame prepped for welding, and as y'all can see from the above pic, its ready for welding.
 
#10
Instead of a powerpoint presentation, could you just use this thread?
:shrug::shrug::shrug:
With a whole shop at your disposal, you probably have all the necessary equipment. That is awesome!
 
#11
Instead of a powerpoint presentation, could you just use this thread?
:shrug::shrug::shrug:
With a whole shop at your disposal, you probably have all the necessary equipment. That is awesome!
very good idea, actually, i think i might ask if that would be acceptable to do now.:thumbsup:
 
#13
Yes, progress was made! (miracle, isn't it?) Also I dug out an ancient 70s era engine repair manual, that has instructions in it on how to completely break down the chainsaw I've got to just the block, and the important running gear. I'm not sure if I'll be 100% able to remove the shrouding, because I think the crank case draws in the fuel/air mix, and the manifold *might* be part of the shrouding. I hope like hell it's not, but stuff like this seems to always bite me in the as&s.


I'm also planning on making an adapter for the PTO so I can run a 5/8 max torque on it instead of the stock clutch. It's MEA weekend now, I'm not exactly sure what the real definition of mea is; but hey, a week off of school gives me one extra week to get work done on this. My Dad has a full metal fab and machine shop in his garage, and it will come in handy here.

Ccd
 
#14
I wish you luck on your project and hope you get it done in time-sounds like fun! (I really like these mini-minis, very kewl)

What kind of school are you in that lets you make a mini-bike for your credit? (that's awesome! I guess I went to the wrong school.... :shrug: )
 
#16
I wish you luck on your project and hope you get it done in time-sounds like fun! (I really like these mini-minis, very kewl)

What kind of school are you in that lets you make a mini-bike for your credit? (that's awesome! I guess I went to the wrong school.... :shrug: )
Lol, I'm going to a project based highschool that just opened this year. We just need to do the work associated with the required stuff to graduate, in a project of our choice. I'm getting art credits for painting the bike, some geometry for doing a half ass full scale drawing (1x1 cm box from the small pic= 3" x 3" box in a full size) some other maths for "figuring out a theoretical top speed. And also I'm using this thread to document my building of the bike, for more credits. the way you learn is perfect for me, 15 minuets in normal school and I'm off in another world inside my head, chasing a locomotive with a rupp roadster lol. Thanks for the definition, Byron.

Ccd
 
#17
back in school today, i think todays project will be drilling out the rear dropouts and the fork trees. Should be a simple enough job (knock on wood) I will update y'all when i get into the shop.
 
#19
this took a bit of technical trickery to upload, since the schools web browser blocks photobucket. i figured it out tho :thumbsup: but, i got my fork bent up last week, 3/4 inch tubing, I dont know what gauge it really is but it is very thick. ends have been flattened, drilled, and the tree plates made. i need to somehow widen the inside of the fork to clear my tire, the genius i am didnt take into account that the tires I am using are about a 1/4 inch wider than the ones in the plans.


now i believe that i just need to shorten my rear frame loop back to the plans recomended 8'' height, because thats what ive taylored my forks to use. and ive got a bit of a problem, turns out that my deadline included the week i had off, so ive got untill next monday to have a rolling frame at the minimum:freakout::freakout::freakout::freakout: I can get the frame done in that time, but the saw engine ive got has a 1/2 inch shaft on it, and i dont believe that i could make a shim to bring it up to 5/8ths like the clutch i have. it'd be an awfully small shim, and i would need to thread the inside of the shim on one end to thread onto the pto of the saw, and the shim would also need to have a key way slot for the max torque. could anyone give me a hand with that?
 
Top