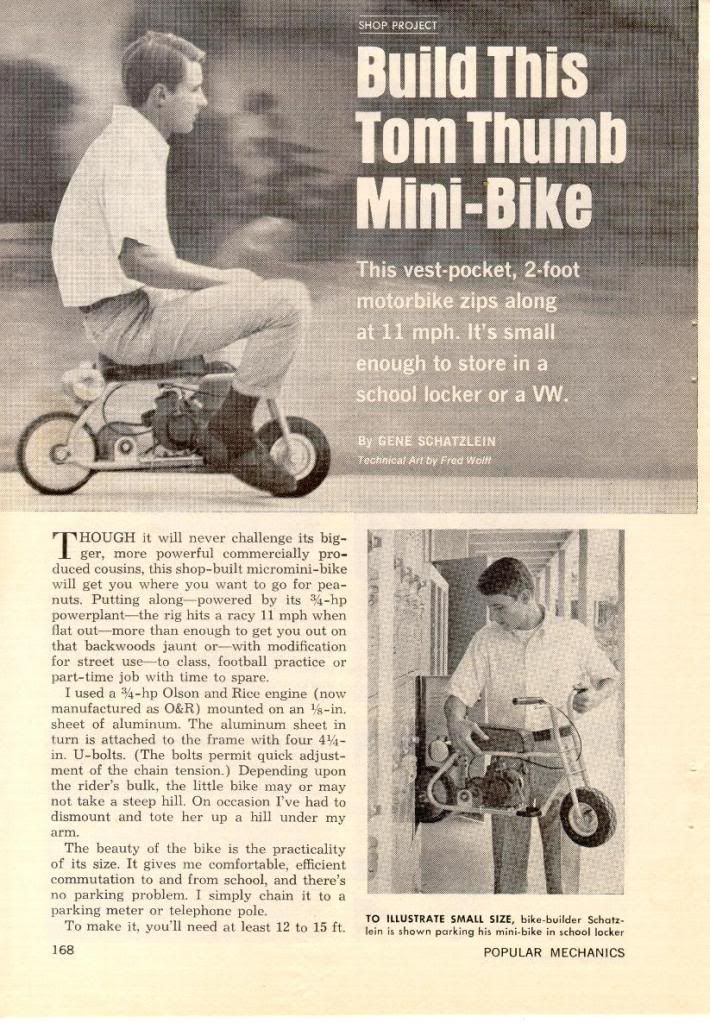
Back in High School I purchased a couple boxes of old Popular Mechanics magazines from the 60’s and 70’s. One of the magazines had a cool article that said “Build This Tom Thumb Minibike”. Ever since I read that article I wanted to build my own Tom Thumb Mini. Well fast forward another 10 years or so and I happened to be looking through some of the old magazines again and ran across the Tom Thumb article again. At this time my father and I had a motorcycle meet coming up and thought this would make a great little pit bike to bring to the show…..so we decided to build our own little Tom Thumb Mini.
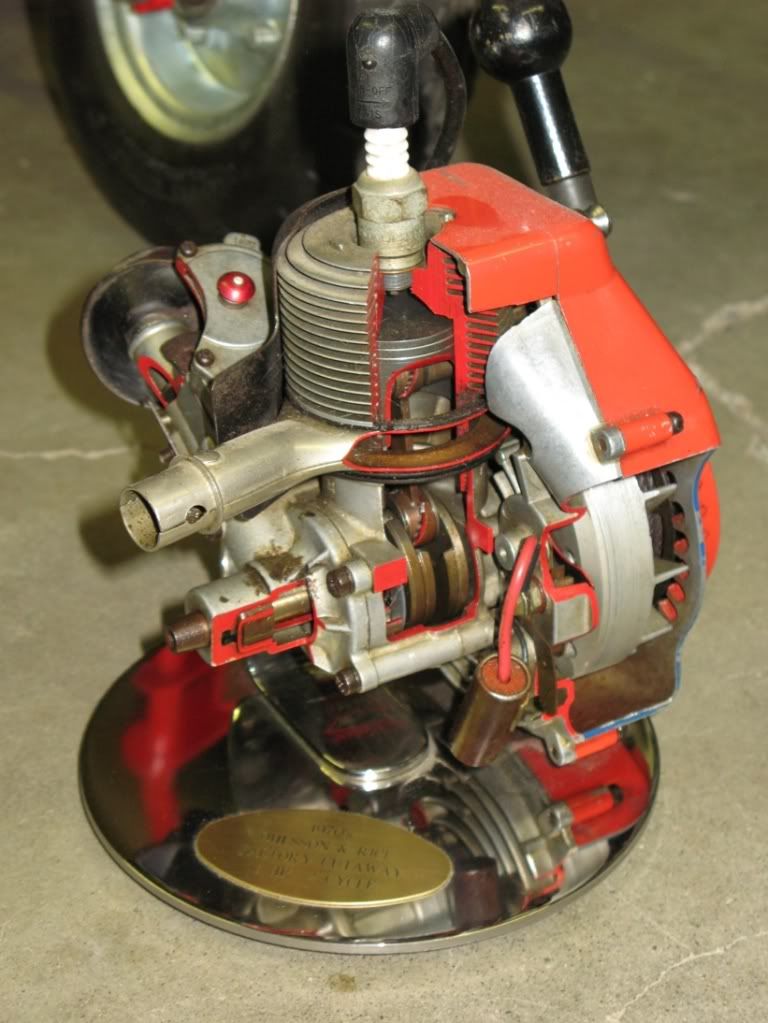
I wanted to keep the minibike as close to the original plans as possible, only substituting things that I thought would be a safety improvement or help the bike last longer. I started watching E-bay and picked up an original NOS Ohlsson & Rice 1HP engine (The one in the original article is a 3/4hp but basically the same engine. These little engines were used on everything in the late 60's and early 70's. They powered everything.....from chain saws, drills, water pumps, boat motors, generators ect. Very cool little engines). I ordered up some parts from a go-cart supply house, stopped by my local steel supply and we were off and running.
First a copy of the original article from 1970....
Page 1

Page 2
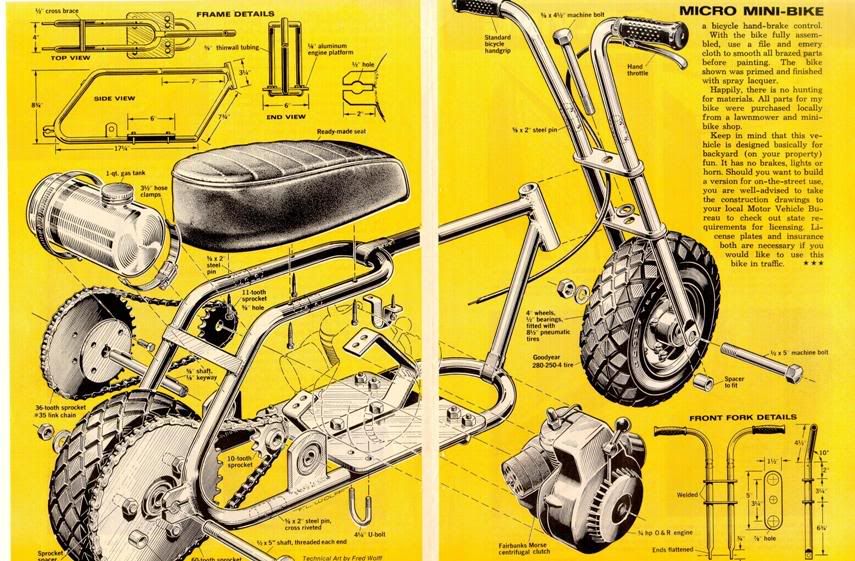
Page 3
IF Anyone Wants a full size copy of the article/plans just PM me and I'll email them to you.
OK.....Now on to the build....
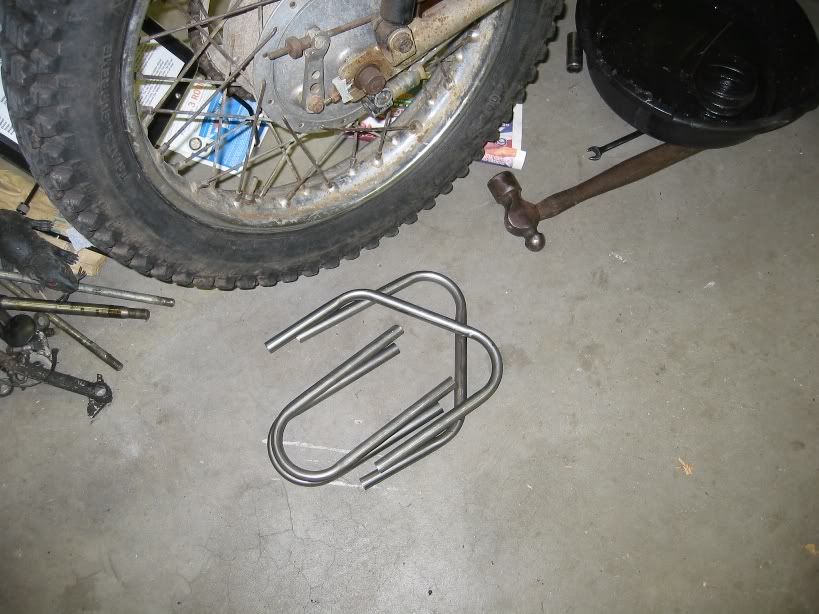
Tubing bent and cut.....lets get started.
The plans in the magazine give you most of the specs but leave out a couple of items. I started by taking all the measurements on the plans and laying them out in full scale on a piece of cardboard. I was then able to get the rest of the measurements, like steering head angles ect. I would bend a piece a little at a time and then check it on the template until the bends were exact. Once all the bends were correct I cut the pieces to proper length and we were ready to assemble.
On a side note bending the tubing was harder than it really should have been. I have a manual bender that will bend 5/8 tubing, but the shoe that it uses won't bend a tight enough radius. So I borrowed a 5/8 shoe that would bend the correct radius but the shoe wouldn't fit with my bender. I ended up making a Jury rigged setup out of the borrowed shoe, my manual bender, a couple welded posts on the table, some clamps and a piece of angle iron. It wasn't pretty but it worked.
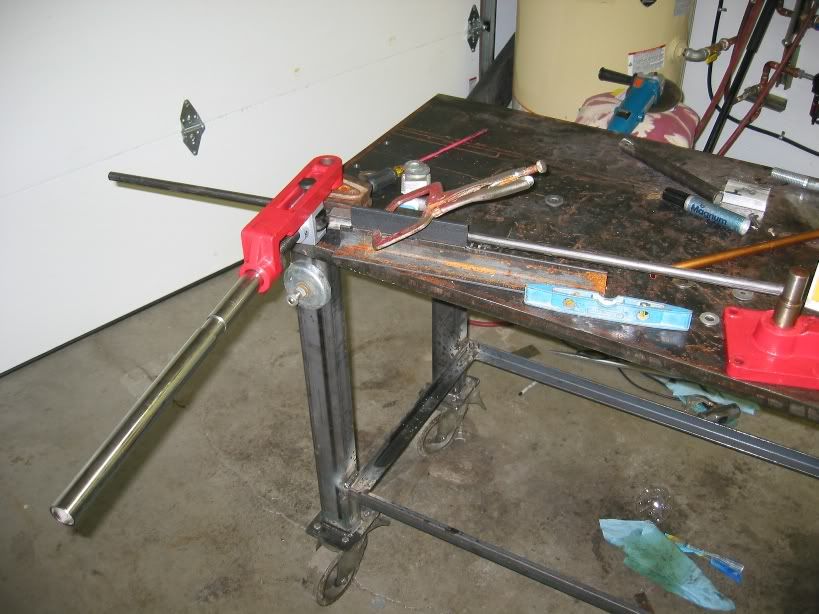
Jury Rigged Bender Setup - Not pretty but it got the job done.
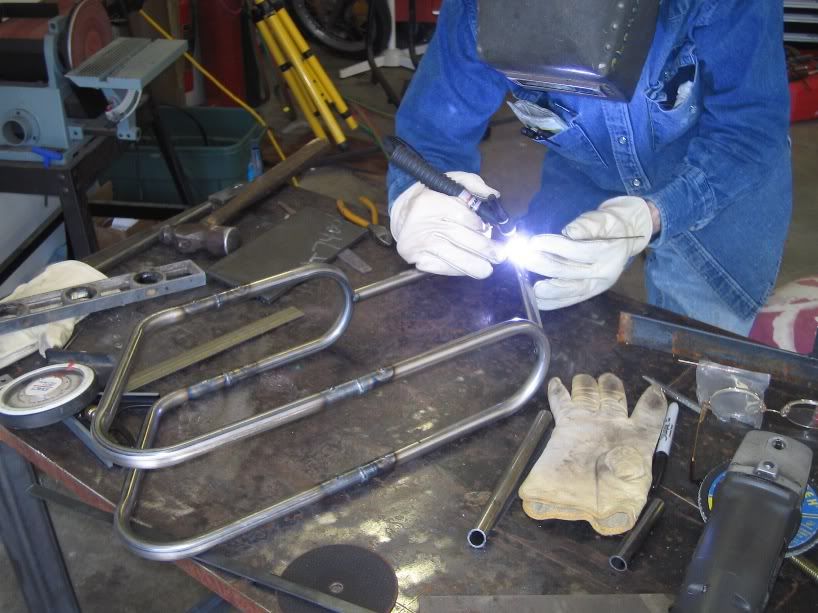
My Father Dan welding on the steering head. We decided to deviate from the plans here a little. The original plans were drawn so people could build the Tom Thumb without a welding machine, because of this the frame halves were riveted together instead of welded. I can see a problem with using rivets on the frame if you plan on keeping it any length of time, the rivets will wear out and you'll end up with a frame that wiggles like a fishing worm, not good.....So welding it is.
We joined the frame halves with a four - 2 inch or so long piece of solid round stock slid an inch or so into each side of the joining connections. A hole drilled in the tubing about an inch from each end allowed a weld to be made, joining the tubing and the round stock. Then the frames were fully butt welded. This makes a super strong joint that should last a life time, this is a common joint in aircraft.
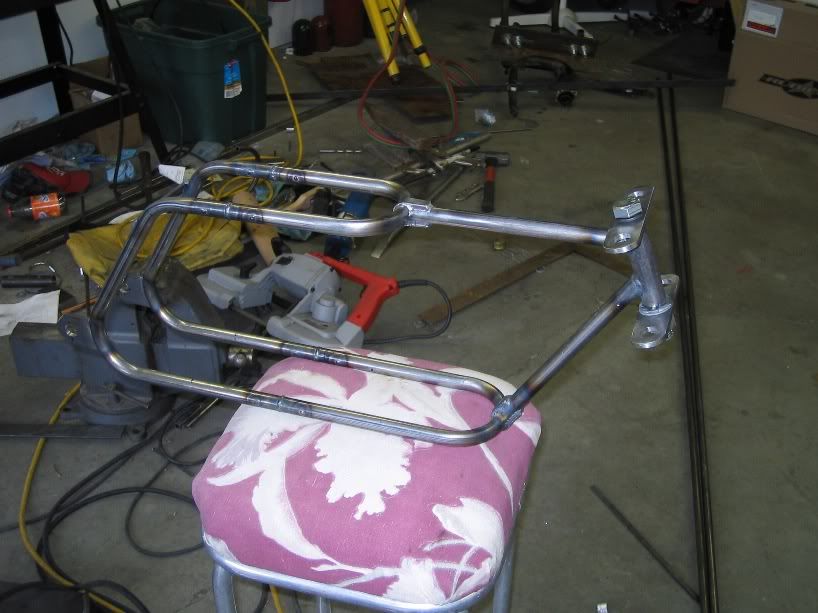
Here the frame is basically welded up. We just finished fabricating the triple trees and the rear axle attach points have been installed. You can also see the small pieces of flat bar that have been heated and molded around the frame down tube and top tube where they attach to the frame. These are fully welded and add quite a bit of strength to the connections.
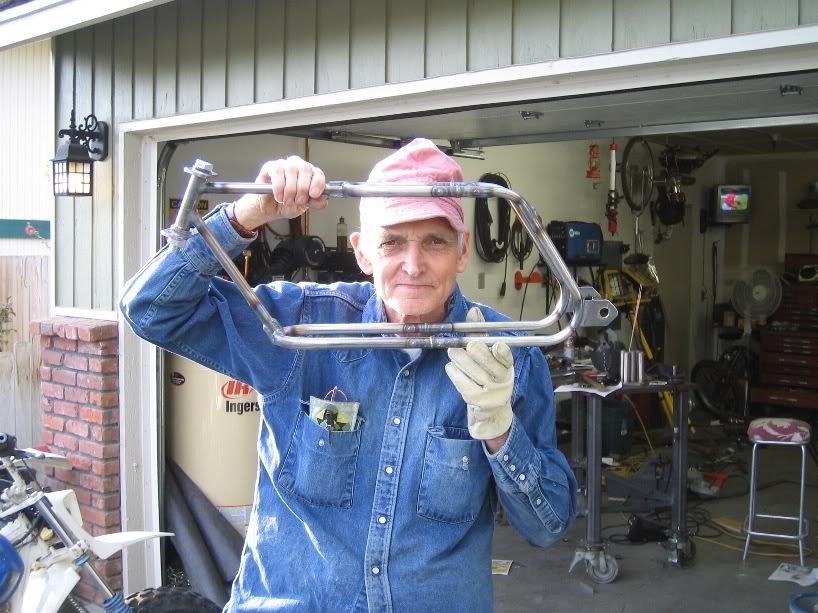
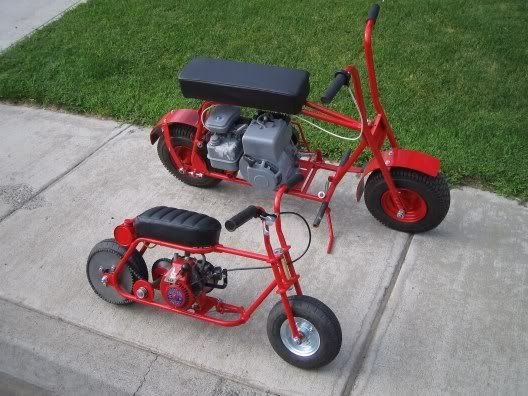
Here my father is holding up the frame for a size comparison. This is one small mini!
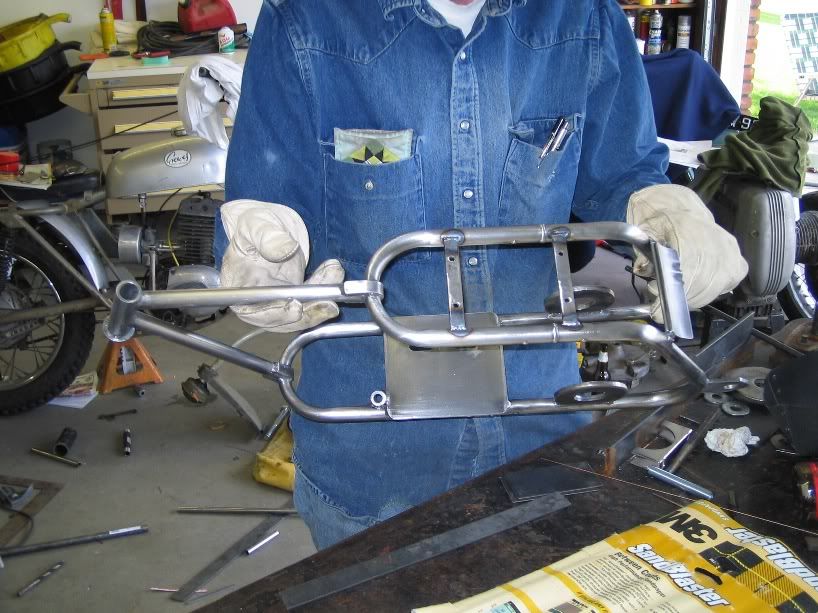
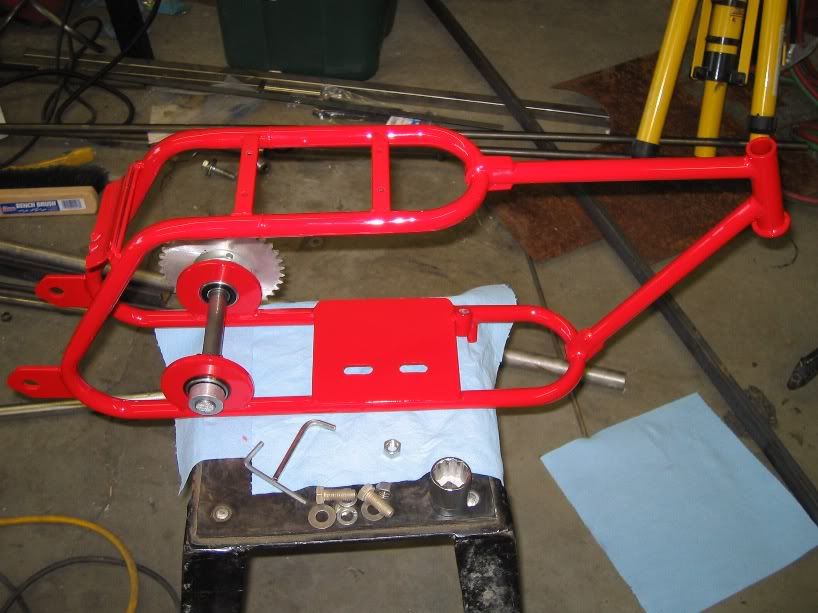
Here a few more items have been installed.....The engine mounting plate, Seat mounting bars, Fuel tank mount, Jack shaft pillow blocks and the kickstand mount.
We decided to deviate from the plans a little more here, first the engine mount. The original plans call for the engine to be bolted to the engine plate, then the plate is bolted to the frame using U-bolts. This allows you to slide the engine forward and backwards to adjust chain tension. Although this works great it really doesn't look the best since the U-bolts are out in the open.
So we opted to weld the engine mount plate to the frame, mount the motor to the motor mount and bolt the motor mount to the plate through two oval shape holes. This way the motor can still slide and it looks cleaner.
Second is the seat mount. The plans show 4 holes drilled through the frame and 4 screws holding the seat to the frame. We added two bars across the frame for the seat to bolt to so we didn't have to drill holes in the frame, again just a visual improvement.
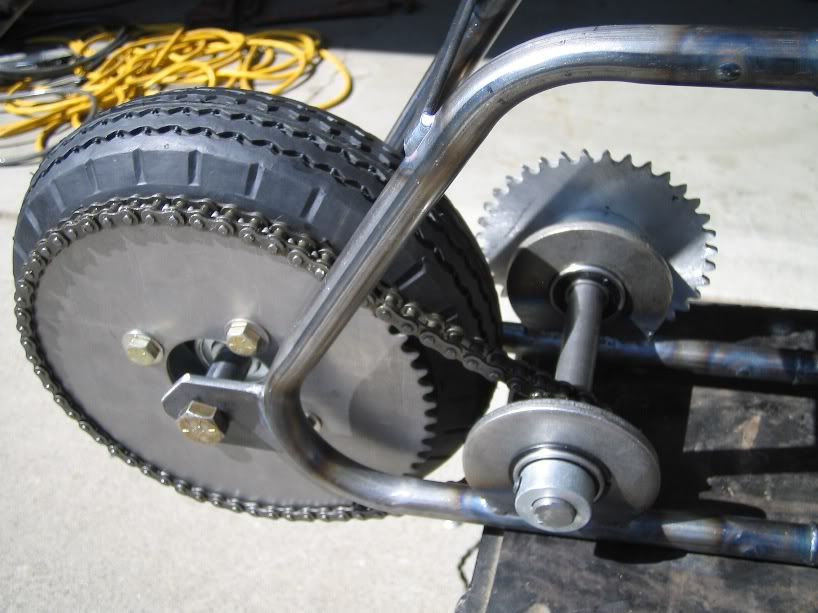
Here the jack shaft is in place.
One note on the wheels here. Make sure the wheels/tires that you buy will fit between the frame (4" If I remember right). I had ordered a nice set of high quality minibike wheels from a place on line and they looked great although they ended up being to wide to use. So I picked these wheels up at Harbor Freight for $4.00 each, installed some skinny tires from a minibike supply house, and modified the rear wheel to accept the sprocket. Sweeeet, we have wheels!
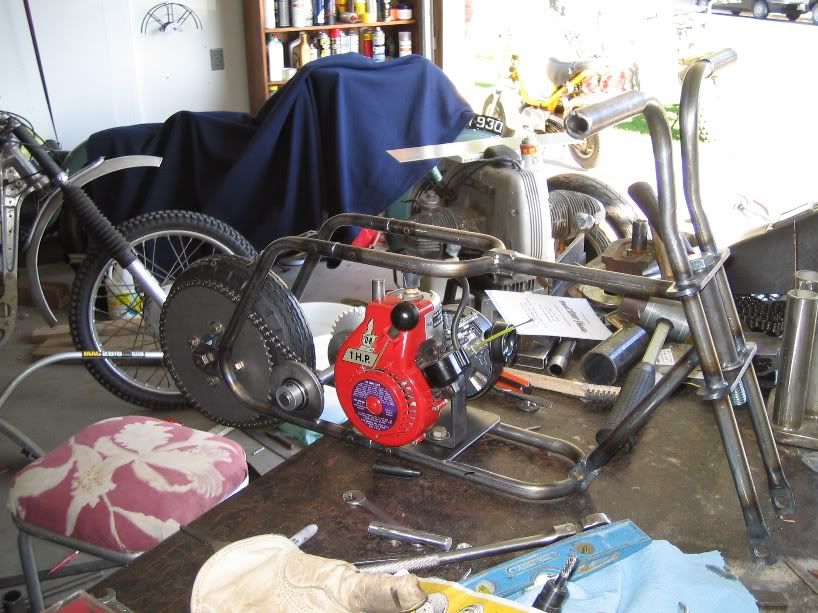
In this picture we are trial fitting the engine up. The front forks have also been added.
We decided to strengthen the forks by making them double walled. We slid a piece of half inch tubing up into the 5/8 tubing making it double walled. This should give the forks a lot more strength if you hit a curb ect. We then smashed the ends, rounded them and drilled the holes for the axle. Also in this picture you can see we added a larger piece of tubing where the grips will go. Since you can't find grips in the 5/8" size we welded on some larger pieces of tubing to accept standard motorcycle grips.
Just finished painting and its time to start the assembly. The mini was painted with PPG Urathane in Dodge Viper Red.
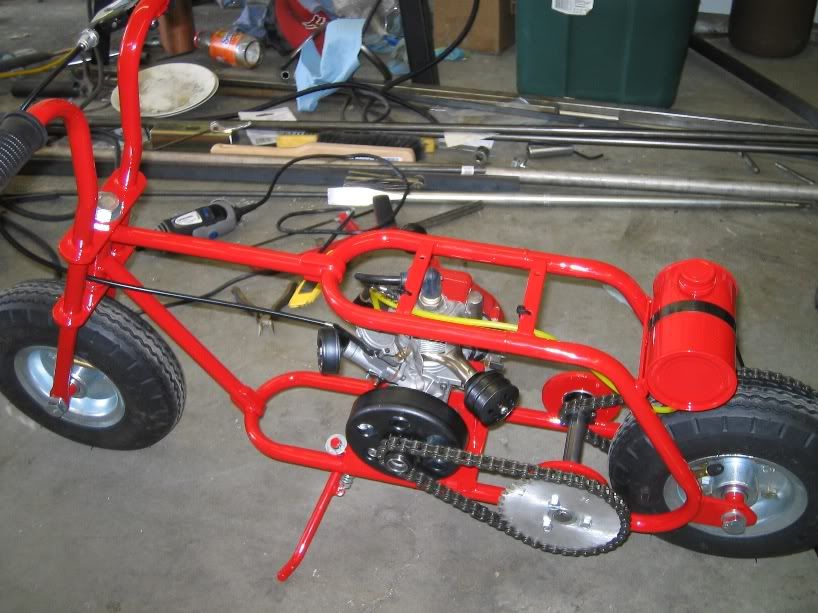
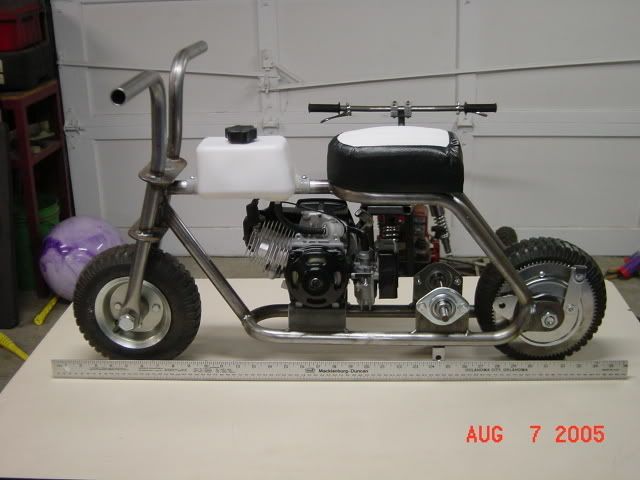
Starting to look like a minibike now. You can see the tank installed, RC airplane fuel line, Kickstand installed, Grips and Throttle.
For the throttle I used a spring loaded bicycle lever, available at any bike shop. This is great since the throttle return spring is built into the lever and you don't have to make a mount for it at the carb.
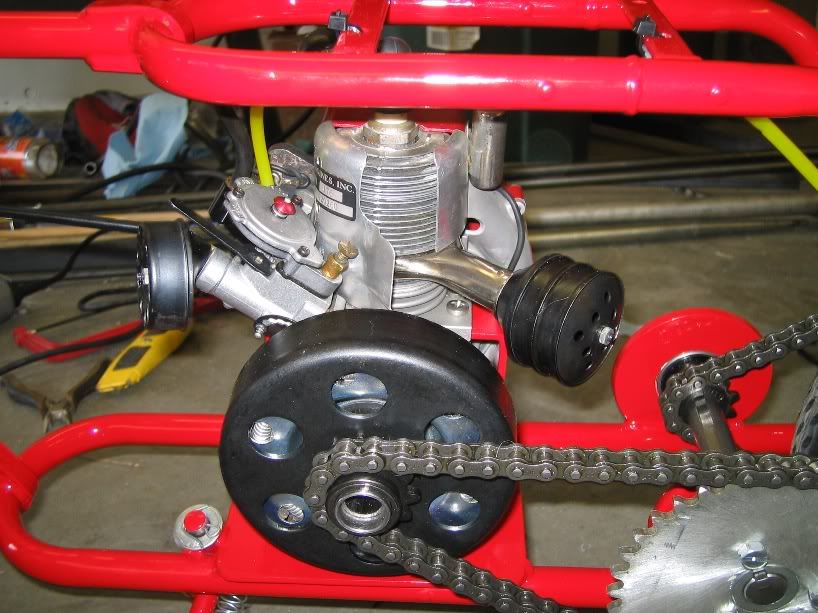
Closeup of the engine and clutch assy.
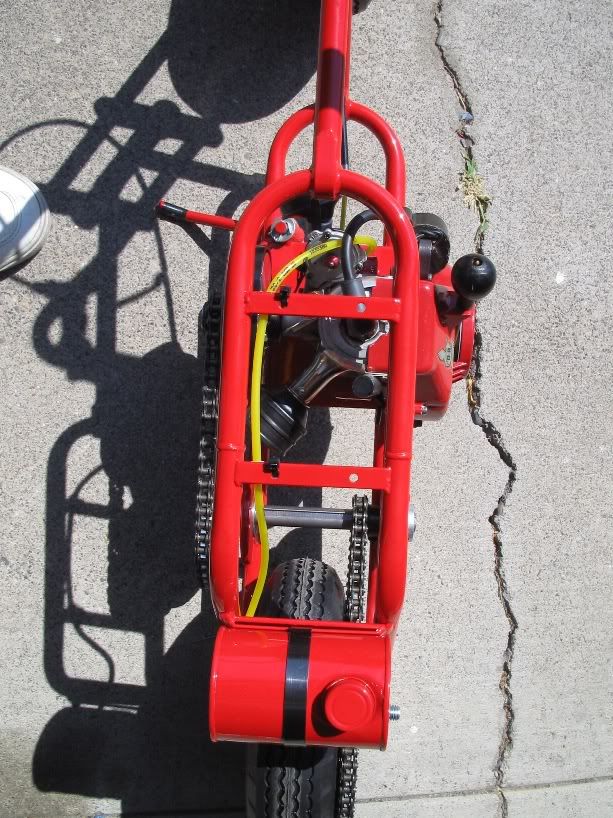
Top SHOT
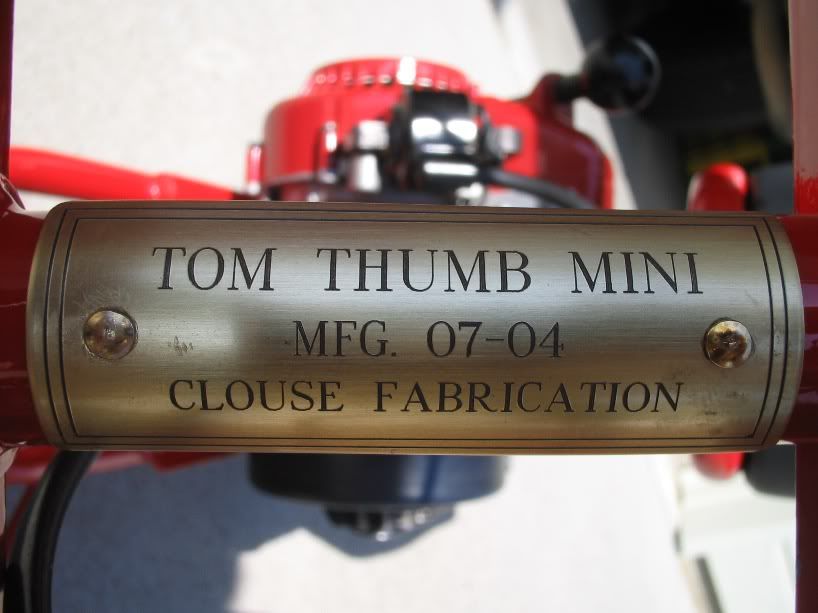
Had to add a steering head badge.
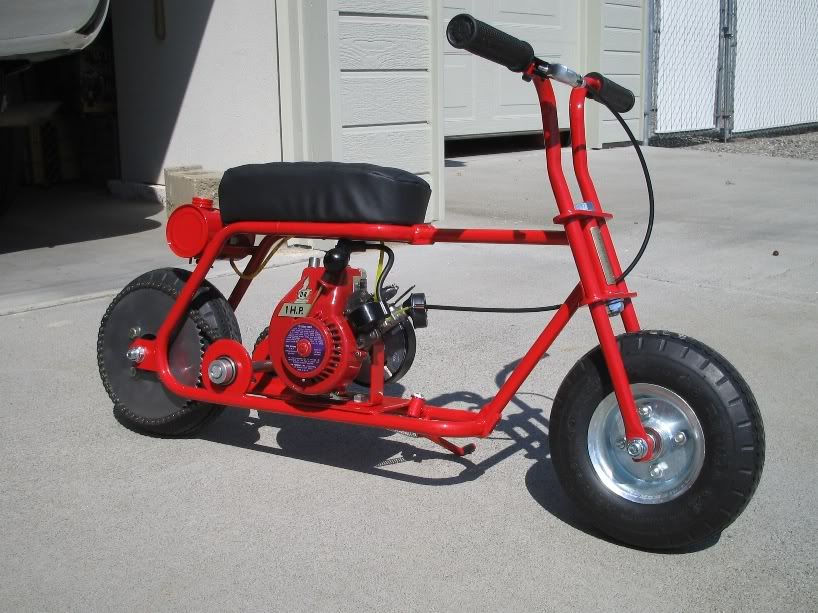
Finished. 3 days from start to finish. It will do about 10mph with me on it and it sounds like a chain saw with no muffler...
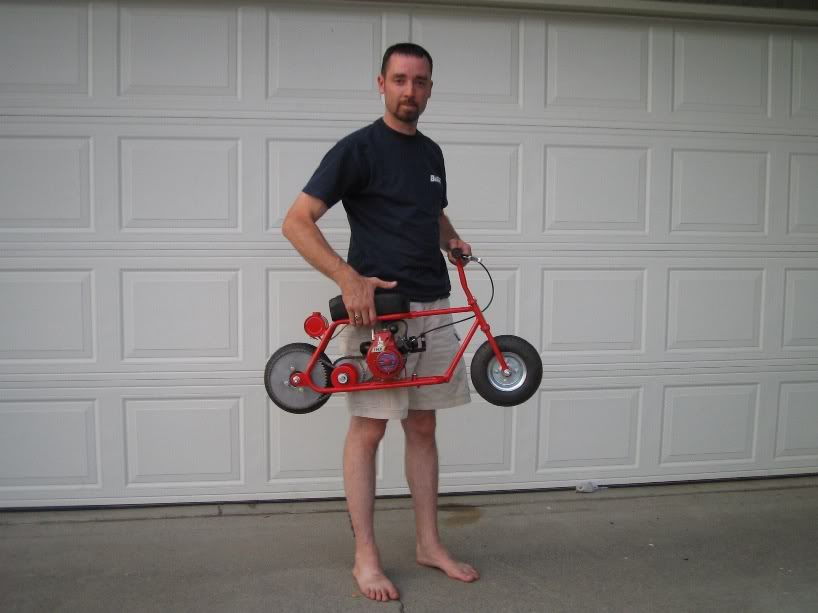
Another size comparison.
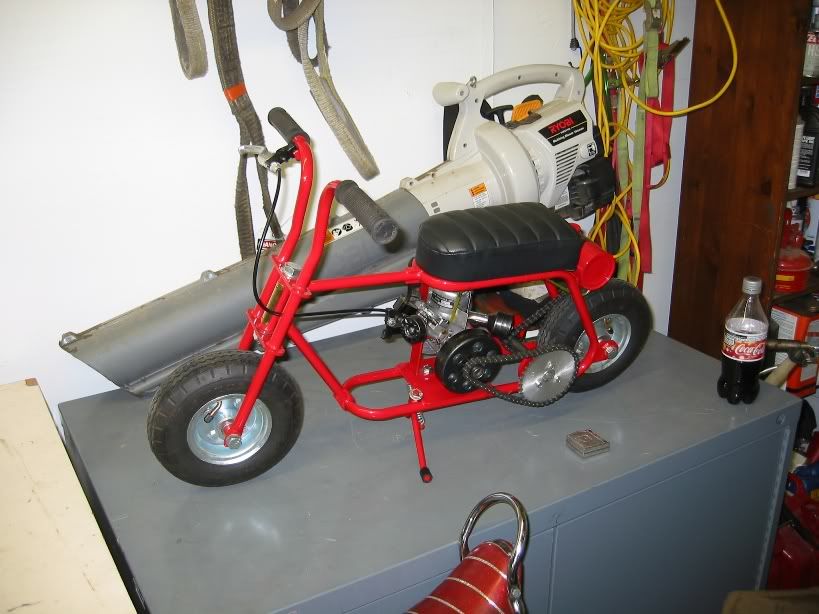
Sittin in the Garage.
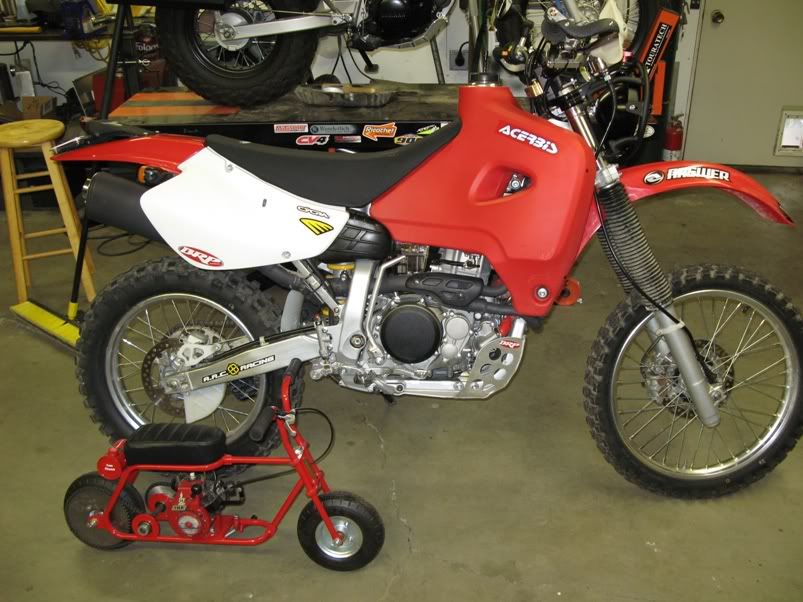
I think I could carry it along on the XRR.
I've had a couple people come up to me at shows saying that they had read the article when they were young and had dreamed about building a Tom Thumb Mini.
Has anyone else made up a Tom Thumb? If so post up some pics!
Hodakaguy
I wanted to keep the minibike as close to the original plans as possible, only substituting things that I thought would be a safety improvement or help the bike last longer. I started watching E-bay and picked up an original NOS Ohlsson & Rice 1HP engine (The one in the original article is a 3/4hp but basically the same engine. These little engines were used on everything in the late 60's and early 70's. They powered everything.....from chain saws, drills, water pumps, boat motors, generators ect. Very cool little engines). I ordered up some parts from a go-cart supply house, stopped by my local steel supply and we were off and running.
First a copy of the original article from 1970....
Page 1
Page 2
Page 3
IF Anyone Wants a full size copy of the article/plans just PM me and I'll email them to you.
OK.....Now on to the build....
Tubing bent and cut.....lets get started.
The plans in the magazine give you most of the specs but leave out a couple of items. I started by taking all the measurements on the plans and laying them out in full scale on a piece of cardboard. I was then able to get the rest of the measurements, like steering head angles ect. I would bend a piece a little at a time and then check it on the template until the bends were exact. Once all the bends were correct I cut the pieces to proper length and we were ready to assemble.
On a side note bending the tubing was harder than it really should have been. I have a manual bender that will bend 5/8 tubing, but the shoe that it uses won't bend a tight enough radius. So I borrowed a 5/8 shoe that would bend the correct radius but the shoe wouldn't fit with my bender. I ended up making a Jury rigged setup out of the borrowed shoe, my manual bender, a couple welded posts on the table, some clamps and a piece of angle iron. It wasn't pretty but it worked.
Jury Rigged Bender Setup - Not pretty but it got the job done.
My Father Dan welding on the steering head. We decided to deviate from the plans here a little. The original plans were drawn so people could build the Tom Thumb without a welding machine, because of this the frame halves were riveted together instead of welded. I can see a problem with using rivets on the frame if you plan on keeping it any length of time, the rivets will wear out and you'll end up with a frame that wiggles like a fishing worm, not good.....So welding it is.
We joined the frame halves with a four - 2 inch or so long piece of solid round stock slid an inch or so into each side of the joining connections. A hole drilled in the tubing about an inch from each end allowed a weld to be made, joining the tubing and the round stock. Then the frames were fully butt welded. This makes a super strong joint that should last a life time, this is a common joint in aircraft.
Here the frame is basically welded up. We just finished fabricating the triple trees and the rear axle attach points have been installed. You can also see the small pieces of flat bar that have been heated and molded around the frame down tube and top tube where they attach to the frame. These are fully welded and add quite a bit of strength to the connections.
Here my father is holding up the frame for a size comparison. This is one small mini!
Here a few more items have been installed.....The engine mounting plate, Seat mounting bars, Fuel tank mount, Jack shaft pillow blocks and the kickstand mount.
We decided to deviate from the plans a little more here, first the engine mount. The original plans call for the engine to be bolted to the engine plate, then the plate is bolted to the frame using U-bolts. This allows you to slide the engine forward and backwards to adjust chain tension. Although this works great it really doesn't look the best since the U-bolts are out in the open.
So we opted to weld the engine mount plate to the frame, mount the motor to the motor mount and bolt the motor mount to the plate through two oval shape holes. This way the motor can still slide and it looks cleaner.
Second is the seat mount. The plans show 4 holes drilled through the frame and 4 screws holding the seat to the frame. We added two bars across the frame for the seat to bolt to so we didn't have to drill holes in the frame, again just a visual improvement.
Here the jack shaft is in place.
One note on the wheels here. Make sure the wheels/tires that you buy will fit between the frame (4" If I remember right). I had ordered a nice set of high quality minibike wheels from a place on line and they looked great although they ended up being to wide to use. So I picked these wheels up at Harbor Freight for $4.00 each, installed some skinny tires from a minibike supply house, and modified the rear wheel to accept the sprocket. Sweeeet, we have wheels!
In this picture we are trial fitting the engine up. The front forks have also been added.
We decided to strengthen the forks by making them double walled. We slid a piece of half inch tubing up into the 5/8 tubing making it double walled. This should give the forks a lot more strength if you hit a curb ect. We then smashed the ends, rounded them and drilled the holes for the axle. Also in this picture you can see we added a larger piece of tubing where the grips will go. Since you can't find grips in the 5/8" size we welded on some larger pieces of tubing to accept standard motorcycle grips.
Just finished painting and its time to start the assembly. The mini was painted with PPG Urathane in Dodge Viper Red.
Starting to look like a minibike now. You can see the tank installed, RC airplane fuel line, Kickstand installed, Grips and Throttle.
For the throttle I used a spring loaded bicycle lever, available at any bike shop. This is great since the throttle return spring is built into the lever and you don't have to make a mount for it at the carb.
Closeup of the engine and clutch assy.
Top SHOT
Had to add a steering head badge.
Finished. 3 days from start to finish. It will do about 10mph with me on it and it sounds like a chain saw with no muffler...
Another size comparison.
Sittin in the Garage.
I think I could carry it along on the XRR.
I've had a couple people come up to me at shows saying that they had read the article when they were young and had dreamed about building a Tom Thumb Mini.
Has anyone else made up a Tom Thumb? If so post up some pics!
Hodakaguy