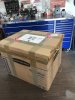
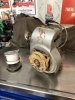
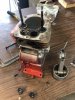
Doing a few engines for one guy. Last one I shipped back up to him he reused my crate I made to send another down just for a basic rebuild/repaint ….my crates are doing pretty good
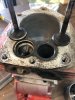
does not look to bad but the block does have a few issues
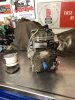
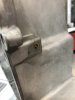
The intake flange bottom thread is broke and the actual intake has been welded/repaired. Not a big deal for me to fix the block, but firing up the welder, drilling and retapping cost time and money
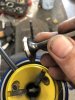
The bore was on the verge of having to go overbore, and after running a hone through it there are still few scratches that show through and I would be at the max according to the bore gauge and be starting with a pretty wide gap on the rings as well as a lot of clearance between skirt and cylinder, so it needs bored over. again no big deal for me to do and have the parts in stock but costs a lot and time consuming.
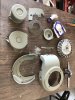
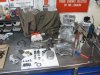
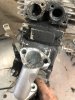
I have a few extra HS40 blocks accumulated so it will actually be a fraction of the cost for me to just use a donor that’s onhand (repeat customer discount of course") ) this one specs out really tight on the cylinder no repairs needed, just the standard valve recuts needed that were no worse than the original engine.
) this one specs out really tight on the cylinder no repairs needed, just the standard valve recuts needed that were no worse than the original engine.
this is the donor, piston is clean and not scratched up as well so This will save on the parts bill as well.
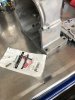
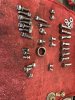
While the block was in the soak tank, I refaced the valves
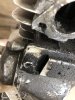
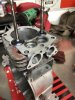
Out of the tank, I resurfaced the deck, and deglazed the straight, clean bore. I removed all the cast flashing from the intake/exhaust ports (this one was pretty sloppy). Now it’s ready to rod the exhaust seat off the pitting and get both seats reduced down to proper widths and seated better on the valve faces via a multi angle seat recut
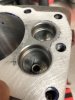

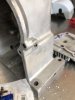
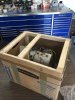
here the original block after cleanup, I will do the boring and welding to it at a later time as it i

today I will put the crank on the machine and polish the journals, it’s decent, the rod/main is on its last serviceable measurement but not egged out or grooved or gouged so it’s very doable… all other internals will be cleaned and prepped as well as the hardware and hope to get it at least into a shortblock, so I can get it off the bench and work on the carb and shrouding etc…
does not look to bad but the block does have a few issues
The intake flange bottom thread is broke and the actual intake has been welded/repaired. Not a big deal for me to fix the block, but firing up the welder, drilling and retapping cost time and money
The bore was on the verge of having to go overbore, and after running a hone through it there are still few scratches that show through and I would be at the max according to the bore gauge and be starting with a pretty wide gap on the rings as well as a lot of clearance between skirt and cylinder, so it needs bored over. again no big deal for me to do and have the parts in stock but costs a lot and time consuming.
I have a few extra HS40 blocks accumulated so it will actually be a fraction of the cost for me to just use a donor that’s onhand (repeat customer discount of course
) this one specs out really tight on the cylinder no repairs needed, just the standard valve recuts needed that were no worse than the original engine.this is the donor, piston is clean and not scratched up as well so This will save on the parts bill as well.
While the block was in the soak tank, I refaced the valves
Out of the tank, I resurfaced the deck, and deglazed the straight, clean bore. I removed all the cast flashing from the intake/exhaust ports (this one was pretty sloppy). Now it’s ready to rod the exhaust seat off the pitting and get both seats reduced down to proper widths and seated better on the valve faces via a multi angle seat recut
here the original block after cleanup, I will do the boring and welding to it at a later time as it i
today I will put the crank on the machine and polish the journals, it’s decent, the rod/main is on its last serviceable measurement but not egged out or grooved or gouged so it’s very doable… all other internals will be cleaned and prepped as well as the hardware and hope to get it at least into a shortblock, so I can get it off the bench and work on the carb and shrouding etc…