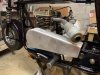
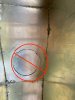
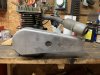
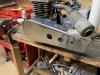
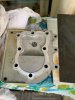
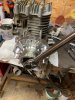
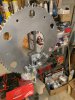
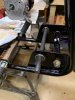
Working on engine details: The cylinder head came first. I had cleaned it with paint stripper some weeks ago, and I knew I had to true the head as there was a gasket leak on the exhaust side. You can see the discoloration in the thumbnail below.
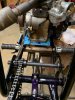
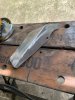
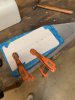
So I used a flat plate with 150 wet/dry to start to true the surface. The first pic shows about a minute in, and the second is when I got it true for the gasket to seat properly. I didn't take a lot off as I wasn't looking for more compression....just enough to get the mating surface flat.
I cleaned up the head bolts and used anti seize to make sure they didn't bind up in the freshly chased bolt locations.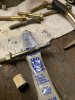
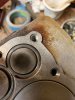
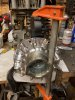
Following the torque pattern, I fitted the head in place at 140 in-lbs. I went up in 20# increments.
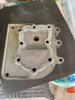
I double checked valve lash and it was in spec, so I went ahead and put the valve spring cover on and tightened it down snugly.
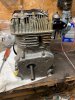
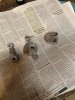
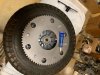
I lapped the flywheel to the crank next. Didn't take much and I cleaned the surfaces with brake cleaner. I picked up a new jam nut and used the Beville washer provided by ARC.
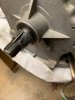
I have several keys to work with but since the flywheel is already set at 30 degrees, I went with a stock key first.
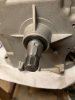
I torqued the flywheel to spec at 65lbs.
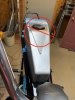
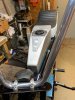
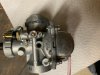
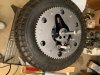
Next up was the new coil. I'm not looking to run this engine super hard, so I went with a stock coil as opposed to a PVL. The stock coil will take me to 5000 rpm before breaking up. The air gap is et at 0.030" and I had a feeler gauge in that thickness, but I had to clamp the coil down as the gauge was so stiff.
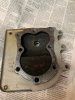
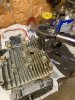
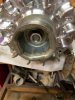
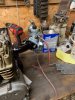
I pulled the bolts on the side cover and sealed them with red Loctitie. The side cover is torqued to 140 in-lbs but there is no torque pattern, so I created one. I brought each bolt up from 20 in-lbs at a time.
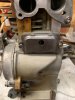
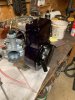
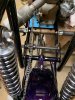
I next installed the recoil on the shroud. I didn't have it powder coated as I caught you-know-what on last year's build off bike. I think I'll leave it satin black as the block will be painted satin black also. The shroud extension will be painted black, too.
Hopefully, we can test fire on Thursday. My sister-in-law's memorial service is tomorrow, so off to Southside VA in the morning.
So I used a flat plate with 150 wet/dry to start to true the surface. The first pic shows about a minute in, and the second is when I got it true for the gasket to seat properly. I didn't take a lot off as I wasn't looking for more compression....just enough to get the mating surface flat.
I cleaned up the head bolts and used anti seize to make sure they didn't bind up in the freshly chased bolt locations.
Following the torque pattern, I fitted the head in place at 140 in-lbs. I went up in 20# increments.
I double checked valve lash and it was in spec, so I went ahead and put the valve spring cover on and tightened it down snugly.
I lapped the flywheel to the crank next. Didn't take much and I cleaned the surfaces with brake cleaner. I picked up a new jam nut and used the Beville washer provided by ARC.
I have several keys to work with but since the flywheel is already set at 30 degrees, I went with a stock key first.
I torqued the flywheel to spec at 65lbs.
Next up was the new coil. I'm not looking to run this engine super hard, so I went with a stock coil as opposed to a PVL. The stock coil will take me to 5000 rpm before breaking up. The air gap is et at 0.030" and I had a feeler gauge in that thickness, but I had to clamp the coil down as the gauge was so stiff.
I pulled the bolts on the side cover and sealed them with red Loctitie. The side cover is torqued to 140 in-lbs but there is no torque pattern, so I created one. I brought each bolt up from 20 in-lbs at a time.
I next installed the recoil on the shroud. I didn't have it powder coated as I caught you-know-what on last year's build off bike. I think I'll leave it satin black as the block will be painted satin black also. The shroud extension will be painted black, too.
Hopefully, we can test fire on Thursday. My sister-in-law's memorial service is tomorrow, so off to Southside VA in the morning.

")