My Dirt Bug as it should be, modded...

#41


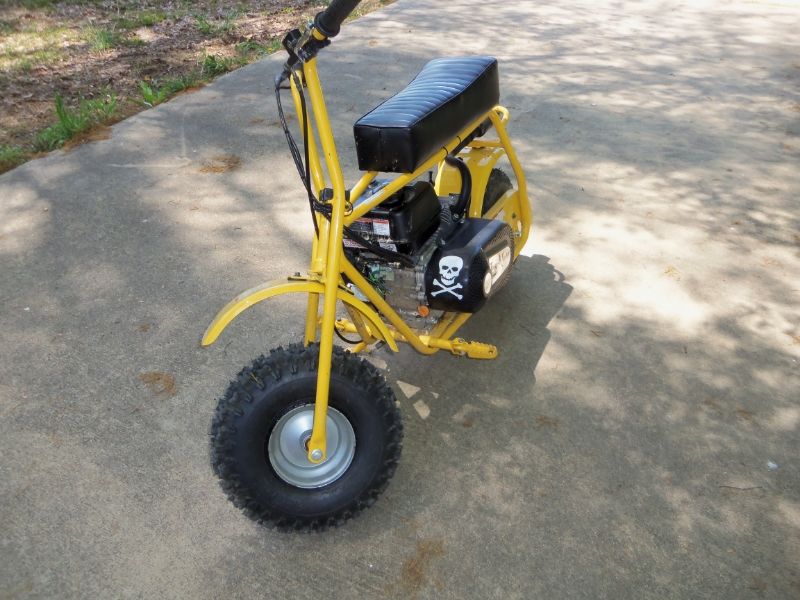
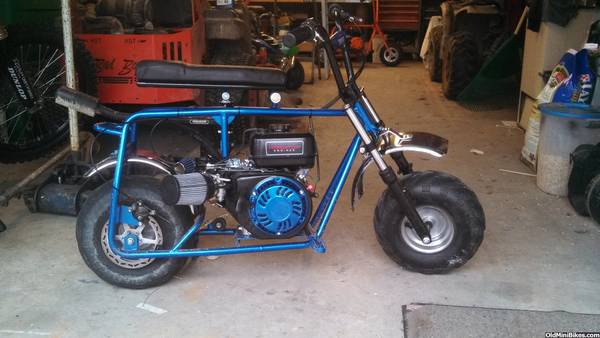
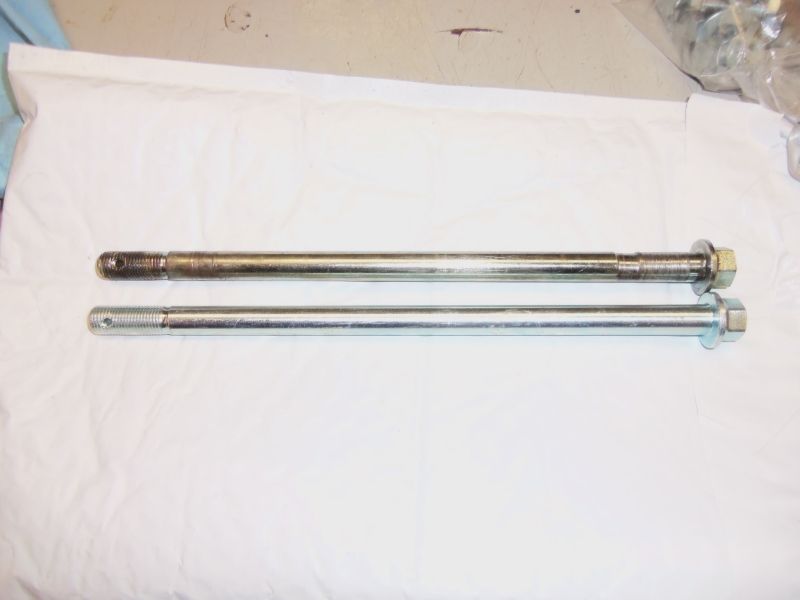
Got my new rear axle shaft in from OldMiniBikes. Still no stickers...:no:


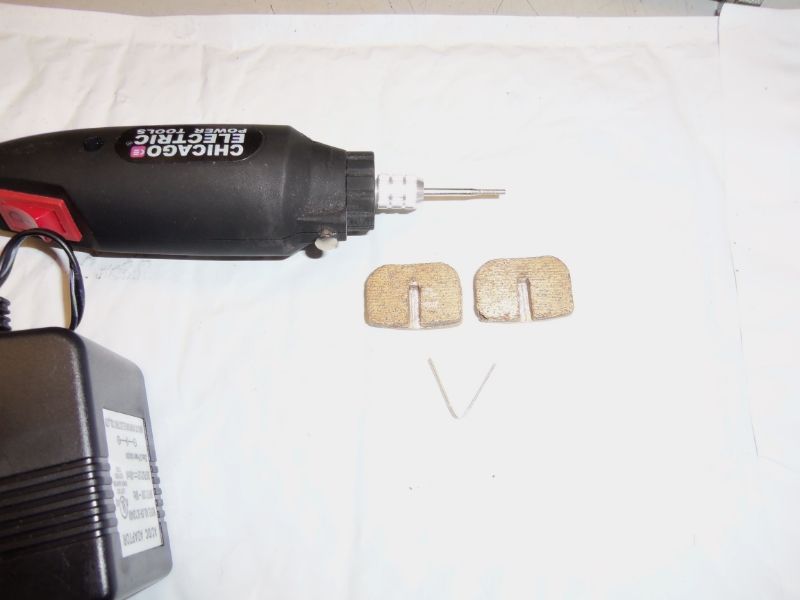
I had to grind out the slots a little bit in the harder compound brake pads. The slots were too narrow for the V-shaped metal return spring for the pads.

Sorry about too much flash. You can just barely see the V-shaped return spring below the pads.


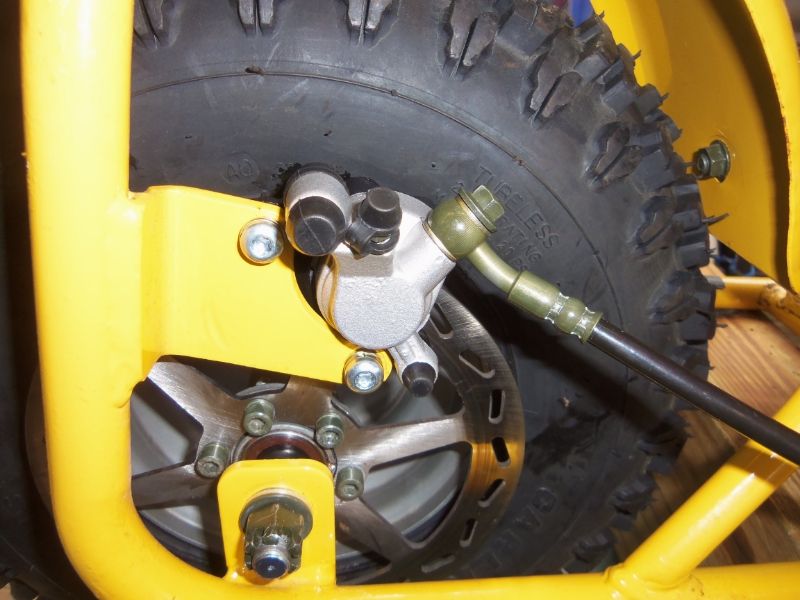
Hydraulic brake caliper bolted up with no problems.


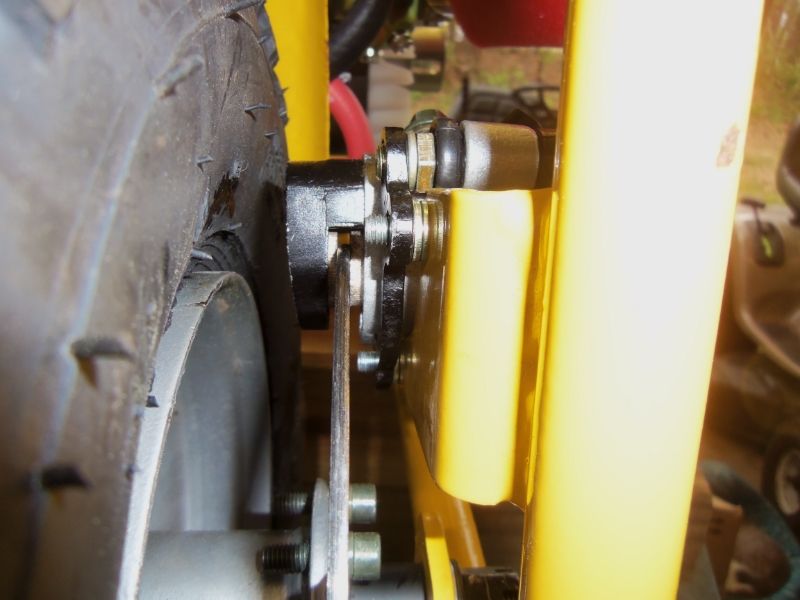
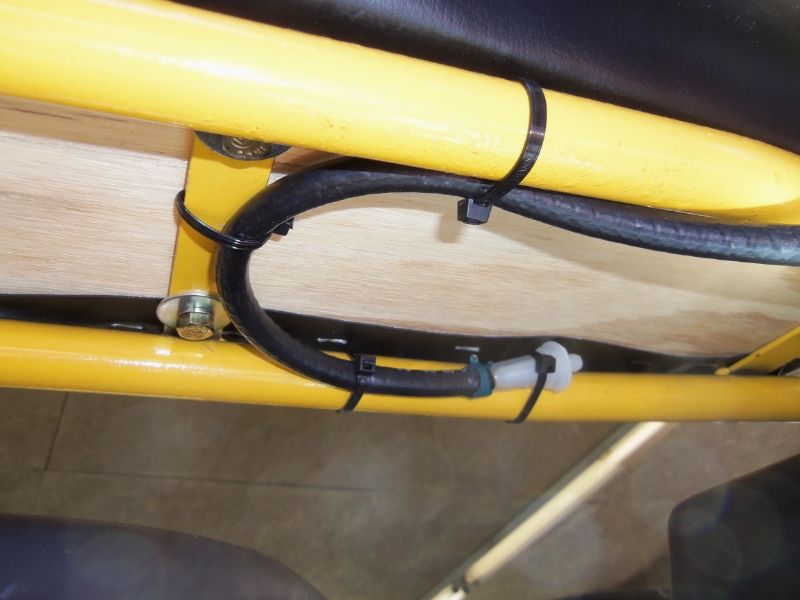
I ended up using two washers between the caliper bracket and the mounting tab to center the caliper over the brake rotor. As such, I had to use longer mounting bolts.


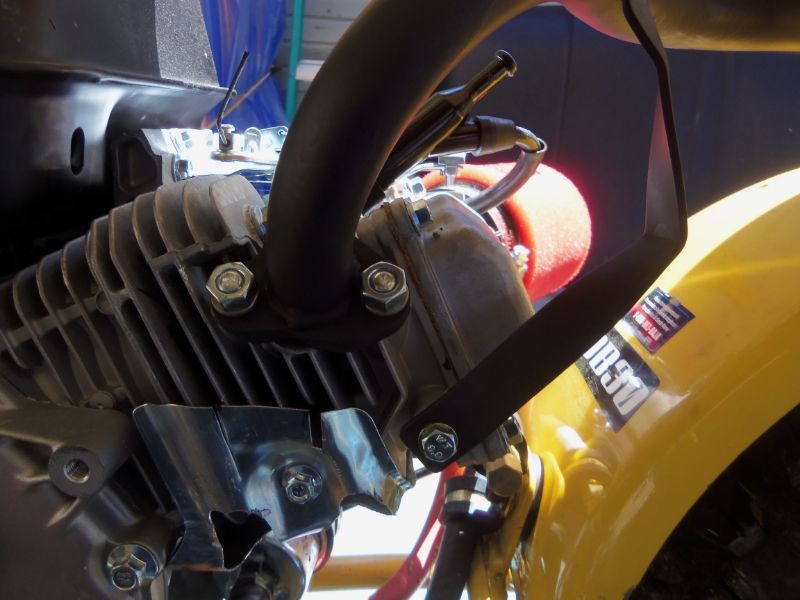
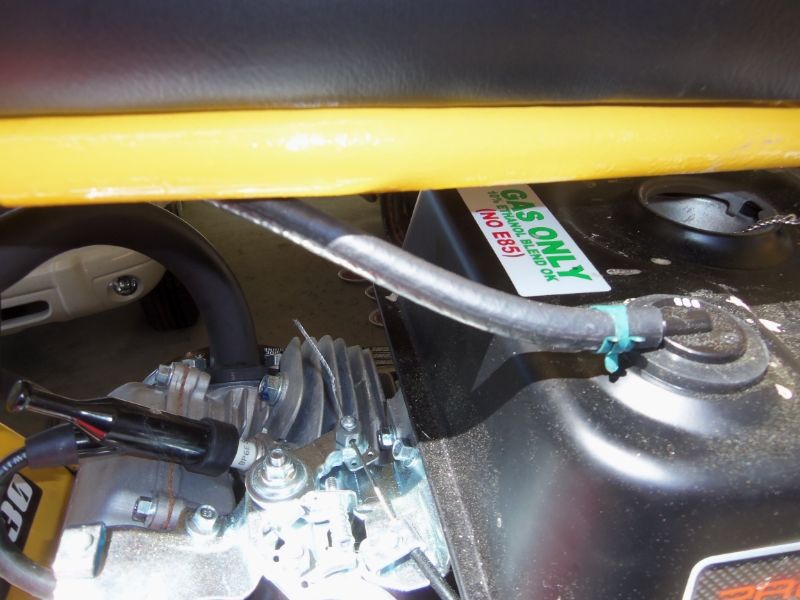
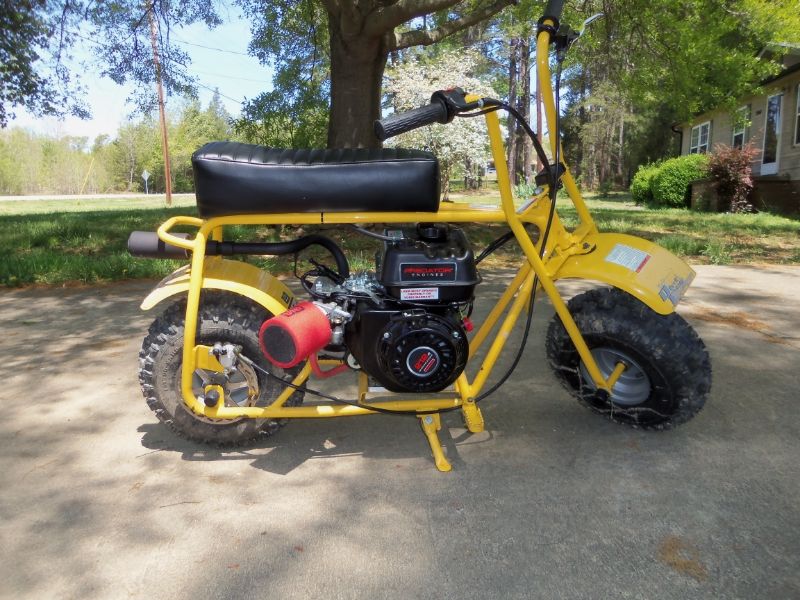
Alright, at this point, I test fired the engine. It started on the first pull, but was a little raggedy. it surged some and had the occasional backfire. I tweaked the idle mixture screw to get the smoothest idle once it warmed up. Idle ended up being 1200 RPM. Idle has a lope to it and burbles out of the open header.

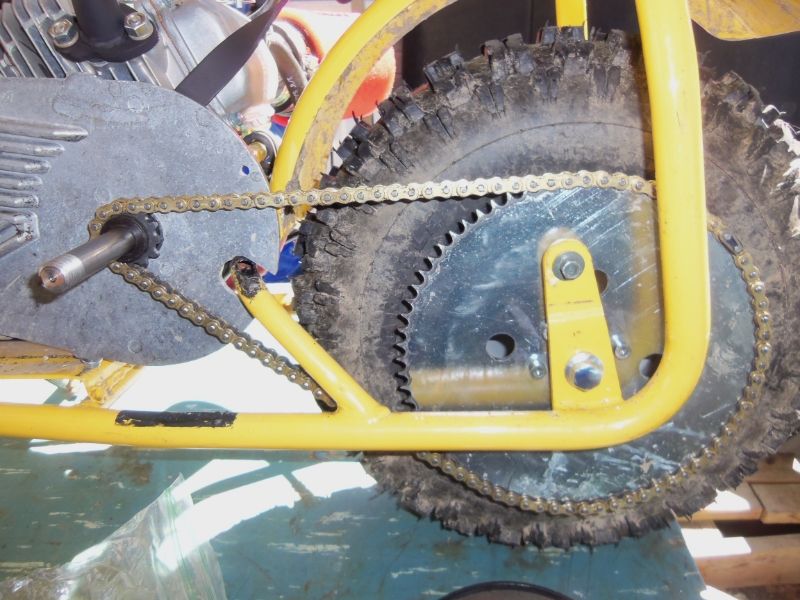
Warmed up, the engine would run up to 3900 WOT. Over the next two days I put 30 minutes on the engine, varying the RPM and such. Other than some low speed vibrations, I had no issues from the engine.

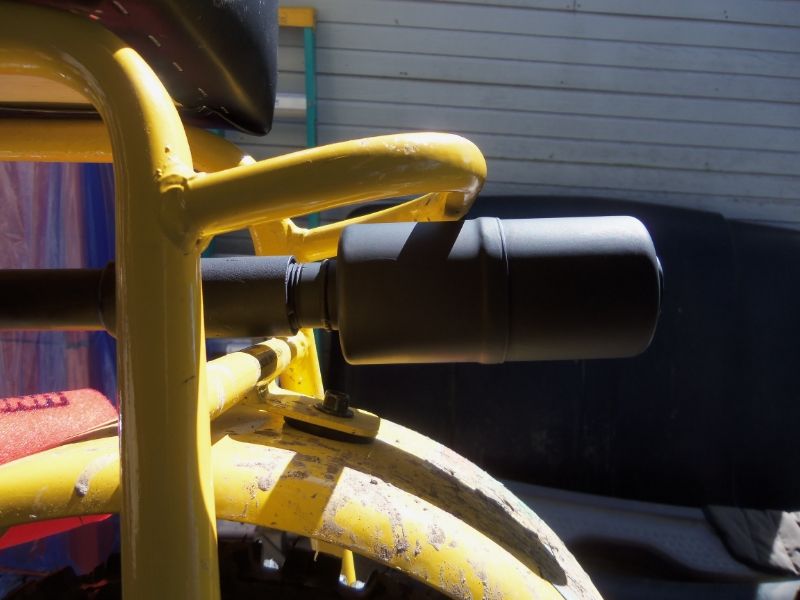
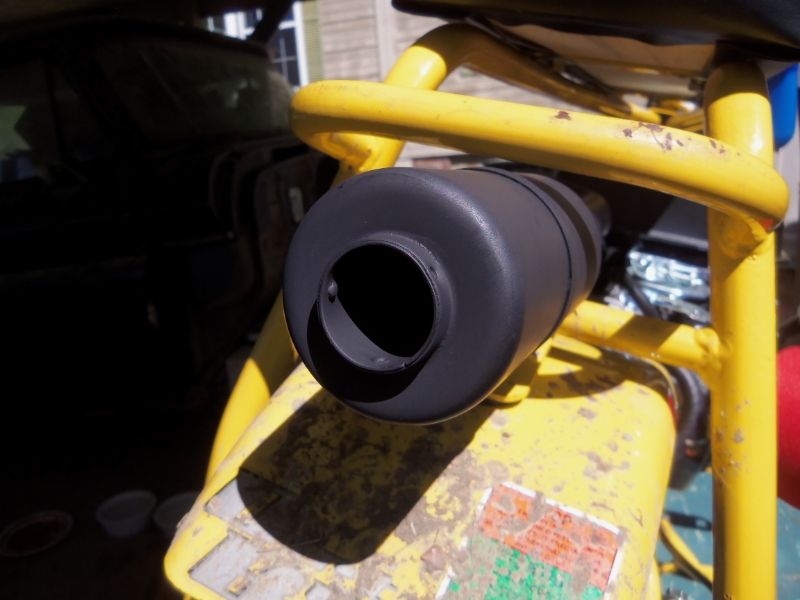
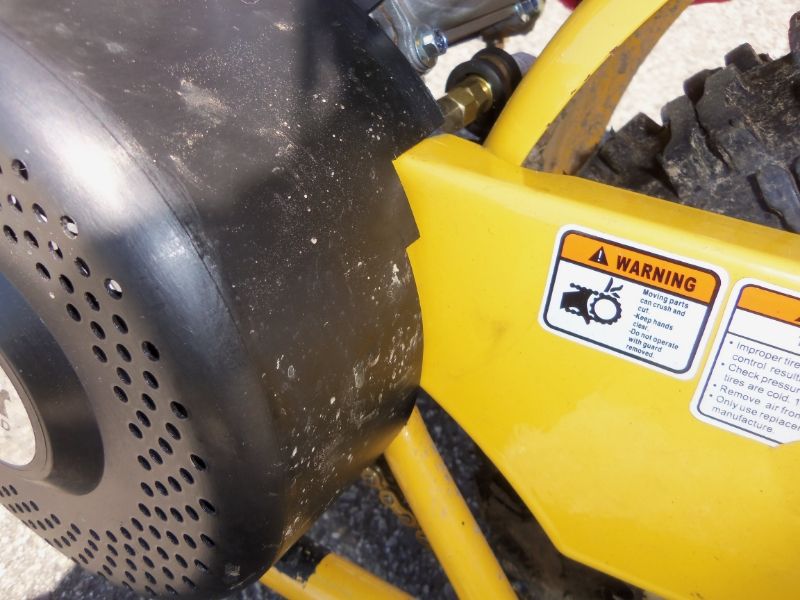
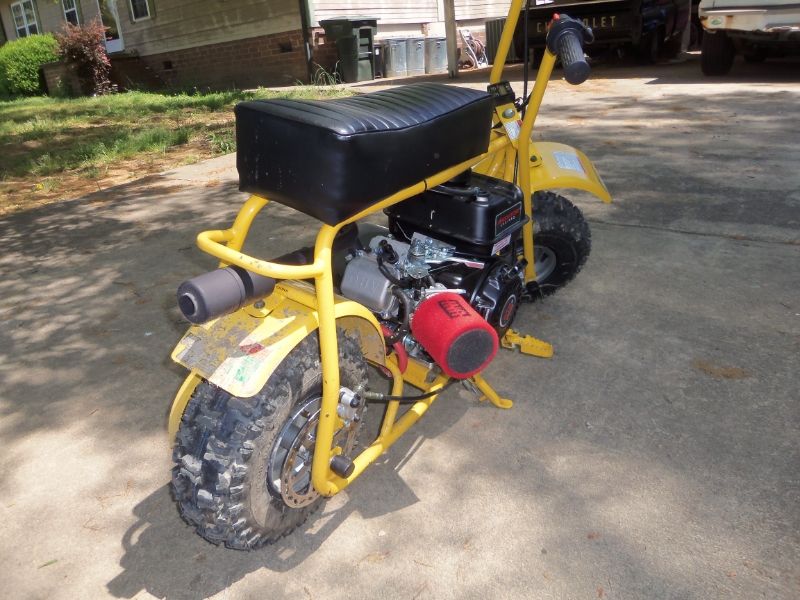
The TAV however, was another story. It was neat watching the pulleys shift and the belt move. Then the belt started smoking at higher RPM's. I thought the plate was cocked at its back end. More testing pretty much shredded the beveled edge of the belt. I also figured out what was wrong.

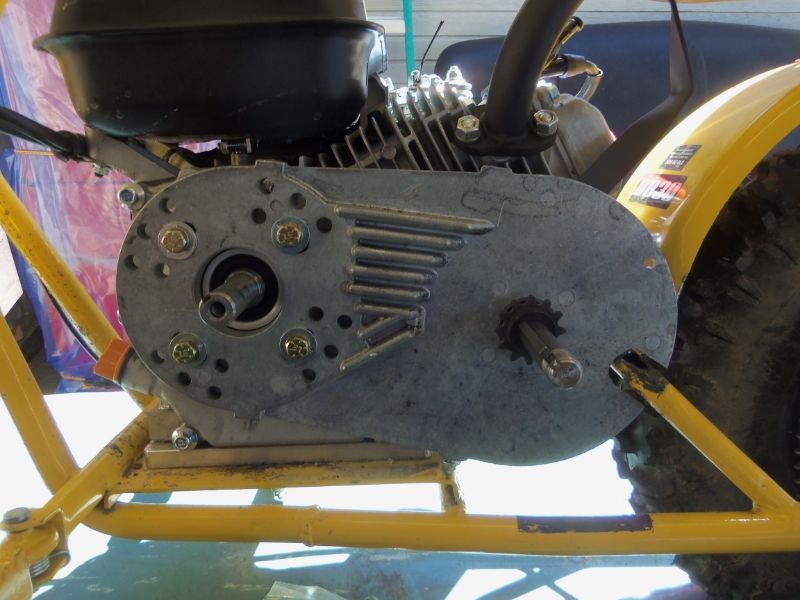
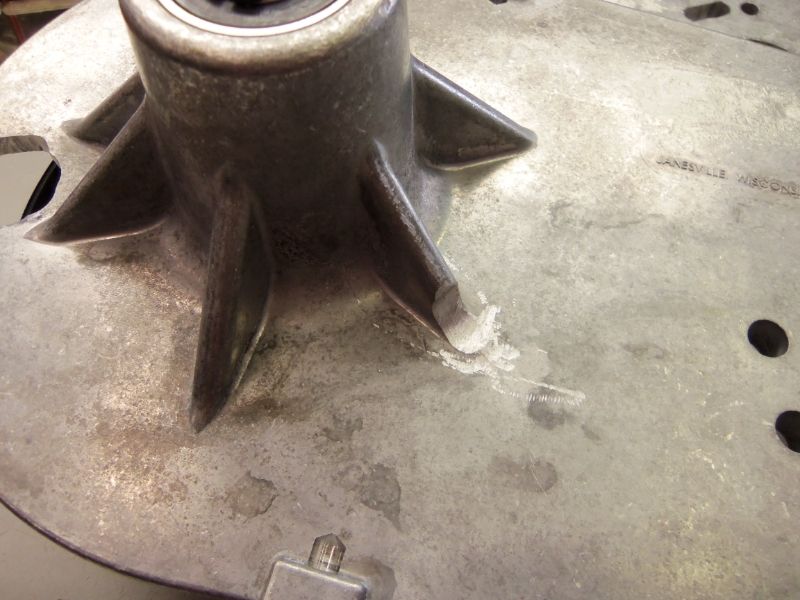
Remember me talking about getting medieval with the grinding of the TAV plate to make it tuck up next to the engine? I went too far.

The back end of the TAV plate, that carries the secondary pulley, flexed out under load, allowing the belt to bias into the driven pulley, shredding it. There was no fix. You can't effectively put metal back after you grind it off.

So, I had to buy another TAV2 kit. That was a nice $200 mistake. :censure:

This time, I ground the slot at the back tighter, and did very, very little grinding to the TAV plate itself. Instead, I got medieval on the cylinder air baffle...


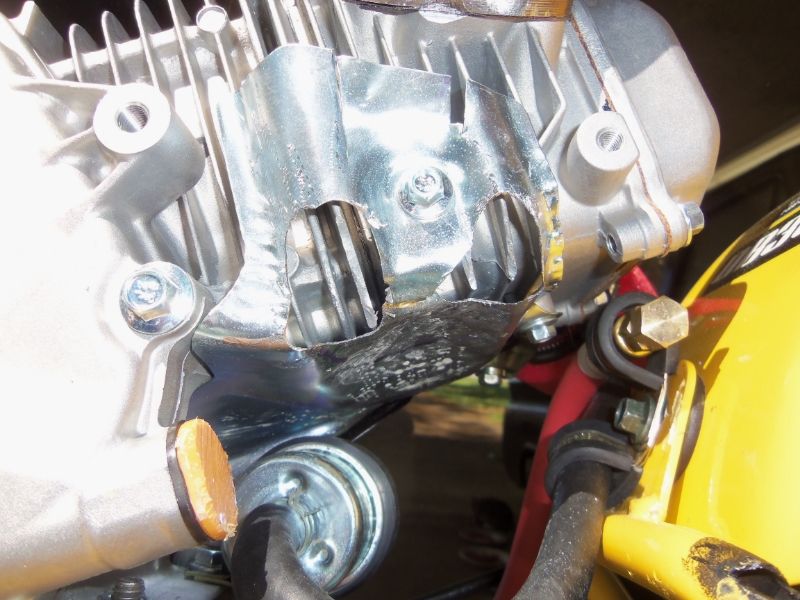
I ground these two holes in the baffle for clearance of two gussets on the bearing snout on the back of the TAV plate. I ground a slight amount off a few cylinder fins, and dimpled the baffle a little more. Now, the TAV fits in the same place as the other one, but is not weakened.


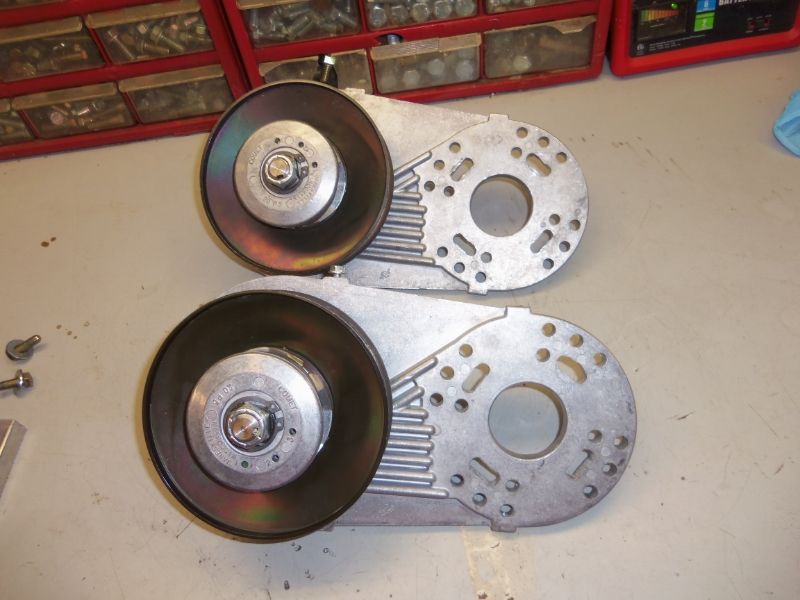
No, you're not seeing double. I now have TWO TAV2 kits.


I did not make the same mistake twice.


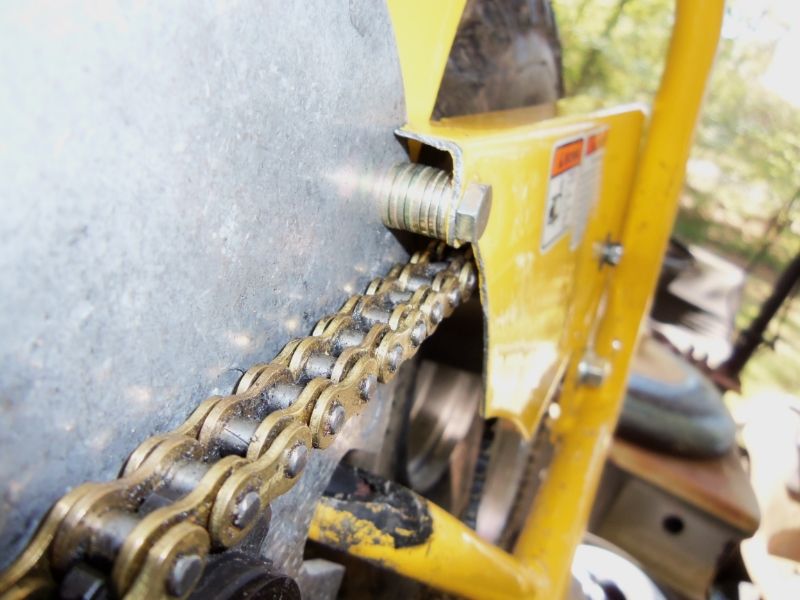
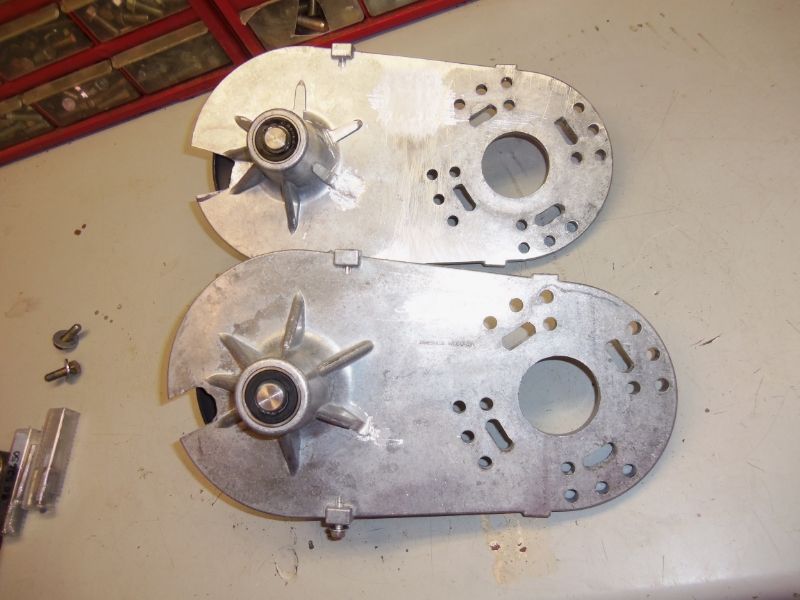
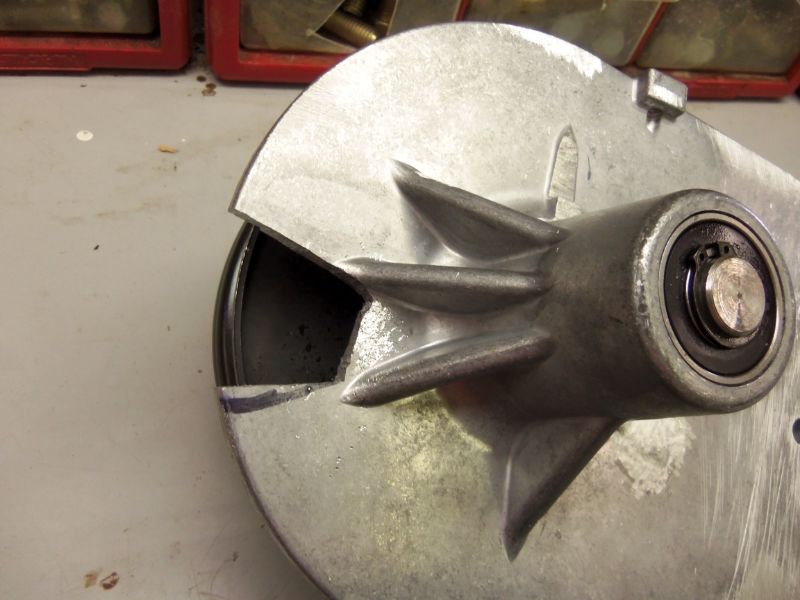
The only grinding on gussets I did was this little notch, needed to clear the rear oil fill cap and boss.


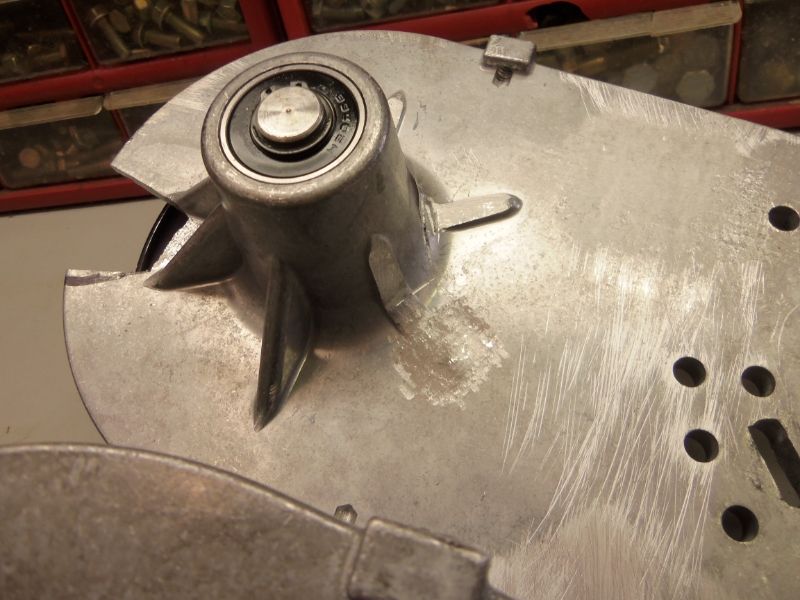
As opposed to the removal of 3 complete gussets on the bearing snout of the old TAV plate.


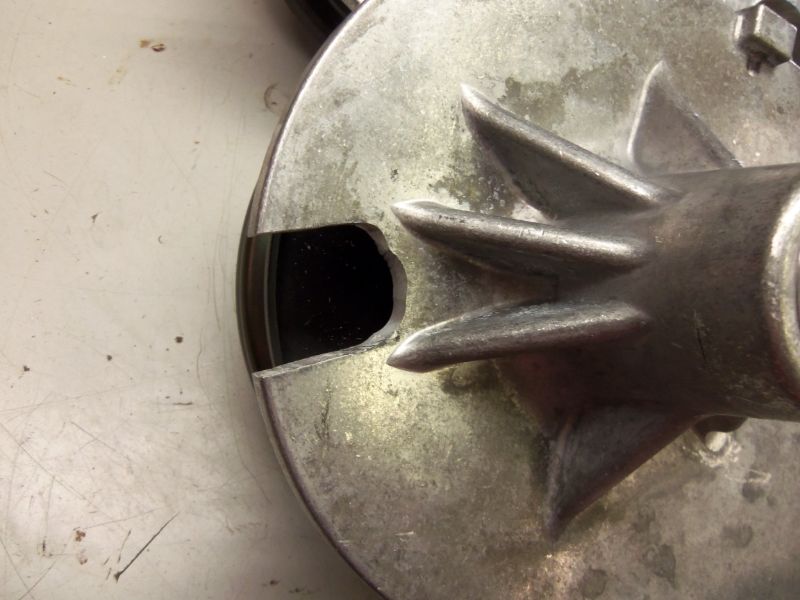
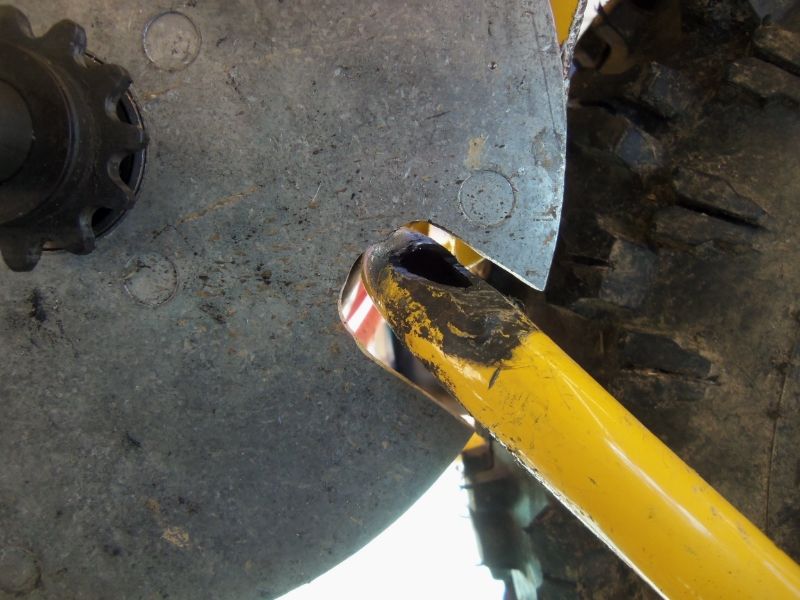
The notch to clear the frame tube is much tighter on the new TAV plate.


As opposed to the too wide slot on the old TAV plate.


Well, I am trying to be philosophical about this. As far as mistakes go, a $200 one is not bad. I have made much worse. So, now I have a complete spare TAV. So be it...


Seth K. Pyle
 
#42


I finally got the header and muffler put back together. The header was actually a little short in my opinion. The bend was perfect, as it put it right inline with the opening in the rear frame. Unfortunately, the muffler was too large a diameter to fit in that opening in the frame. So, I extended it with a 3/4 NPT close nipple and merchant coupling. Once it was all together, I used a large piece of red Scotchbrite pad to prepare the surface of the header and muffler for painting. I coated the whole thing with VHT ceramic header paint. It turned out quite well.

To support the header, I bought the header brace from OldMiniBikes. Too bad I didn't pay attention that it was for a box stock header, not a minibike header. Luckily, with a little creative bending, it fit the header and bolted to a boss towards the rear of the cylinder head. I had the brace welded on 4 sides to the header in hopes that it would take longer to crack and break.


I also had the close nipple, merchant coupling, and muffler tack welded to the header. I tightend all of them quite tight. I had the tack welding done for vibration resistance. They will stay put, but I can grind the tack down later and unscrew everything if I need to.


Sorry for the lousy photo. This shows how the brace was welded onto the header pipe.


Header and brace where they bolt to the cylinder head. I used split lock washers for vibration resistance.


These last three photos show where the muffler exits the frame. It looks good and relatively proportional. However, at cold idle, the muffler does rap the frame due to engine vibration. I haven't figured a way around that yet.


New TAV plate bolted to the engine. Note how the notch is tighter to the frame.


I could have ground a little more out of the notch, but it will be alright.


Seth K. Pyle
 
#43


Installed the RLV Xtreme Gold #35 chain. Turns out I only needed one box of chain. So, now I have a spare box of chain.


Hacked and cut on the original chain guard to get it to fit and clear everything.


The chain clears the guard, but it is close. Rolling along, you don't really hear any chain slap.


I had to grind down the head of the bolt to get it to clear the back side of the secondary pulley. It clears.

You can see the yellow torsion spring in the rear pulley hub. Rather than go through the hassle of disassembling the old rear hub, removing the yellow spring, disassembling the new rear hub, installing the yellow spring, then fighting to assemble it, I just swapped complete rear pulley/hub assemblies.
No muss, no fuss.


Originally, I had a rubber cap over the emissions fitting on top of the gas tank. That was a brain fart, as the fuel cap is sealed and that fitting is used to vent the tank. So, I made a vent line. It goes up to the frame...


Where it loops around to a fuel filter. This keeps the breather hose out of the way, lets the fue tank vent, and keeps it away from the hot engine/exhaust.


I trimmed the TAV cover to fit tightly over the chain guard. I wanted it to be a neat intallation.


Seth K. Pyle
 
#44
I am now riding my Dirt Bug. It is done for the moment, and I am happy with it. Now, I have to get proficient at riding a minibike.

As of three mornings ago, this is what my completed Dirt Bug looks like. Note the dirt, I ride it.


Note worthy here is the routing of the hydraulic brake hose. I routed it such that nothing binds or catches. I may zip tie it to the rear frame. We will see.


Hours steadily climbing on the meter. Rapidly approaching oil change time.


Seth K. Pyle
 
#45
Impressions after riding my Dirt Bug for awhile...

I am the suspension...must choose my route carefully.

Hydraulic brake = AWESOME! It stops very well.

This thing is a WHEELIE MACHINE OF DEATH!!!
Yanking the twistgrip to full throttle is a suicidal move that results in the minibike (and you if you are lucky) rolling right over onto the back. Even merely goosing the throttle pulls the front wheel off the ground.
I ride with a feather touch on the throttle and lean forward. I am still learning how to go up hills without rolling it over backwards.

I ride with a perpetual grin on my face.

Now, I just keep up with the maintenance, and keep riding...


Seth K. Pyle
 

GustoGuy

Well-Known Member
#47
Impressions after riding my Dirt Bug for awhile...

I am the suspension...must choose my route carefully.

Hydraulic brake = AWESOME! It stops very well.

This thing is a WHEELIE MACHINE OF DEATH!!!
Yanking the twistgrip to full throttle is a suicidal move that results in the minibike (and you if you are lucky) rolling right over onto the back. Even merely goosing the throttle pulls the front wheel off the ground.
I ride with a feather touch on the throttle and lean forward. I am still learning how to go up hills without rolling it over backwards.

I ride with a perpetual grin on my face.


Now, I just keep up with the maintenance, and keep riding...


Seth K. Pyle

Great job Seth

You should get the Motovox front end now. It is a fully hydraulic front suspension. With your
nicely padded seat it would make for a better ride.
 
Last edited:

MikeBear

Active Member
#49
You could have saved a bunch of money by buying this, and just transferring the pulley over to it from the badly ground plate. It's the same as the old version TAV30: http://www.ebay.com/itm/Steel-Torqu...H_DefaultDomain_0&hash=item20d7e4cece&vxp=mtr

Actually, you can still buy one and rescue the damaged one for another bike.

Looks at this and you can see what the old-school versions looked like before they changed to the cast plates. Same one on my Ken-Bar MB-6 minibike:

http://www.oldminibikes.com/forum/mini-bike-parts/46728-comet-tav-30-asymmetric.html
 
Last edited:
#51
Bandit 40, Thank You!!! Not sure about the wheelie bar, though...

GustoGuy, Thanks! Also, I am now investigating what it will take to fit a Motovox front end to my Dirt Bug.

shaky, thanks for the compliment, I very much appreciate it!

MikeBear, Sweet!!! That is very good to know. However, I have a question. How well does the steel plate resist flexing under load?

DANP, the header paint has a good reputation, but I've only got about 30 minutes runtime on mine. So far, so good. Prep work is the key, though.

Look towards the beginning of the thread, you will see what the DrainZit hose looks like new.

I am going to hold onto the old TAV. I am eyeballing another minibike.


Thanks!
Seth K. Pyle
 

MikeBear

Active Member
#52
The steelplate holds quite well. The only "weak spot" is the fact there are no flanges on the bearing support tube. So, you'd be wise to strengthen that area. Even so, mine held up to an Tecumseh 6 hp motor, (mounted on a Ken-Bar MB-6 minibike, which is quite large at 175lbs!) and an 8 year old kid ragging on it for 4-5 years (until he outgrew it). I then took it on a 20+ mile ride out in the state land, and hung up the bike on a small tree stump. It threw the chain and jammed it hard, and flexed the bearing support tube. I took it to a place where they tig-welded around it, and it's been good as new ever since.

If that wouldn't have held up, I would have bought one of these plates myself and transferred everything over to it.

p.s. It's only rated for like 7-8hp or so. If you build up that motor to a far higher horsepower, you'll have problems. Then again, you'd have problems even with the cast plate TAV with high HP.
 
Last edited:
#53
Sweet, MikeBear. Thanks!

I am going to order a plate.

As for more power, (this is going to kill me to say) I think I went too far. On my Dirt Bug, 8hp with a yellow sprung TAV and Snow-Hog tires across semi-rough ground might be a bit much...

Seth K. Pyle
 
#54
The Motovox front end is a no brainer if funds allow , it'll also add some needed weight to the front of the bike , also with a hopped up motor gear the rear sprocket down ! If you built this to ride you gotta put some rear suspension too .
 
#55
Thanks chipper!
The motovox hydraulic front end is a go. $145 plus shipping for everything I will need. I will be ordering it later this week.

I don't really see any kind of rear suspension happening. That goes beyond the scope of what I am doing.

Different rear sprocket...now that is something I had not thought of.
Thanks!

Seth K. Pyle
 
#58
Yep, front forks, front axle bolt, handle bars, and risers.
$145
I am not going to complain.

Seth K. Pyle

I really dig your bike!
However, my fab-fu is not very good, so that's not going to happen.

Thanks!
 
Top