So... yesterday I finished my very first motor build.... and i'd like to say a quick thank you to all of you guys on here who have helped me through it. Even if you didn't know it, because truly, reading through everything in this forum got me through the whole thing. Especially MoeTrout, who took extra time to help me figure my stuff out, and listen to me complain along the way as well. haha. I am new to engine building. When I say "new", I mean NEW. I've replaced a spark plug in an old dirtbike I had, and i've cleaned 2 carburators on my actual motorcycles, but I have NEVER cracked an engine open.... and going into this, I honestly wasn't even sure exactly where the valve springs were. (hurts to admit, but it's true). And after 3 weeks, I now have the following completed.... using ONLY this forum and it's awesome people who belong to it and Youtube.
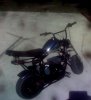
(This motor is in a Monster Moto 80, which I never ran. I bought it new and immediately took the engine out before I even put oil in it.)
Predator 363 (Yes, it's a Harbor Freight Predator 212cc Hemi, but 212 Hemi sounds wierd and using the last 3 digits of the part number just sounds cooler.)
ARC Billet Flywheel
ARC Billet Connecting Rod
CS Grind Clone Core Camshaft
18LB valve springs
NR Racing Header
NR Racing Air Intake
.36 Jet and Trick Emulsion Tube
Custom throttle assembly made by me.
Custom Engine Mounts made by me.
Now, I went into this build thinking I was FOR SURE going to wreck the thing due to my lack of experience. So, I wanted to take the time to write out this little message that I wish someone had written before I started my build so I could have anticipated details more. So, here are a few tips for the boneheads like me:
1) When you lash the valves, you need a 9mm wrench. If you are like me, and you bought the basic metric wrench set from Harbor Freight.... it does not come with this size. It jumps from 8mm to 10mm. As far as I know, this is the only nut on the Predator 363 that requires this size wrench, but it will be handy to have.
2) When lashing your valves, be absolutely certain you are at top dead center with your piston. There is lots of info on how to do that, but take your time to make sure, or else you WILL be taking your valve cover off again to re-lash.
3) Buy a new side gasket before you even bother removing the side cover to do any internal work. Better yet, order a gasket SET. I was as delicate as possible with mine, and I had never run it beforehand, and it STILL tore. Might as well have one on hand since they only cost like 4 bucks.
4) DO NOT buy Harbor Freight socket Sets and then use them with a torque wrench. My 10mm socket bent itself out while I was torquing down my side cover. Now it slides off any nut it is placed on. Whereas, the Craftsman socket I used on my connecting rod, at 54 lbs, performed flawlessly. If you're on a budget, just get a 10mm, 8mm, and 13mm QUALITY socket (and remember, the ARC Rod needs a 12pt imperial socket, I think it was a 3/8 but i'm too lazy to pull out my entire tool box).
5) Get a set of feeler guages before you start the build.
6) If you install a camshaft, you HAVE to re-lash your valves, even if you installed valve springs earlier and lashed them at the time. I didn't do this, and when I went to start it I couldn't pull the cord even. I took off the valve cover and found out that my push rod on the left side wasn't even in contact with the rocker anymore so the valve wasn't opening.
7) Harbor Freight 3/8" drive FOOT LB torque wrenches BARELY work. Mine didn't work at all, so I googled it, and it was a common problem in that specific drive size. The 1/2 and 1/4" apparently work great. The INCH LB's one I also bought, which was a 1/4" drive, worked great.
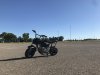
8) Ride your mini-bike before you get all Ricky Bobby and just "wanna go fast". I am a long time "Rain/Shine" motorcycle rider, and i'm telling you right now.... this mini-bike at 30-35mph is 10 times scarier than my REAL motorcycle at 100+ mph. You feel EVERY tiny movement, and it is unstable due to having no suspension. If i'm being honest, I think if I had known all this, I would have saved myself some cash, and just removed the governor, and added some bits to make it safer to remove said governor, and that's it. I haven't even topped mine out yet and i'm still using the stock sprocket.
9) If you use a throttle link setup similiar to what Red Beard uses on RedBeardsGarage (youtube), then the throttle will not physically move as much as when it was stock. This is normal. I also added a bunch of electrical tape around it (on the throttle arm side), so that it would have no extra play in the throttle, and that worked great.
10) Lastly, and most importantly. Get EVERYTHING YOU NEED.... valve grinding compound, tools, sockets, gaskets, oil, grease... EVERYTHING... so that you don't have to leave everything unfinished while you go track down what you need. I did this several times.... and I now have 2 screws and 2 washers... where I have absolutely nooooooo idea where the hell they came from. haha... don't be like me, and have patience before you begin.
Info that is Monster Moto Specific:
1) The brakes were not meant for the job. Do not think you can stop on a dime with this things like you can on an actual motorcycle because it's just not in the cards for this underwhelming braking system.
2) In videos you watch on youtube, some guys cut the front oil drain plug and the motor fits. Well... I have done my fair share of metal fabrication in the past (Welders Assistant for a year), and the size of this frame must fluctuate or something because that 100% is NOT the case for me. I had to install 1" tall engine mounts I made to get mine to fit, and the Air Intake is still SO close to the rear support on the frame that I had to cut a notch in the actual pod filter and TAPE it on with electrical tape (literally not even room for the metal C clamp to fit. I'm not sure if this is the case for all systems like this, or just the NR Racing one like I have, but.... be prepared for that.
3) This bike is NOT the wheelie machine that youtube would have you believe. If you've ever ridden a dirt bike, and know enough to sit forward on the seat when you take off instead of lounging like most of the folks in the videos, then you will be 100% fine. At least in the case of a 13t CLUTCH like I am using. You literally pretty much have to just gun the thing from a dead stop in order to make it flip.
Welp, that's all. I just wanted to save some folks some headaches and making the same mistakes I did. The final thing i've learned from this whole experience is that this hobby puts a giant smile on your face no matter what age you are. I'm 34 and feel like a little kid when I ride this thing. Her name is now Shelby, and I love her. Trying to start a mini-bike racing group in Michigan now. And hoping I can eventually get more folks into small engines and the endless amount of fun you can have with them... as well as learning useful things about mechanics along the way. If you're reading this, then i'm telling you now, you're gonna have a lot of fun.
First Start
[video=youtube;A_jZapWOu5s]https://www.youtube.com/watch?v=A_jZapWOu5s[/video]
Sound of the Motor w/ the above modifications done
[video=youtube;mmDF1VmqCbc]https://www.youtube.com/watch?v=mmDF1VmqCbc[/video]
(This motor is in a Monster Moto 80, which I never ran. I bought it new and immediately took the engine out before I even put oil in it.)
Predator 363 (Yes, it's a Harbor Freight Predator 212cc Hemi, but 212 Hemi sounds wierd and using the last 3 digits of the part number just sounds cooler.)
ARC Billet Flywheel
ARC Billet Connecting Rod
CS Grind Clone Core Camshaft
18LB valve springs
NR Racing Header
NR Racing Air Intake
.36 Jet and Trick Emulsion Tube
Custom throttle assembly made by me.
Custom Engine Mounts made by me.
Now, I went into this build thinking I was FOR SURE going to wreck the thing due to my lack of experience. So, I wanted to take the time to write out this little message that I wish someone had written before I started my build so I could have anticipated details more. So, here are a few tips for the boneheads like me:
1) When you lash the valves, you need a 9mm wrench. If you are like me, and you bought the basic metric wrench set from Harbor Freight.... it does not come with this size. It jumps from 8mm to 10mm. As far as I know, this is the only nut on the Predator 363 that requires this size wrench, but it will be handy to have.
2) When lashing your valves, be absolutely certain you are at top dead center with your piston. There is lots of info on how to do that, but take your time to make sure, or else you WILL be taking your valve cover off again to re-lash.
3) Buy a new side gasket before you even bother removing the side cover to do any internal work. Better yet, order a gasket SET. I was as delicate as possible with mine, and I had never run it beforehand, and it STILL tore. Might as well have one on hand since they only cost like 4 bucks.
4) DO NOT buy Harbor Freight socket Sets and then use them with a torque wrench. My 10mm socket bent itself out while I was torquing down my side cover. Now it slides off any nut it is placed on. Whereas, the Craftsman socket I used on my connecting rod, at 54 lbs, performed flawlessly. If you're on a budget, just get a 10mm, 8mm, and 13mm QUALITY socket (and remember, the ARC Rod needs a 12pt imperial socket, I think it was a 3/8 but i'm too lazy to pull out my entire tool box).
5) Get a set of feeler guages before you start the build.
6) If you install a camshaft, you HAVE to re-lash your valves, even if you installed valve springs earlier and lashed them at the time. I didn't do this, and when I went to start it I couldn't pull the cord even. I took off the valve cover and found out that my push rod on the left side wasn't even in contact with the rocker anymore so the valve wasn't opening.
7) Harbor Freight 3/8" drive FOOT LB torque wrenches BARELY work. Mine didn't work at all, so I googled it, and it was a common problem in that specific drive size. The 1/2 and 1/4" apparently work great. The INCH LB's one I also bought, which was a 1/4" drive, worked great.
8) Ride your mini-bike before you get all Ricky Bobby and just "wanna go fast". I am a long time "Rain/Shine" motorcycle rider, and i'm telling you right now.... this mini-bike at 30-35mph is 10 times scarier than my REAL motorcycle at 100+ mph. You feel EVERY tiny movement, and it is unstable due to having no suspension. If i'm being honest, I think if I had known all this, I would have saved myself some cash, and just removed the governor, and added some bits to make it safer to remove said governor, and that's it. I haven't even topped mine out yet and i'm still using the stock sprocket.
9) If you use a throttle link setup similiar to what Red Beard uses on RedBeardsGarage (youtube), then the throttle will not physically move as much as when it was stock. This is normal. I also added a bunch of electrical tape around it (on the throttle arm side), so that it would have no extra play in the throttle, and that worked great.
10) Lastly, and most importantly. Get EVERYTHING YOU NEED.... valve grinding compound, tools, sockets, gaskets, oil, grease... EVERYTHING... so that you don't have to leave everything unfinished while you go track down what you need. I did this several times.... and I now have 2 screws and 2 washers... where I have absolutely nooooooo idea where the hell they came from. haha... don't be like me, and have patience before you begin.
Info that is Monster Moto Specific:
1) The brakes were not meant for the job. Do not think you can stop on a dime with this things like you can on an actual motorcycle because it's just not in the cards for this underwhelming braking system.
2) In videos you watch on youtube, some guys cut the front oil drain plug and the motor fits. Well... I have done my fair share of metal fabrication in the past (Welders Assistant for a year), and the size of this frame must fluctuate or something because that 100% is NOT the case for me. I had to install 1" tall engine mounts I made to get mine to fit, and the Air Intake is still SO close to the rear support on the frame that I had to cut a notch in the actual pod filter and TAPE it on with electrical tape (literally not even room for the metal C clamp to fit. I'm not sure if this is the case for all systems like this, or just the NR Racing one like I have, but.... be prepared for that.
3) This bike is NOT the wheelie machine that youtube would have you believe. If you've ever ridden a dirt bike, and know enough to sit forward on the seat when you take off instead of lounging like most of the folks in the videos, then you will be 100% fine. At least in the case of a 13t CLUTCH like I am using. You literally pretty much have to just gun the thing from a dead stop in order to make it flip.
Welp, that's all. I just wanted to save some folks some headaches and making the same mistakes I did. The final thing i've learned from this whole experience is that this hobby puts a giant smile on your face no matter what age you are. I'm 34 and feel like a little kid when I ride this thing. Her name is now Shelby, and I love her. Trying to start a mini-bike racing group in Michigan now. And hoping I can eventually get more folks into small engines and the endless amount of fun you can have with them... as well as learning useful things about mechanics along the way. If you're reading this, then i'm telling you now, you're gonna have a lot of fun.
First Start
[video=youtube;A_jZapWOu5s]https://www.youtube.com/watch?v=A_jZapWOu5s[/video]
Sound of the Motor w/ the above modifications done
[video=youtube;mmDF1VmqCbc]https://www.youtube.com/watch?v=mmDF1VmqCbc[/video]
Last edited:
")