Can't stop doodling minibikes

#1
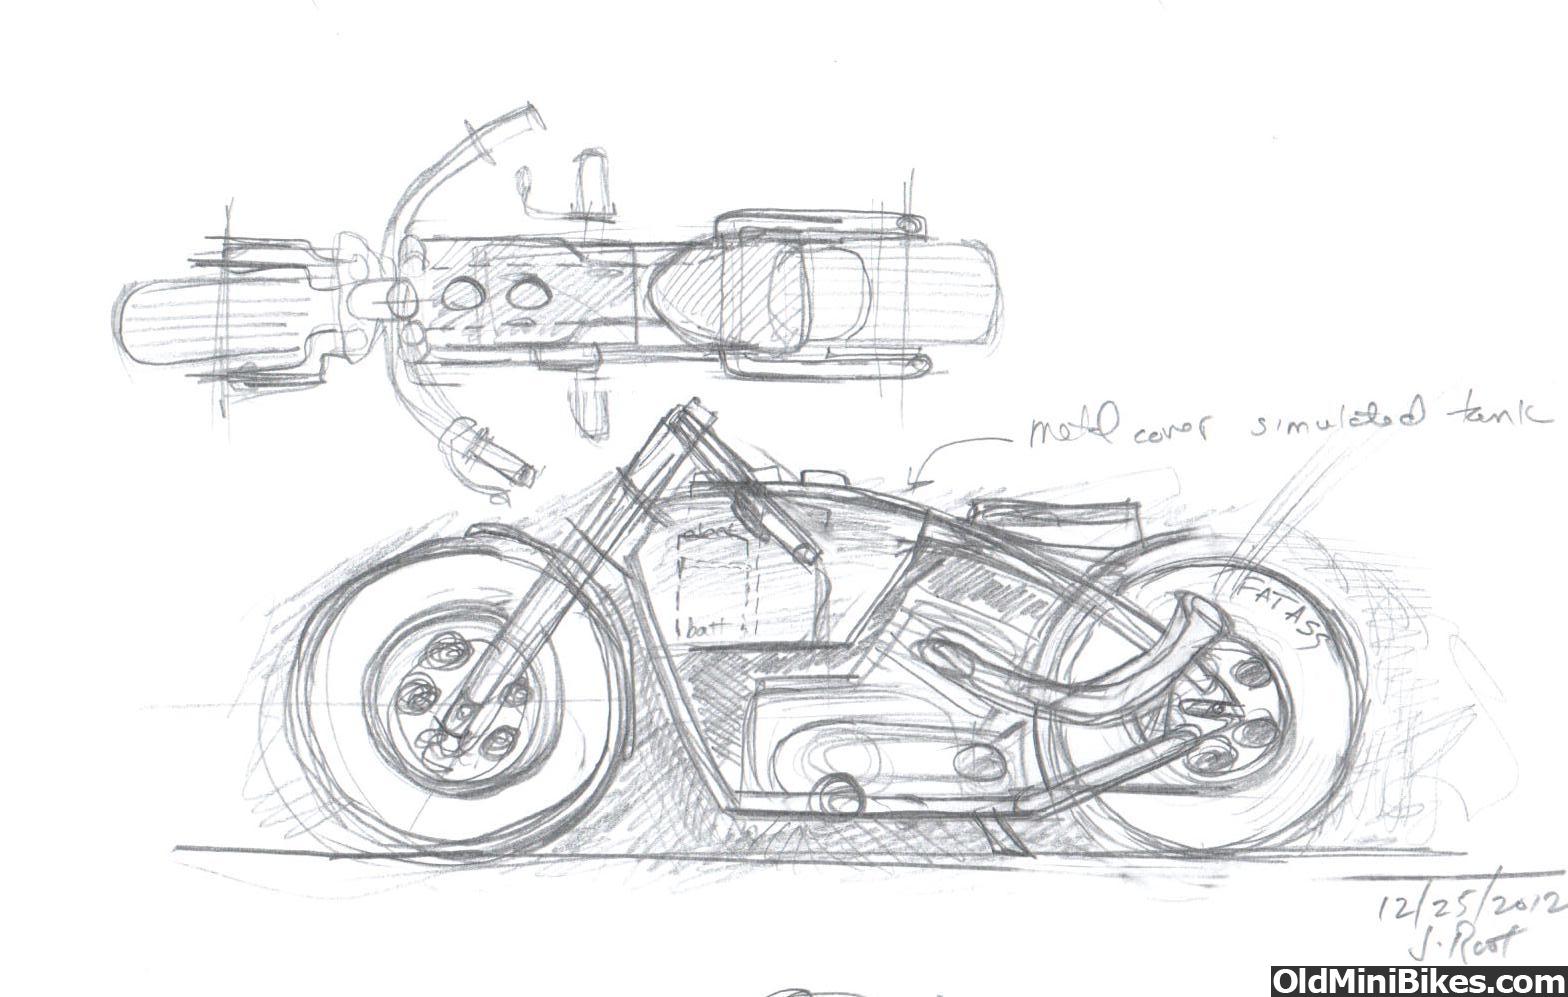
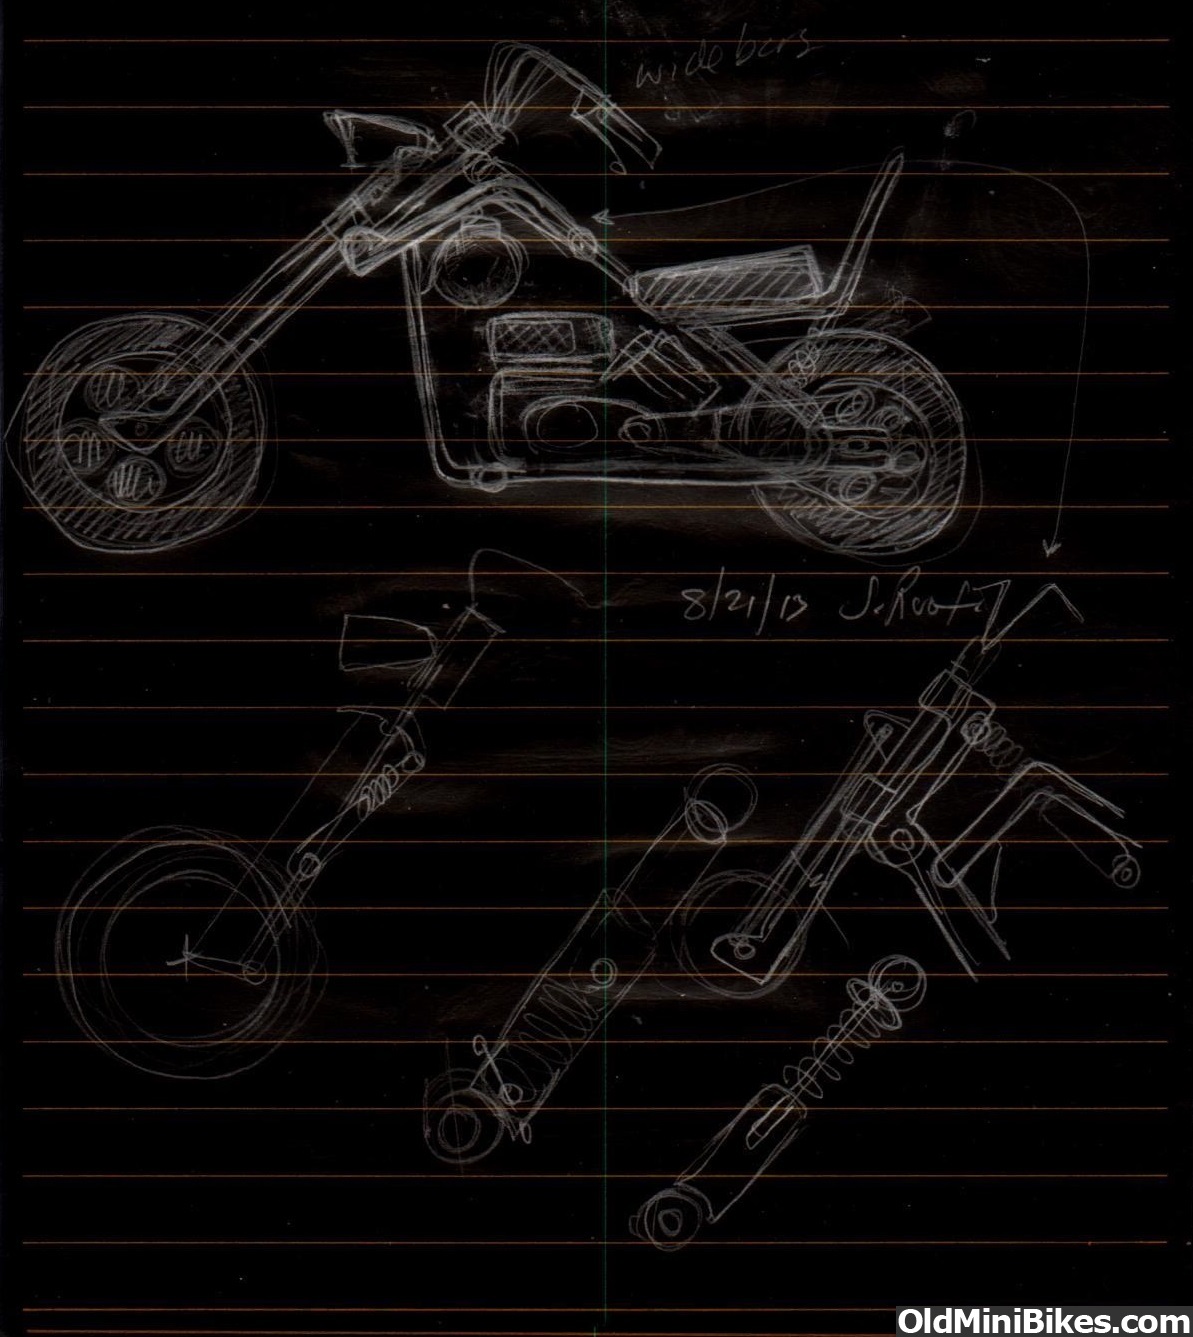
Please tell me I'm not the only one that does this. Lately (for the past several years) I have been filling notebooks and random pieces of paper with designs for minibikes. I think my doodles have evolved from 30 yrs ago drawing house plans as an architecture student to wooden boats while working at various shipyards while in the navy to now what I consider a sick obsession with minibikes. Doesn't matter where I am, at work, home on the crapper, garage, in bed, etc. If I have an idea of what I think is a good design, I draw it and continue to redraw and refine it. I found some relief during this years OldMiniBikes build off when I seen members like BigRob making a unicycle and another guy (DRBHuntnFish) building a 2 wheel driven hydrostat machine and felt a little at home. My new obsession is the style of the bonanza choppers and I really want to modernize the design for next years build off but think my budget will not allow another build for some time so I continue to doodle...:eek:ut:
 
Last edited:
#4
I draw just about everything I build, not sure why, have a hell of am imagination. Yet somehow when its on paper it just makes more sense. Must show you a design I have for a compressed air engine
 
#5
I took the day off work because I do not feel well ( having a beer now see if that helps ).

I spent the morning doing nothing.
But every few huse I go out to my work shop and have a smoke.
I sit in my chair and look at engines and bikes....
I get closer to the bike in question and look closely at it.

I have a girdle to fabricate...
And some additional block bracing as well as cooling air ducting to consider for my next engine.

I don't doodle all that much.
I trace....
Then fabricate based on a template I make.
Then I make 3 or 4 versions of a part or parts until I settle on what works the best.

Not an efficient way to make things but very few things for me ever go straight from idea to drawing and functional part.
 
#7
I draw just about everything I build, not sure why, have a hell of am imagination. Yet somehow when its on paper it just makes more sense. Must show you a design I have for a compressed air engine
Dan, I started dating my designs somewhere around 2007 to show how my stuff evolves. A lot of things I drew as a youngster before a technical education were not practical while others because I wasnt exposed to the dogma of engineering rules, became quite unique. I too have messed around with compression engines and some others have even built their own versions but the thing that usually makes them a bust design is that it takes more energy to create the compression that what you get out. Plus after being a firefighter and wearing 4500 psi scottpaks, they only supplied 30-45 minutes of breathable air so you would need a really large tank to make some energy on an engine.

I took the day off work because I do not feel well ( having a beer now see if that helps ).

I spent the morning doing nothing.
But every few huse I go out to my work shop and have a smoke.
I sit in my chair and look at engines and bikes....
I get closer to the bike in question and look closely at it.

I have a girdle to fabricate...
And some additional block bracing as well as cooling air ducting to consider for my next engine.

I don't doodle all that much.
I trace....
Then fabricate based on a template I make.
Then I make 3 or 4 versions of a part or parts until I settle on what works the best.

Not an efficient way to make things but very few things for me ever go straight from idea to drawing and functional part.
That's probably more practical than just drawing while my high school shop teacher would have a fit and say I was just creating waste without a proper design. My argument for building without a plan is that why waste time with plans if I always deviate from them. Once I start building, something gets cut wrong or doesnt come out like it did on paper and I change anyway. I like to just draw now to get an idea of what I am about to do and my proportions are usually spot on to be accurate enough for a scaled drawing.


When I get back home tonight, I will post a pic of my new(est) chopper design. Maybe someone else will think it's cool and want to build one too. After all, the competition is what drives me.
 
#8
Posting a couple pictures of my "best of" designs. One is a bobber style with larger 20" trailer wheels and custom rims which has been posted on here before and the other is my most recent proposal for my upcoming OldMiniBikes-14 build (if there is still an open build class). The new chopper design is borrowed from a bonanza minichopper but I have added a modern twist to the proportions and style. The triangulated frame is a 3/4/5 unit proportioned with the seat mounted at the midpoint of the hypotenuse. The triple trees are cantilevered from the downtube which allows a spring/shock between the upper rails and strengthens the long front fork. I'm not sure if its ever been done before like that or if it will even work that way but the angle of force is exactly the same as if the springs were mounted directly in the front fork tubes. As a chopper with such a long rake, the springs in that traditional location wouldn't work well, which Is why I relocated them to the neck. The seat is also sprung mounted and slightly inclined to produce a forward riding angle. I would like to make the gas tank in the form of a cannon ball but that's a different issue itself. Let me know what you think, thanks.

 
#9
My buddy draws plans and diagrams all the time for the things he makes. I was digging through some old papers the other day and found this drawing from about 25 years ago when he built a rear brake pedal for my flat track motorcycle. This moved the brake pedal from the left side of the bike to the right side. I like that the notepad was from a car dealer that sold AMCs and Renaults. :thumbsup:

 
#10
Here's a template I am making right now.


I have been living dangerously for too long on this engine so its time to start making the girdles and put them on.

Block flex is an issue....
My side cover bolts are coming loose and its simply a matter of time before something bad happens.

That and every time I ride it I get a little braver and hold the throttle open a little longer.
At some point the block will split unless I get some bracing in there.

Now for the side cover I have a different trick....
I have lots of side covers, so I just stick my finger in a bottle of #2 graphite and rub the bolt holes.
Then I cut the template and match the case PTO holes with the right hand bolt and unused exhaust bracket bolt on the head.

The top plate will be aluminum and I think I will make the side cover brace out of steel.
Not sure I'll have to see how much material I have to scavenge.

This is a good time to mention how important it is to brace a clone block if you know the power level is approaching 15 Hp or more.

They just go BOOM no warning.....
 
#11
NOS, you have some pretty interesting threads in this forum. With those type of fabrication skills, wondering why you don't post more in the project logs section. I'd like to see more of this one you're working on and how the driven clutch is mounted on this frame so close to the engine.

I am still working on my chopper suspension/ fork design. I woke up sometime around 3am this morning with an idea of how to make it so the entire handle bar doesn't move when the suspension is cycling. I need to clean up the drawing and post it later but in the meantime need to grab some toothpicks or something to pry my eyelids open while I'm working attempting to stay awake.
 
#13
This still kinda follows the thread.

Many doodles and a couple of templates later I have started to fabricate the parts I have been meaning to make.
Here's brace to provide some stiffness and block support.

Now onto the top plate....

 
#14
Good deal. Be a neat idea to share ideas and designs on this thread. Posting a drawing I whipped up in order to come up with an A-arm for my quad project that I could build using scrap bits of 3/4 pipe. Found some Bronze bushings that slip inside the pipe but needed to epoxy a piece of canvas to the inside of the pipe in order to create a snug fit.
 
Last edited:
Top