Dr. Shop Teacher's JFF Gilson Knight Rider
- Thread starter Dr. Shop Teacher
- Start date

Hey Pete the hub looks great . But I gotta ask , it looks like side end of the hub will be pressed against the side of the fork and if tightened down will put pressure against the hub and not turn properly. Shouldn’t there have been a bearing in the end of that hub and a spacer between it and the fork ???
It’s a cool piece but just doesn’t look like it will work well . JMO
It’s a cool piece but just doesn’t look like it will work well . JMO
Can you please explain how you produced the cad drawing and had teamxi cnc it?
I searched ebay for teamxi but didn't see anything about them making parts.
I would like to do something similar in the future but didn't know how to go about it.
Thanks
Danford1
I searched ebay for teamxi but didn't see anything about them making parts.
I would like to do something similar in the future but didn't know how to go about it.
Thanks
Danford1
I used Delta CAD to prepare the drawing of the hub. It's a simple CAD program. The vendor actually used the jpeg I sent him to pull the measurements for the machining. My guess is the parts were not done CNC given the line variations of the turning. All of my prep work was through pattern making, test fitting and adjusting. Hope that helps.
One more pattern: Battery Box Cover
I did up a pattern this morning for a battery box cover. This is simple "Recipe Box" design and I added extra dimension to keep the cover away from battery terminals and cables. On the left, you can see the phantom lines showing the side angle of the box and this gives you an idea of how much I added to the cover.
I did up a pattern this morning for a battery box cover. This is simple "Recipe Box" design and I added extra dimension to keep the cover away from battery terminals and cables. On the left, you can see the phantom lines showing the side angle of the box and this gives you an idea of how much I added to the cover.
Clutch Guard Bracket
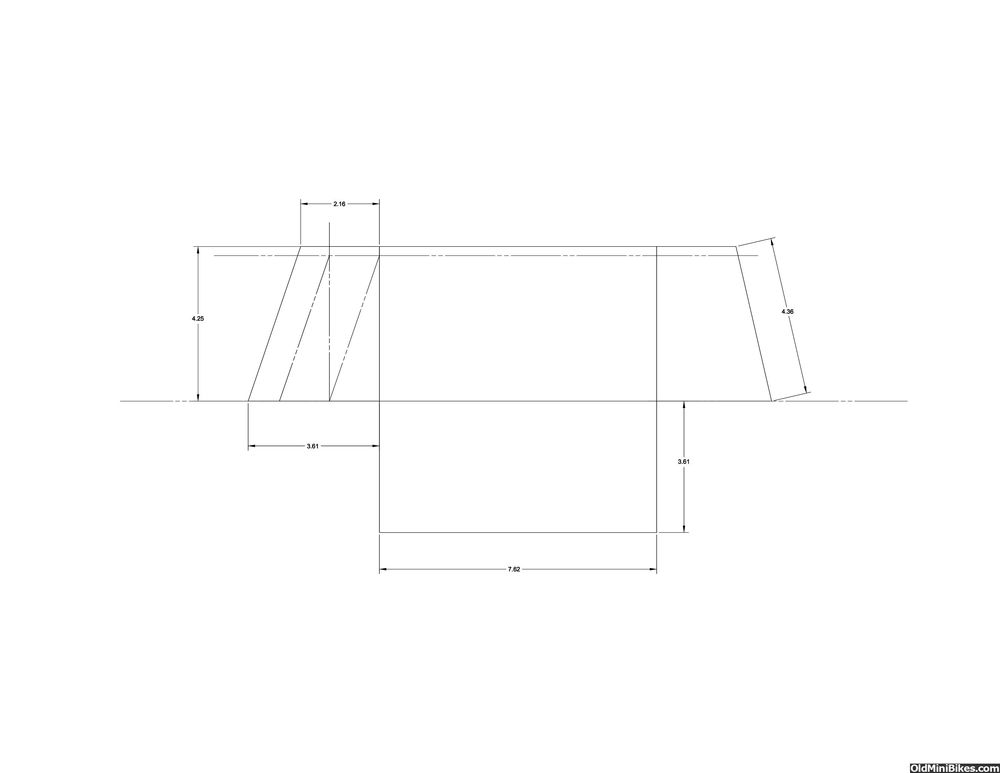
Spent the day making the clutch guard bracket. It's patterned after an original but does not have the tabs and is wider to support the 1/8" aluminum sheet that will be the clutch guard. I traced the design from the original:

Transferred to 1/8" steel plate and added length and width to it:

Then cut with the sawzall and ground to shape:
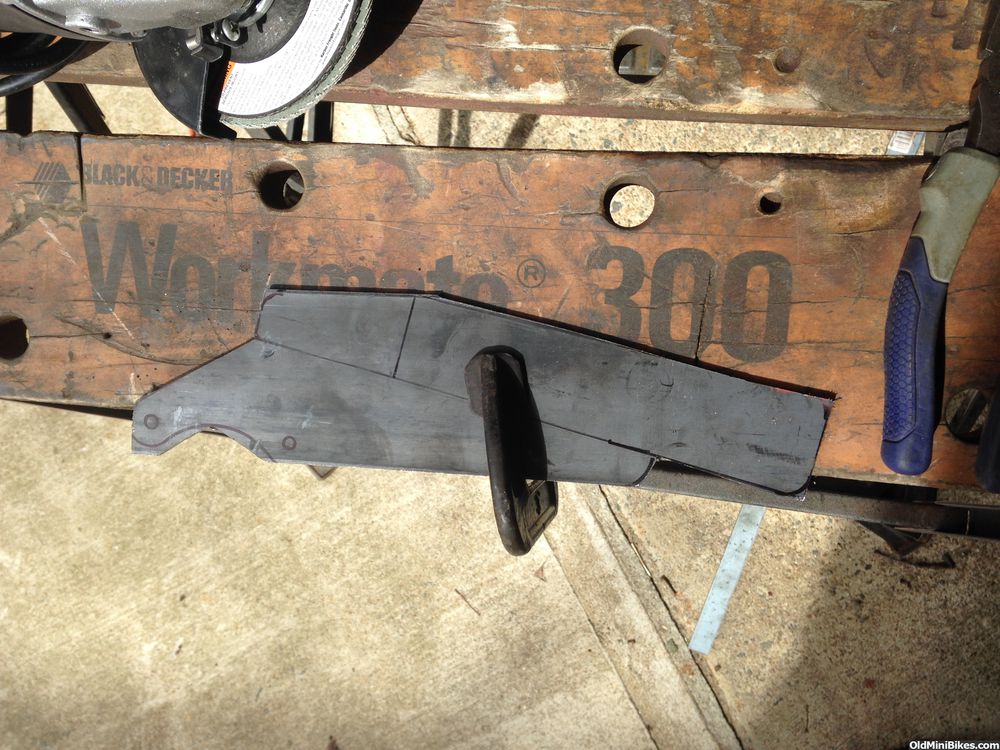


Then I drilled the holes for the mounts and where I would cut slots to bend the bracket:
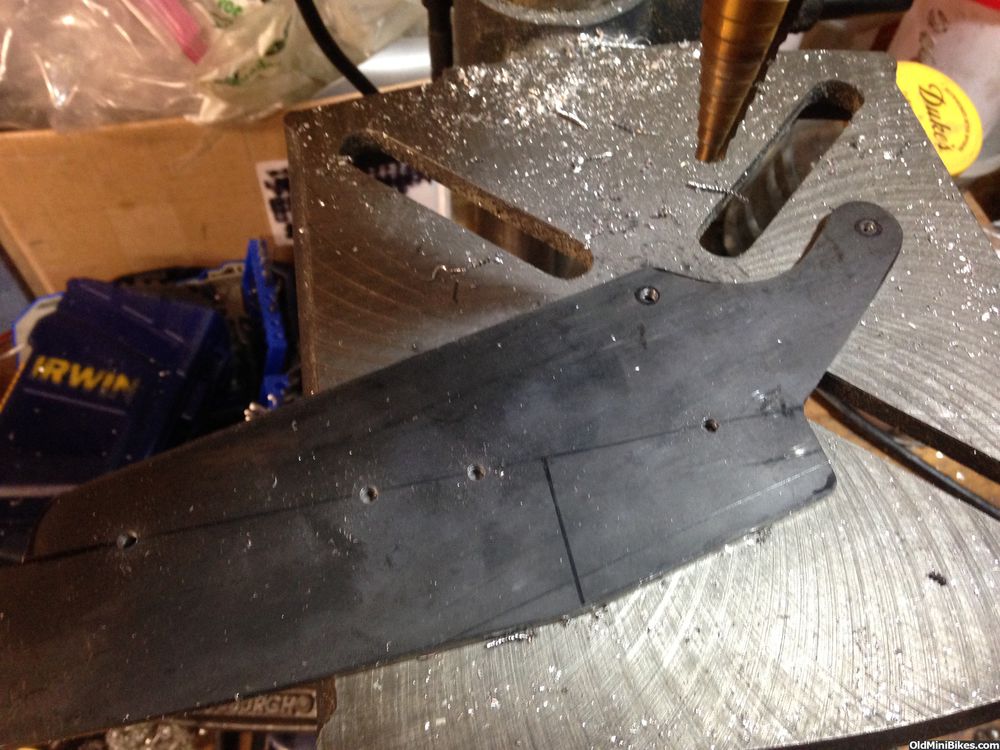
Ready to cut slots, first with a sabre saw and then the sawzall:

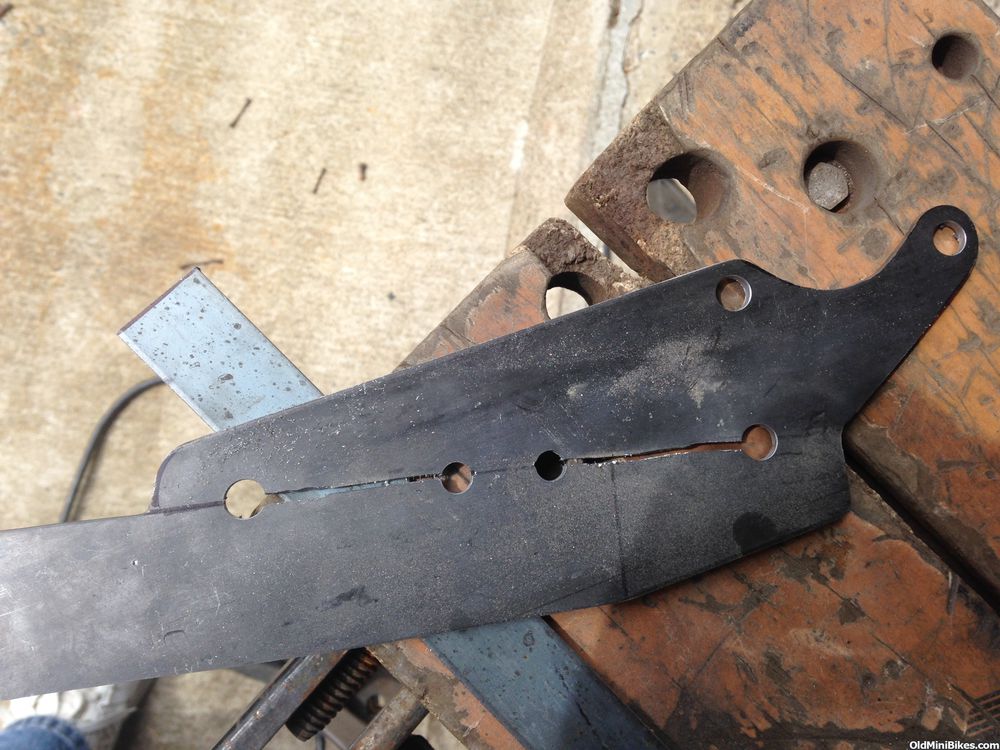
Then I heated the bracket and bent at the tabs to size. Following that, I filled the slots with braze (my tank was getting low and I had a heck of a time with heat).

Inside (block side) view:
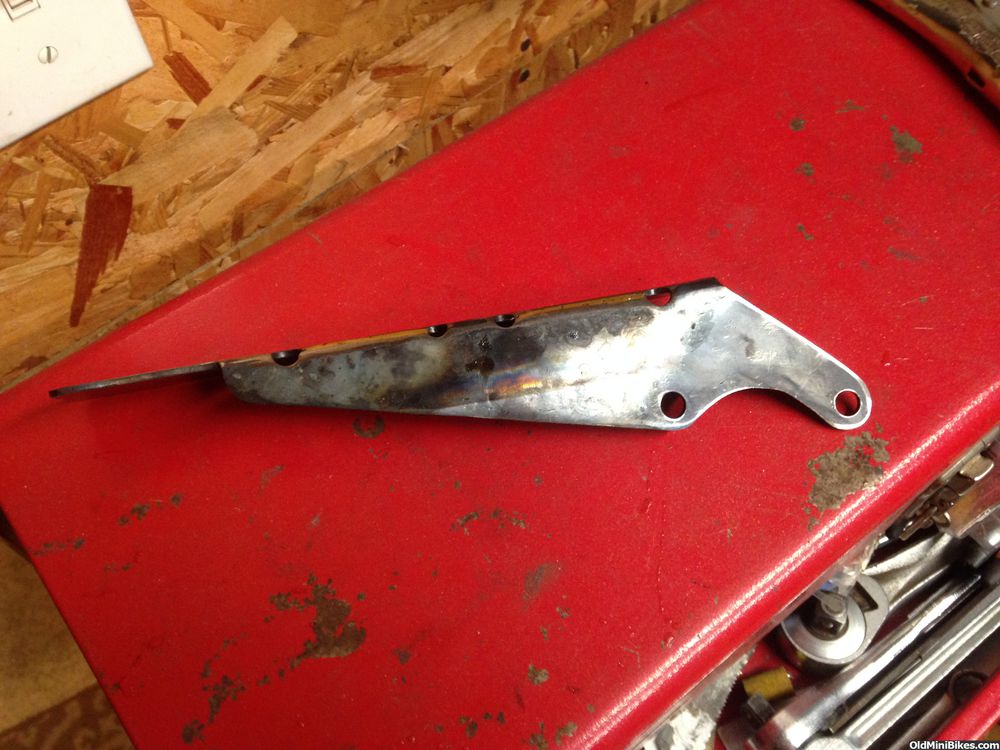
Outside (clutch side) view and still need to get the rest of the flux off.

Polishing is next for all the aluminum parts....
Spent the day making the clutch guard bracket. It's patterned after an original but does not have the tabs and is wider to support the 1/8" aluminum sheet that will be the clutch guard. I traced the design from the original:
Transferred to 1/8" steel plate and added length and width to it:
Then cut with the sawzall and ground to shape:
Then I drilled the holes for the mounts and where I would cut slots to bend the bracket:
Ready to cut slots, first with a sabre saw and then the sawzall:
Then I heated the bracket and bent at the tabs to size. Following that, I filled the slots with braze (my tank was getting low and I had a heck of a time with heat).
Inside (block side) view:
Outside (clutch side) view and still need to get the rest of the flux off.
Polishing is next for all the aluminum parts....
Waiting...and polishing...
Frame is at the powder coater, final batch of parts from OldMiniBikes on their way, so sanded (and sanded and sanded) headlight brackets and rear caliper mount. I went to 2300 wet on the pieces and am half way through the tank. Below represents a full day:
Polished on the top (wacky pics again--should be to the right)--

Caliper mount--

Frame is at the powder coater, final batch of parts from OldMiniBikes on their way, so sanded (and sanded and sanded) headlight brackets and rear caliper mount. I went to 2300 wet on the pieces and am half way through the tank. Below represents a full day:
Polished on the top (wacky pics again--should be to the right)--
Caliper mount--
More polishing--Fuel Tank
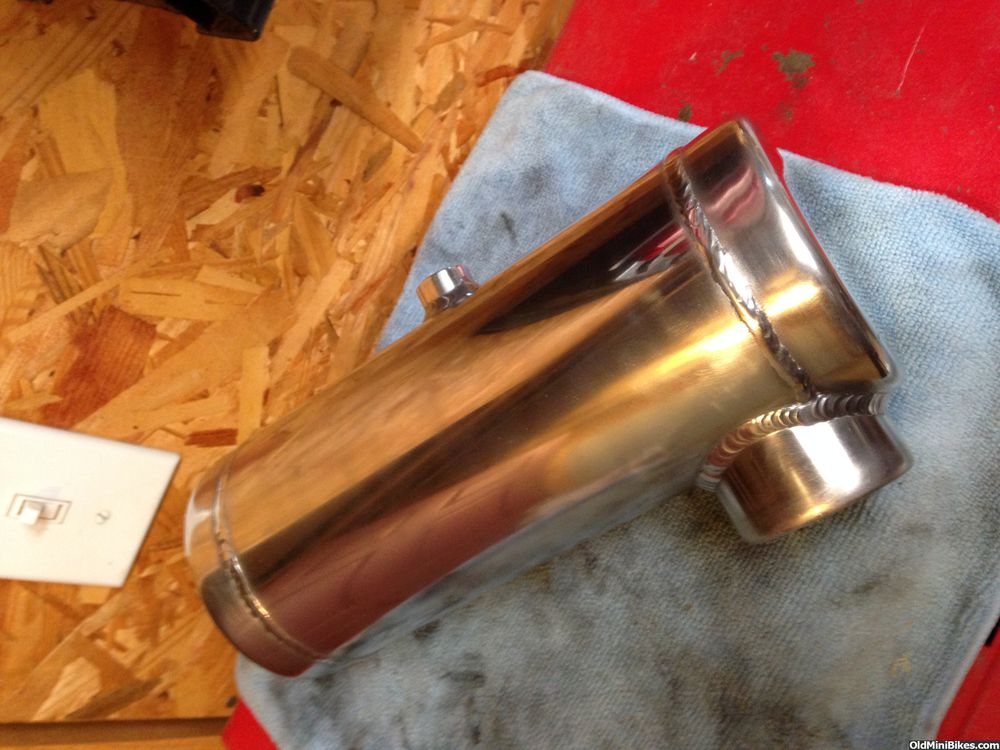
The BAM manufacturing tank is 0.063 wall aluminum and this meant I had to be really careful. I knocked it down lightly with 150 grit paper in the palm sander and then started with 180 wet up to 2500 wet. There are some places where I would have had to sand way too much to get the lines out of the aluminum especially around the welds, so it's not as perfect as I'd like.
Still needs more buffing, but is pretty close.
After 220--

After buffing--
The BAM manufacturing tank is 0.063 wall aluminum and this meant I had to be really careful. I knocked it down lightly with 150 grit paper in the palm sander and then started with 180 wet up to 2500 wet. There are some places where I would have had to sand way too much to get the lines out of the aluminum especially around the welds, so it's not as perfect as I'd like.
Still needs more buffing, but is pretty close.
After 220--
After buffing--
It takes a village to build a bike....Testing the Brake Set-up
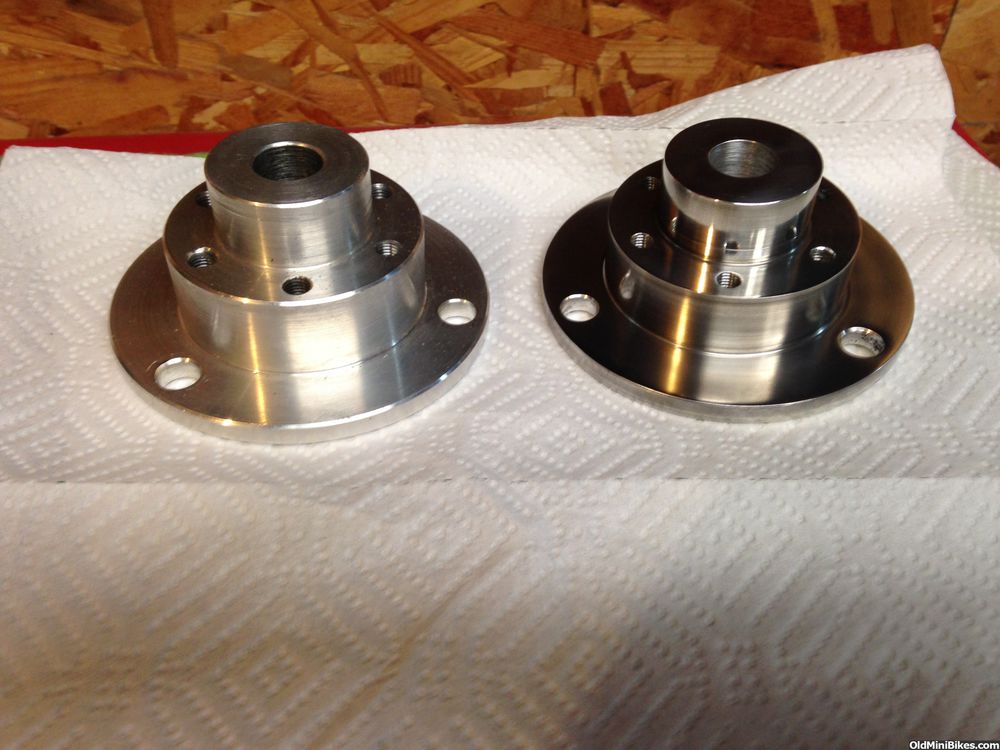
Part of getting the disc hubs machined for the bike included a pair of hubs for [MENTION=46062]chipper[/MENTION]. Angelo alerted me to an issue with the rear hub and it turns out "measuring twice and cutting once" doesn't always work :doah:--my initial width measures were correct and the produced part was 0.26" too wide for the swing arm. Angelo had his machined to remove 0.26" from just the smaller diameter to properly space his hydraulic caliper and I needed to pull the same from both the smaller and larger (disc flange) for the mechanical caliper. The difference is shown below--

At the same time, Angelo and [MENTION=26262]David wulf[/MENTION] were discussing heat build up between the caliper bracket and the hub. Angelo was persistent--and we ended up adding a thrust bearing between the bracket and hub.
To test all of these changes, I used Copperhead which has been the mule for all of the things I've tried on Gilson bikes. Clearance to the swing arm is tight even with the hub stepped off the swing arm. Below shows the factory screws mounting the caliper and these were going to interfere with the swing arm:
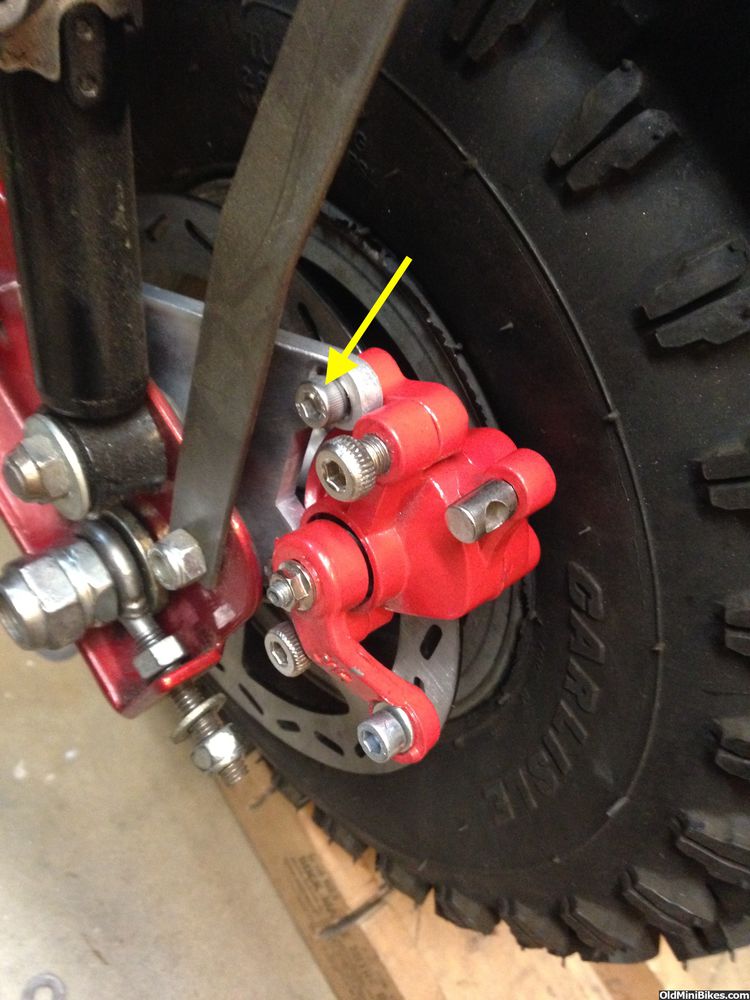
The solution was to use cap screws both for the caliper mount and the lower fender brace.

Figuring out how to properly adjust the cable was a treat, but I got that done. I need to change the way the cable is secured, though.

And, the $10,000 question is why I didn't go hydraulic. If I could have sourced 1" brake handles with reservoirs, I probably would have gone that way. However, when I took Copperhead out for a test ride, the bike stopped really well and would lock up without a lot of effort. Additionally, the TAV serves to brake the bike once the throttle is released.
Special thanks to Angelo and David for being persistent and helping out on this one!
Part of getting the disc hubs machined for the bike included a pair of hubs for [MENTION=46062]chipper[/MENTION]. Angelo alerted me to an issue with the rear hub and it turns out "measuring twice and cutting once" doesn't always work :doah:--my initial width measures were correct and the produced part was 0.26" too wide for the swing arm. Angelo had his machined to remove 0.26" from just the smaller diameter to properly space his hydraulic caliper and I needed to pull the same from both the smaller and larger (disc flange) for the mechanical caliper. The difference is shown below--
At the same time, Angelo and [MENTION=26262]David wulf[/MENTION] were discussing heat build up between the caliper bracket and the hub. Angelo was persistent--and we ended up adding a thrust bearing between the bracket and hub.
To test all of these changes, I used Copperhead which has been the mule for all of the things I've tried on Gilson bikes. Clearance to the swing arm is tight even with the hub stepped off the swing arm. Below shows the factory screws mounting the caliper and these were going to interfere with the swing arm:
The solution was to use cap screws both for the caliper mount and the lower fender brace.
Figuring out how to properly adjust the cable was a treat, but I got that done. I need to change the way the cable is secured, though.
And, the $10,000 question is why I didn't go hydraulic. If I could have sourced 1" brake handles with reservoirs, I probably would have gone that way. However, when I took Copperhead out for a test ride, the bike stopped really well and would lock up without a lot of effort. Additionally, the TAV serves to brake the bike once the throttle is released.
Special thanks to Angelo and David for being persistent and helping out on this one!
You don't need 1" hydraulic brake handles. 7/8" brake handles and throttles fit very well on .... 7/8" bars...
You cut the 1" handlebar off and weld in some 7/8" bar just long enough to hold the brake and throttle lever.
Someone had a write up on that awhile back. I'll try searching for it.
Danford1
You cut the 1" handlebar off and weld in some 7/8" bar just long enough to hold the brake and throttle lever.
Someone had a write up on that awhile back. I'll try searching for it.
Danford1
Last edited:
You don't need 1" hydraulic brake handles. 7/8" brake handles and throttles fit very well on .... 7/8" bars...
You cut the 1" handlebar off and weld in some 7/8" bar just long enough to hold the brake and throttle lever.
Someone had a write up on that awhile back. I'll try searching for it.
Danford1
You cut the 1" handlebar off and weld in some 7/8" bar just long enough to hold the brake and throttle lever.
Someone had a write up on that awhile back. I'll try searching for it.
Danford1
Dan, three of my bikes had hacked handlebars where a 7/8" section was tacked on. To be honest, I just hate that look. With the exception of this build, all of my Gilsons can be returned to original with little effort. While I appreciate the input, I wouldn't do it just to say I have hydraulic brakes. :smile:
Necessity is the Mother of Invention....more polishing
Worked on the hubs today after crying "uncle" on taxes. The easiest and proper way to sand and polish round parts is to use a lathe. Not having one, I improvised and used the drill press instead. Since it's a half inch chuck and hub bores are 5/8" I picked up a couple of packs of 5/8"OD nylon spacers at Lowes. I put a 1/4" bolt through, tightened it down and chucked the hub. Much faster and keeps the work square. Worked my way from 150 dry to 2500 wet, and got one done in about an hour.
Wacky photos as always:

Close up about midway:
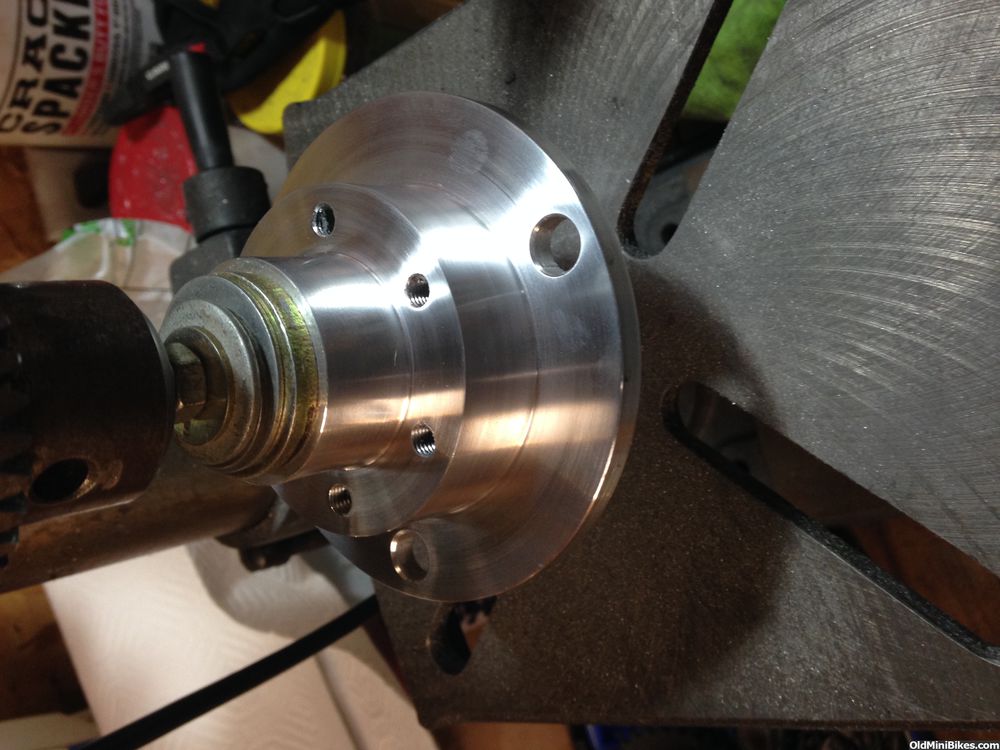
After buffing and polishing:
Worked on the hubs today after crying "uncle" on taxes. The easiest and proper way to sand and polish round parts is to use a lathe. Not having one, I improvised and used the drill press instead. Since it's a half inch chuck and hub bores are 5/8" I picked up a couple of packs of 5/8"OD nylon spacers at Lowes. I put a 1/4" bolt through, tightened it down and chucked the hub. Much faster and keeps the work square. Worked my way from 150 dry to 2500 wet, and got one done in about an hour.
Wacky photos as always:
Close up about midway:
After buffing and polishing:
You can buy 1" brakes
https://www.ebay.com/itm/1-25MM-Uni...ulic-Clutch-Lever-US-/201359313331?rmvSB=true
https://www.ebay.com/itm/1-25MM-Uni...ulic-Clutch-Lever-US-/201359313331?rmvSB=true