I have been meaning to put together a quick tutorial on how to flat lap a cylinder head since the question does get asked on occasion. Tonight I finally did just that. Some of you may remember the dumpster jewel 3hp iron bore/ball bearing Briggs I found a while back. It's been sitting on the work bench partially disassembled, so I figured what better candidate. This procedure is general in that it applies to OHV heads as well. Without further ado...
Materials:
- Wet/dry sandpaper sheets, at least 400 grit.
- Masking tape.
- Layout fluid like Dykem if you have it or a permanent marker if you don't.
- Soapy water. Light oil can be used too, but it's much messier, so I don't recommend it.
- Gloves. Okay, and safety goggles.
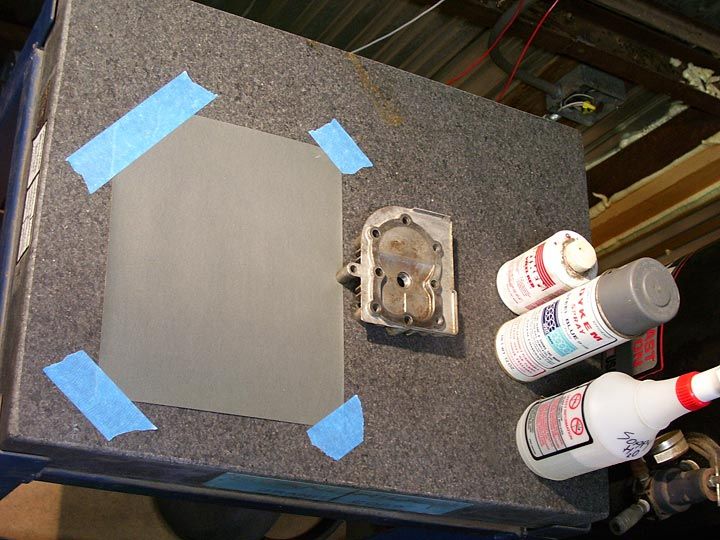
1.) You'll need a clean flat surface, the more precise the better. I have a real granite surface plate at my disposal that is flat to ±0.00006". For the purposes of this tutorial, a piece of decent window glass will suffice. I have even resorted to a polished concrete floor for quick 'n' dirty work. Tape the corners of your sandpaper down like this:
2.) Put a little soapy water on the sandpaper. This keeps the paper from loading up and makes it last a bit longer:

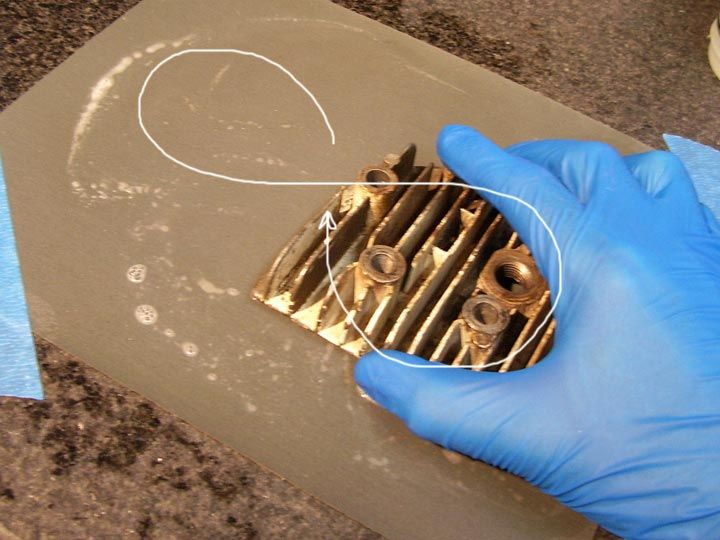
3.) Make sure the head is completely clean with no gasket residue. You can put layout fluid/marker on the gasket surface now or wait until the next step. Put the head on the wet sandpaper and make a few swipes in a figure-8 motion, NOT a circle. Keep the pressure as even across the part as you can:
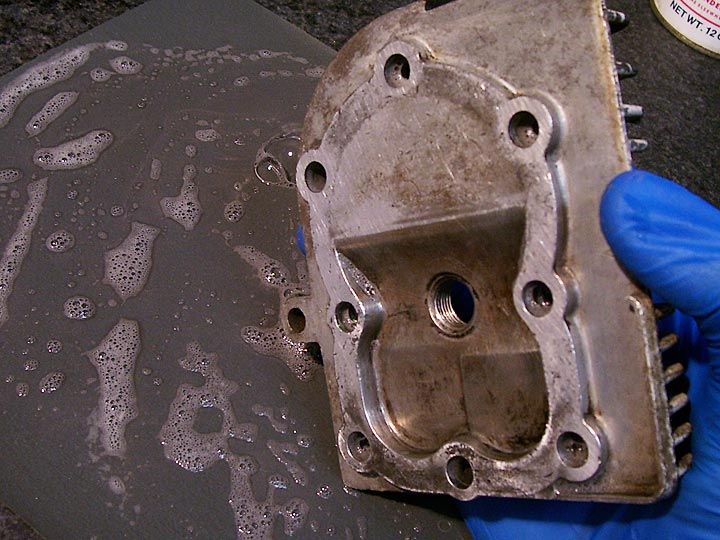
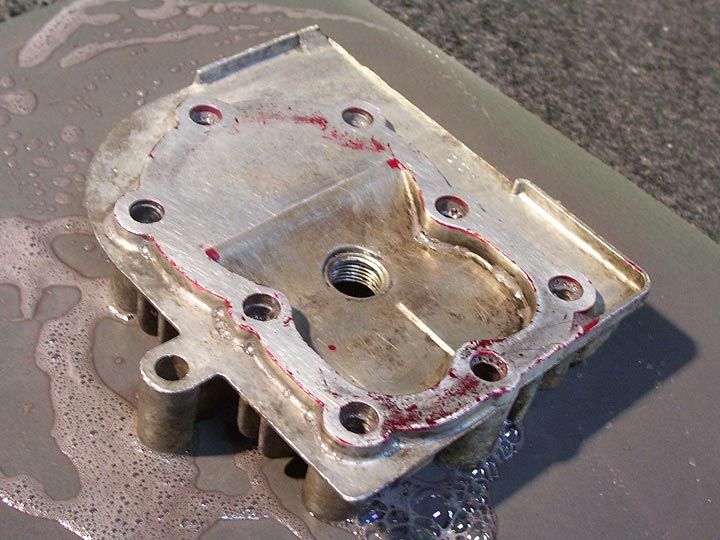
4.) Have a quick look for high and low spots. Here you can see the high spots are mostly around the head bolt holes:
Put the layout fluid/marker on there if you haven't yet:
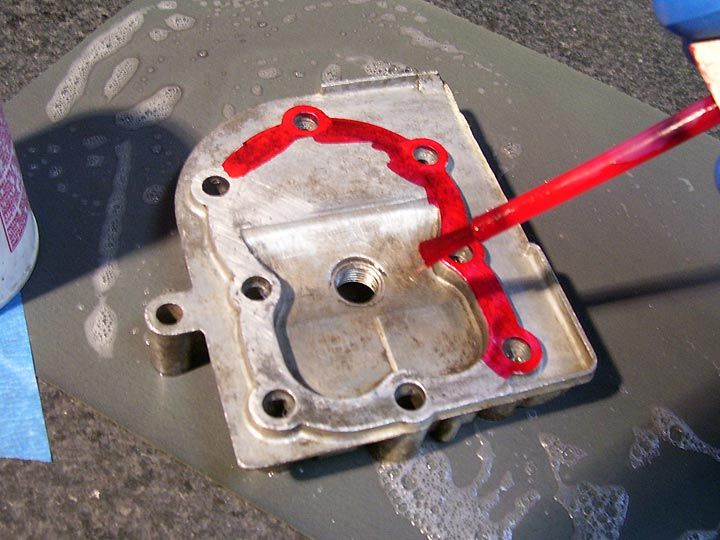
5.) Use some more elbow grease. Rotate the part occasionally as you lap it. Check progress as you go. Low spots will still have color like this:

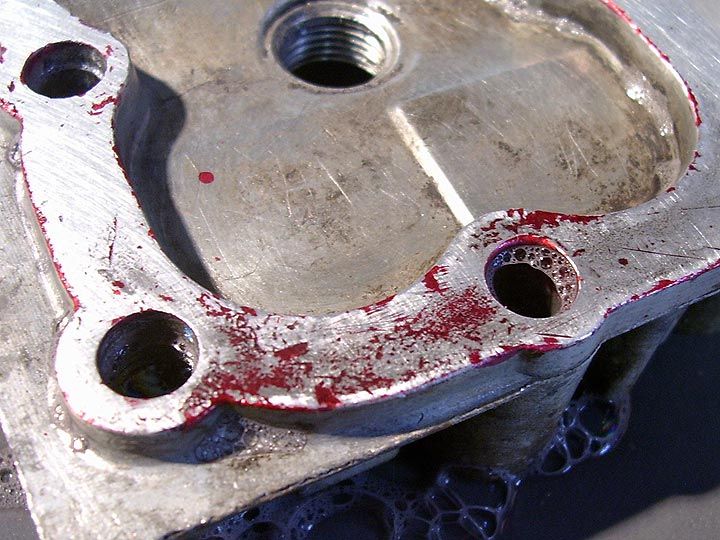
Keep lapping until you are comfortable that they are gone.
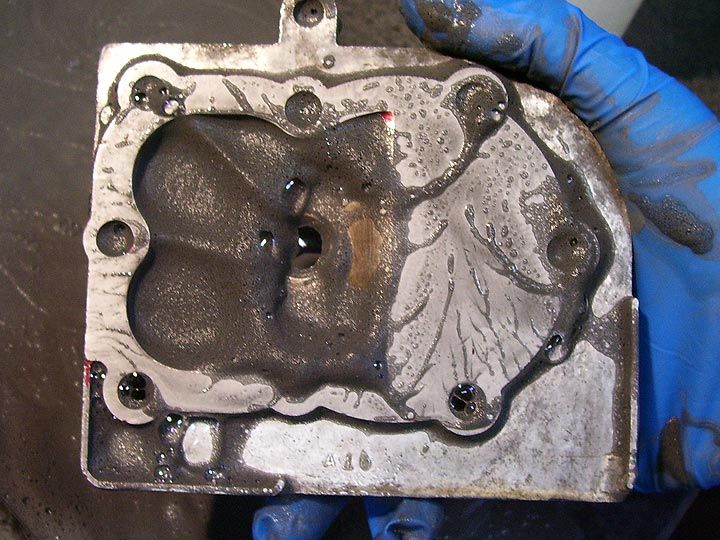
6.) Finish up with a relatively fine paper. Like I said before, 400 is probably a good minimum grit. I started with 400 and went directly to 1000. This is why I recommend using gloves:
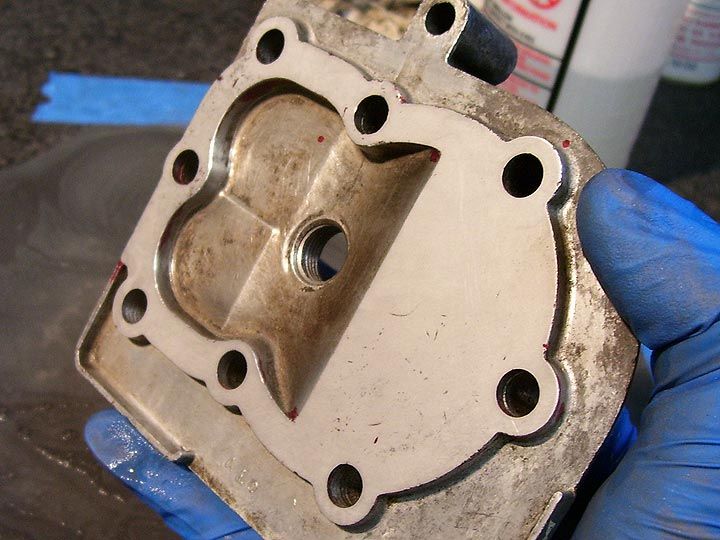
7.) This is what I ended up with. Almost all of the hills and valleys are gone and the gasket has an RA more than fit for even a copper gasket:
Materials:
- Wet/dry sandpaper sheets, at least 400 grit.
- Masking tape.
- Layout fluid like Dykem if you have it or a permanent marker if you don't.
- Soapy water. Light oil can be used too, but it's much messier, so I don't recommend it.
- Gloves. Okay, and safety goggles.
1.) You'll need a clean flat surface, the more precise the better. I have a real granite surface plate at my disposal that is flat to ±0.00006". For the purposes of this tutorial, a piece of decent window glass will suffice. I have even resorted to a polished concrete floor for quick 'n' dirty work. Tape the corners of your sandpaper down like this:

2.) Put a little soapy water on the sandpaper. This keeps the paper from loading up and makes it last a bit longer:

3.) Make sure the head is completely clean with no gasket residue. You can put layout fluid/marker on the gasket surface now or wait until the next step. Put the head on the wet sandpaper and make a few swipes in a figure-8 motion, NOT a circle. Keep the pressure as even across the part as you can:

4.) Have a quick look for high and low spots. Here you can see the high spots are mostly around the head bolt holes:

Put the layout fluid/marker on there if you haven't yet:

5.) Use some more elbow grease. Rotate the part occasionally as you lap it. Check progress as you go. Low spots will still have color like this:


Keep lapping until you are comfortable that they are gone.
6.) Finish up with a relatively fine paper. Like I said before, 400 is probably a good minimum grit. I started with 400 and went directly to 1000. This is why I recommend using gloves:

7.) This is what I ended up with. Almost all of the hills and valleys are gone and the gasket has an RA more than fit for even a copper gasket:


