New Member-Muskin Dune Cat Project

#41
Those pedals are awesome. Great job polishing and buffing. All I can say on the paint is if you use cheap paint you will ruin it quickly and it will wear quickly, but if you use expensive quality paint it will be better and look better; however, it is for your son so it could take only one ride to mess up the paint so the real question is... "is the spray paint the better option?"

I personally would choose the spray paint since it is for your son.

Keep up the good work.
 
#42
WOW,What can't you do?
Well, appearently I’m not quite the auto painter I thought I was.

Here Goes nothing!! I started late, and started outside as the day was nice and I expected less dust outside than in my dusty shop. A storm moved in and I had to move it inside.


I’m thoroughly convinced I got a bad can of Aliss Chalmer Orange spray paint. It was spitting droplets, and the paint did not seem right- I switched out to another can (always buy too much spray paint) and it laid on fine, but it was too late as I had sprayed a good portion of the cart with the first can- which we’ll see later caused me big issues.


The paint took over 4 hours to dry enough for masking- actually it hadn’t dried enough and the tape left marks in a few key spots (as seen later)


Silver laid on great- with no troubles except for lots of small specs of dirt and dog hair and the kind of stuff I knew I was going to deal without a professional paintshop. I did realize that there was one section of the silver fender wells that I had forgot to wipe down and was pretty gritty.


Heres a tip- I had made paper templates for the shark mouth sections in advance- to make sure both sides match up- I Just taped them on with masking tape, and cut them out with a scalpel blade-.


Then I masked off the rest of the cart and shot white.


Here’s another tip- I attached the paper templates to the underside of a pane of glass. I was then able to pre cut my shark teeth from masking tape and mark them making it MUCH easier than trying to eyeball them on the cart. WHAT I DIDN’T DO WELL, is to make sure that all the shark teeth where pressed down firmly all around their edges, and I got lots of teeth that did not have crisp sharp paint lines (as seen later).


Shot red..


Removed masking, the best it ever looked as when it really went bad is after I started shooting clear coat. Already I revealed that my masking tape had scared the orange in several spots, my teeth were fuzzy in spots, and there were lots of dirt specs and tiny bugs.


It wasn’t until I had shot clear coat all inside the leg wells that I started to realize that the clear coat was melting the orange paint and wrinkling it severely. There are several spots of the orange that took the clear coat fine, and it had been nearly 12 hours since I first painted the orange, so I’m attributing this to a bad mix of paint. It is possible that the paint in the legwells was thicker and just had not been given enough time to dry, but I can’t see that as the tape marks where around the back seat area.


I HAD TESTED THE PAINT on a board to see how long it would take to dry, and to make sure that it would take clear coat well!


The silver, white and red paint took clear coat pretty well, except for one single weird big liquid bubble in a horrible spot, I opted to rub it out and paint a quick touch up which looks better, but will always be a big flaw that bugs me until I end up fixing it.


On top of that, the Dune Shark now has it’s first battlescar- My stupid door fan fell on it and put a big scratch in the shark jaw- I sprayed some red in a cup and painted the scratch in but it still looks tacky.


After sleeping on it, the wrinkled paint in the leg wells looks kinda like orange rhino lining and I lucked out in that it’s pretty symmetrically located. I’ve come to think that it kinda looks cool- almost like I planned it that way. IF YOU DON'T LOOK TOO CLOSE, and remember it’s just a go cart sprayed with spray paint and not a 66 Chevelle, It looks pretty cool.


buckeye

Well-Known Member
#43
Naaaw, you need to strip it down and sart all over.:laugh::laugh::laugh:

My gosh man, that thing is beautiful!!! Great work.:bowdown::bowdown::bowdown:
 
#44
Yeah- I've taken this project on with a lot of enthusiasm, but the thought of having to resand and repaint this thing would just send every ounce of enthusiasm running right out the door.

Thanks by the way- but honestly, the pictures don't do it enough IN-justice. It looks great as long as you're standing 10 feet away.
 
#45
We call the ten foot quality a clean and shine. I still stand by what I said before about using the spray paint in the first place because it was for your young son. A few imperfections and blah spots and the scratch will be the least of the issues on the body after he takes it out for a week or two. :thumbsup:

It does look great in the photos. I like it. Very impressive and very sharp.
 
#46
SO I’ve been working on some other projects around here lately, and have neglected the cart for a little while. Among my new projects is a recent purchase of an electroplating /electroforming rectifier (gotta LOVE E-Bay!!!)- I may try to chrome plate the fiberglass air scoop I built for this cart :punk:


I mounted the motor in the original motor mount slots- I’m hoping that I can get the clutch to fit on this motor and sprocket using the original slot mounts. I rolled the cart out of the garage and ran it for a while. I’d only ran the motor for a minute or two since I’ve had it, and it was 10 years sitting outside before that. The engine has started on the first pull for me every single time I’ve ever pulled the cord. I ran the motor for a good while, and the throttle responded better and better the longer I ran fuel through the carb- I think this engine’s a winner!

Riddle me this- gurus: Once it warms up, I still cannot adjust the choke down to zero without it dying. It starts great when fully choked, and idols great (after it warms up) at about 1/3 choke- not sure if this constitutes a problem- Any thoughts here?:shrug:

Anyway- I did work on a seat makeover and got my seatbelts mounted.


I took my seat out and stripped the vinyl. I mounted the seatbelt to the bottom of the seat, which will bolt to the frame. It may not survive a NASCAR crash, but it certainly should hold the kid in if he rolls it down a ditch bank.


I cut new vinyl and stitched seams into the four corners of the seat- This looks a lot better than the last version.


So I have my clutch- ordered from OldMiniBikes it’s the Hilliard extreme duty clutch- I don’t know much about one clutch or another, but I liked the design of it, it seemed smart to pay a few extra bucks for this Hilliard clutch that seems to be a little more forgiving of a kids driving skills.

I’ve ordered 4ft of nickel-plated chain- I hope that I can find some guidance on here for how to press out chain links when it comes time for me to shorten the chain to the right size. I’ve seen special tools for it, but I think I can build something in my shop that will allow me to get the job done.

I have to figure out how I’m going to rig the throttle/gas pedal cable I have, which has me scratching my head a bit. But beyond that we are getting close to ready for some test videos pretty soon.

 
#48
Does anyone have any guidance on what clutch to get. My motor has a ¾ shaft, and there are several clutches available with anywhere from 10-14 teeth (#35 chain) I’ve seen others caution that it is important to get a clutch that matches up (ratio wise), or risk burning out your clutch. My drive sprocket on the axel is 84 teeth- I’m told that these clutches all are set for around 1500rpm engagement, does this sound right? And I want to govern to avoid having it rev over 3500 rpm, is this correct? Any help here would be appreciated, I’m not familiar at all with this type of thing- am hoping someone can explain what I should be concerned about. I do understand that different ratios give me more acceleration, versus more top end speed, I’m mainly looking to hit it right down the middle to insure that the motor-clutch-gear is optimized to last.
Also, I assume there is a special tool to press the clutch on- is this something I can do myself, or should I bring the thing into a small motor shop and have them do it? Seems like a bolt down the shaft and some and shims could do it, but figure I’M probably oversimplifying, right? Wrong?
With your large tires, heavy kart a plain cent clutch may not last very long. I have a kart with 18in tires, 84 tooth rear sprocket and the clutch didnt last all that long. You may want to look into a TC?

Maybe those did have a plain ole clutch, I dont know...
:shrug:

Oh and by the way, that thing looks awesome!
 
#49
Nice job on the Dune Cat !!!
I love to see people using the skills they have learned throught out life, and you have some good ones. One you might want to learn, is the Air Brush. You can dress up a simple paint scheme with some shading,fading,lining, and so on.
The best part of your build however, is the fact that you involed your son. He well remember this for the rest of his life. Not to mention the skills you are now passing on to him.
Keep up the good work, and enjoy your new toy !!!!!
 
#50
What is a TC clutch? I'm going to roll with this Hilliard clutch (for now) and see what happens, I refer you to my posts showing the Chinese Aluminum caliper brake I have on this bike.- My guess is the cheesy clutch will outlast and out perform the cheesy brakes. but drive train upgrades will be a different phase- I've found a Honda 12hp I want to buy, but I'm more interested in building something from scratch with it... who knows.

We live in the mountains, I gotta get this cart running before the snow sets in.
 
#51
My Model R9508 has a "Torque-Sensing Torque Converter Drive", as Muskin called it.
It looks to be equlivent to a Comet 20 Series "Symetrical" unit and was made by Horstman MFG Co..
 
#52
What is a TC clutch? I'm going to roll with this Hilliard clutch (for now) and see what happens, I refer you to my posts showing the Chinese Aluminum caliper brake I have on this bike.- My guess is the cheesy clutch will outlast and out perform the cheesy brakes. but drive train upgrades will be a different phase- I've found a Honda 12hp I want to buy, but I'm more interested in building something from scratch with it... who knows.

We live in the mountains, I gotta get this cart running before the snow sets in.
If your on fairly flat land, the cent clutch will work to an extant...
If youve got lots of hills it probably wont last too long.

You could whip up a jackshaft if you dont want to get a TC now.
You can gear it better, give it more lowend for hills and such.
:thumbsup:
 
#54
Tried to install the clutch. The clutch went on the shaft a lot easier than I thought it would, but the bolt they sent in the clutch package seemed a lot harder to tighten than normal. I figured it was just intentionally tight tolerances-

Long story short- I broke the bolt off in the motor shaft:mad2:. All my wives (former and future) have taken to calling me "Baby Huey" because of my delicacy deficiancy:hammer:. I've tried a few things including heating the shaft with a torch and dremeling a slot in the bolt stub for a flat screw driver. I bought a couple different types of bolt extracters, which I feel are a last resort as they can end up in a more serious tragedy once I snap one of them off in there. Either way, I'm going to wait until I get back from my deer hunt next week before I fiddle with it any more.

In the meantime, Any tricks, tips, or ideas are welcome.

Bummer :censure:.
 
#55
Hi GameWarden98,

Great build thread! I commend you for involving your son. I am also doing a Dune Cat build with my 6 & 7 year old girls. I posted a bunch of pictures on the main Muskin Dune Cat thread, on page 10. But I am gonna start a clean build thread.

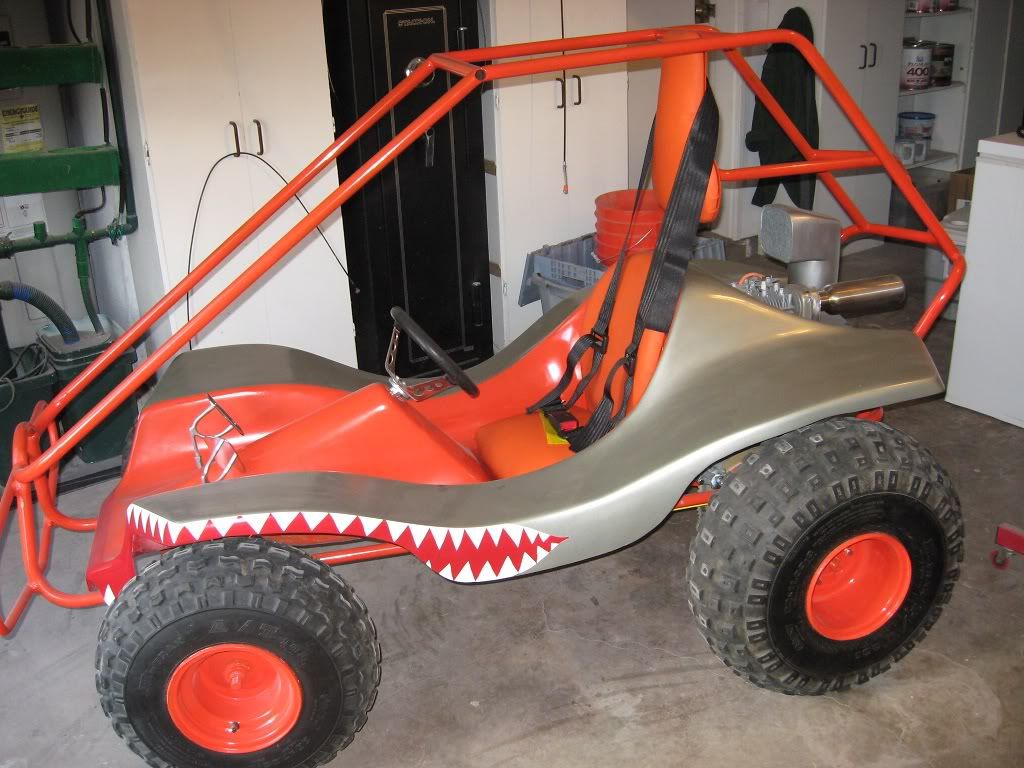
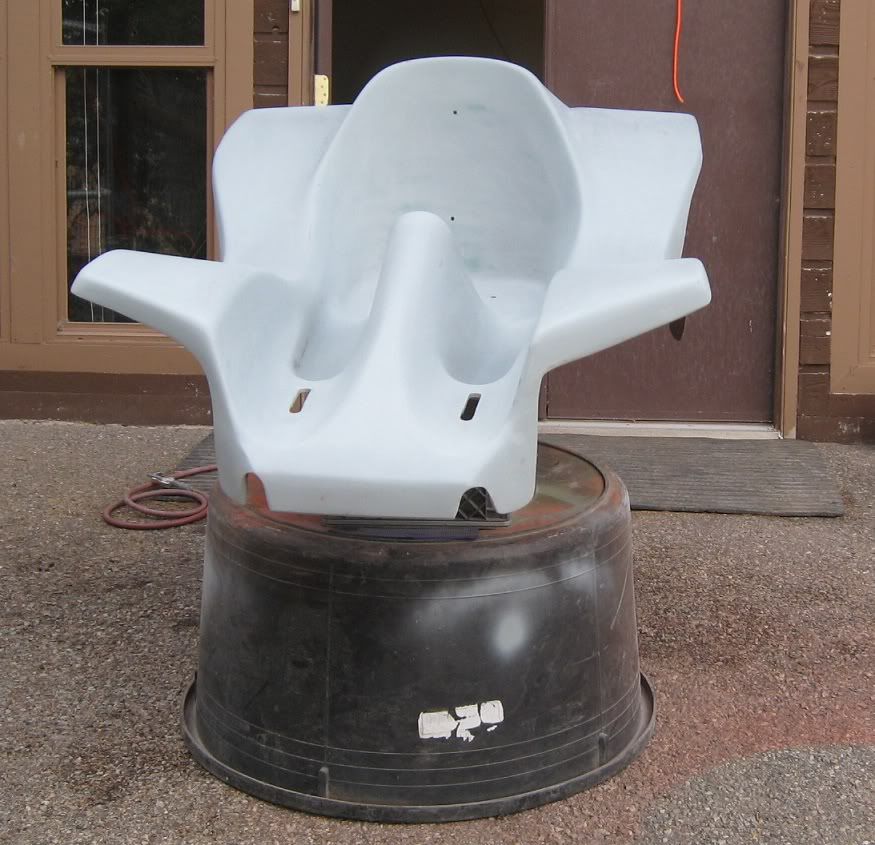
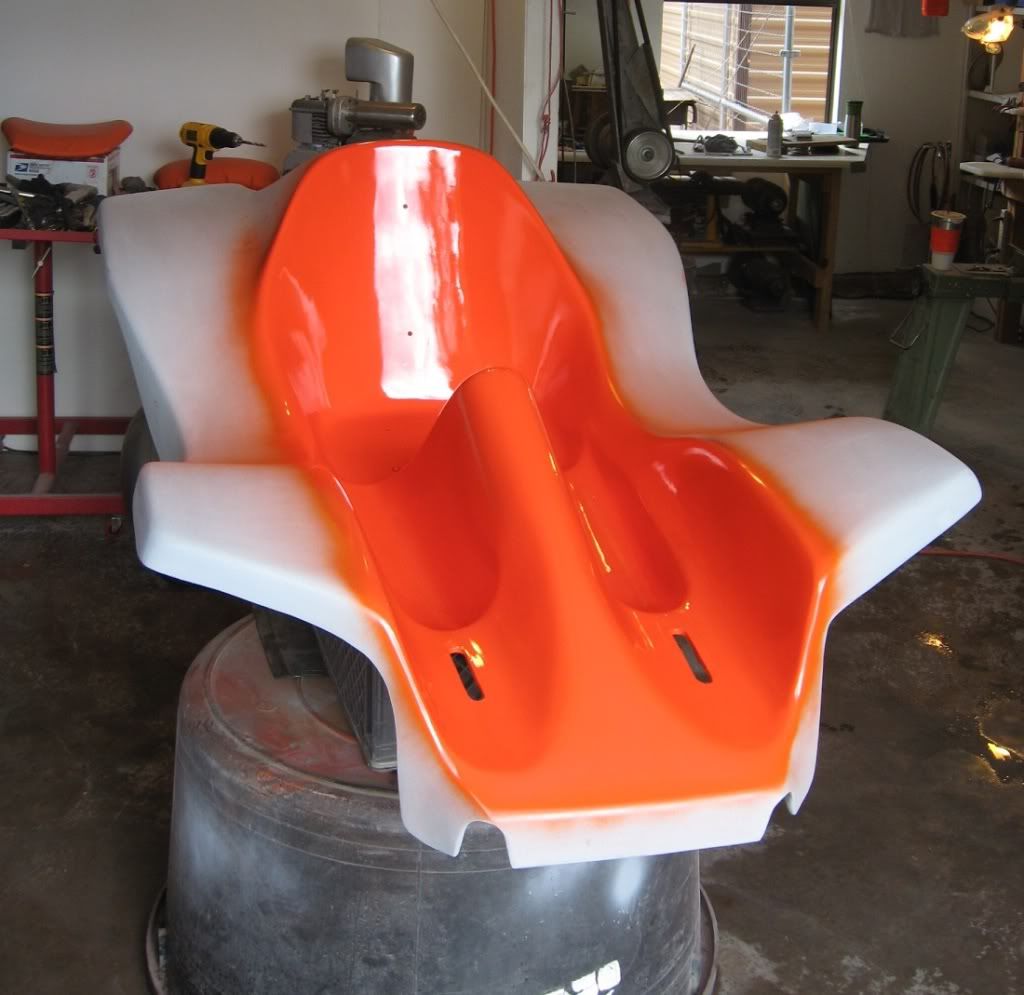
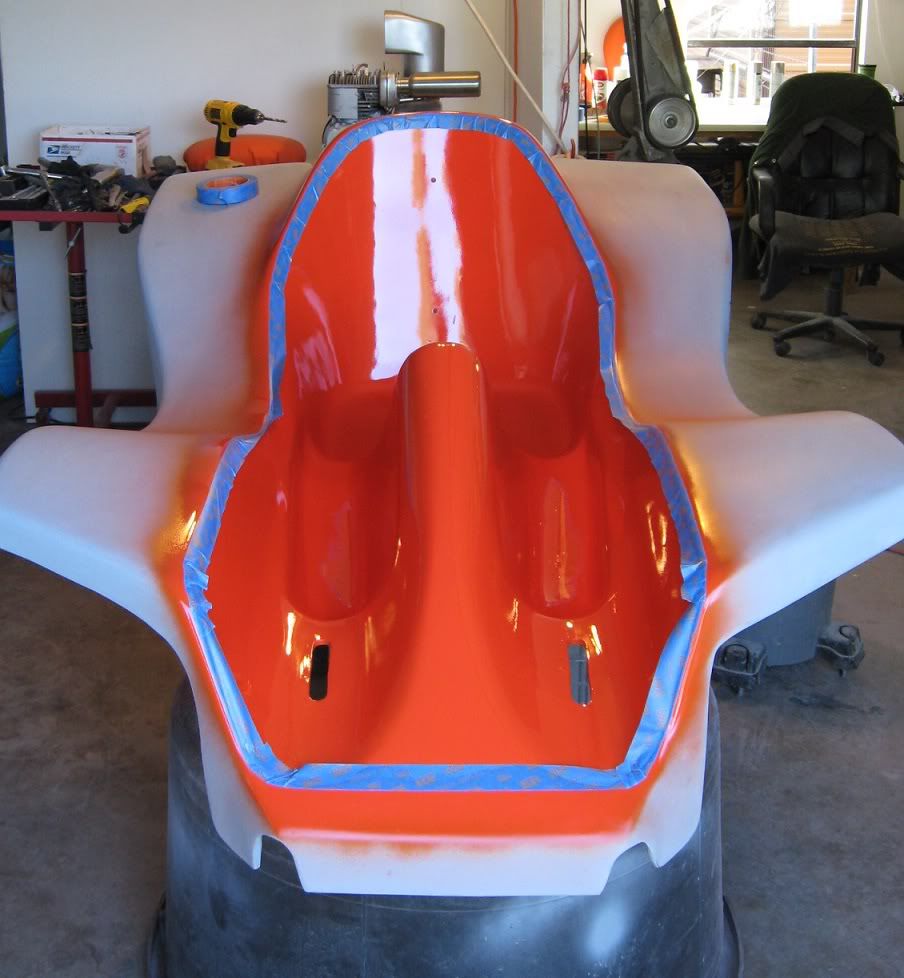
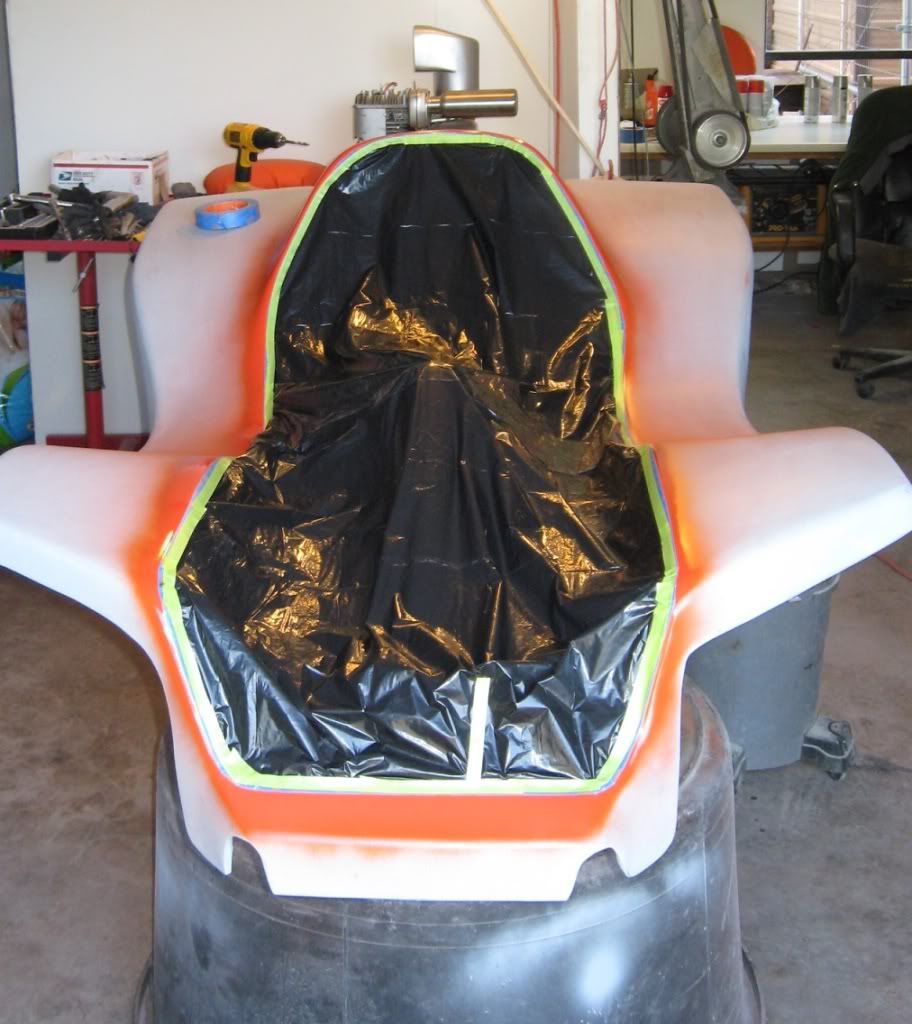
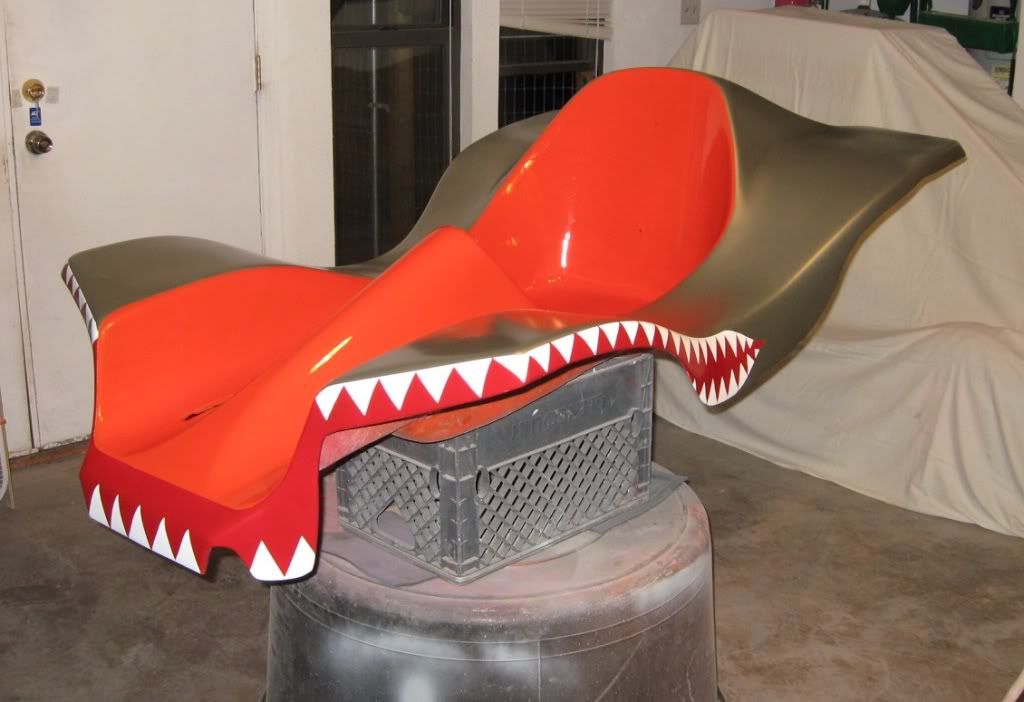
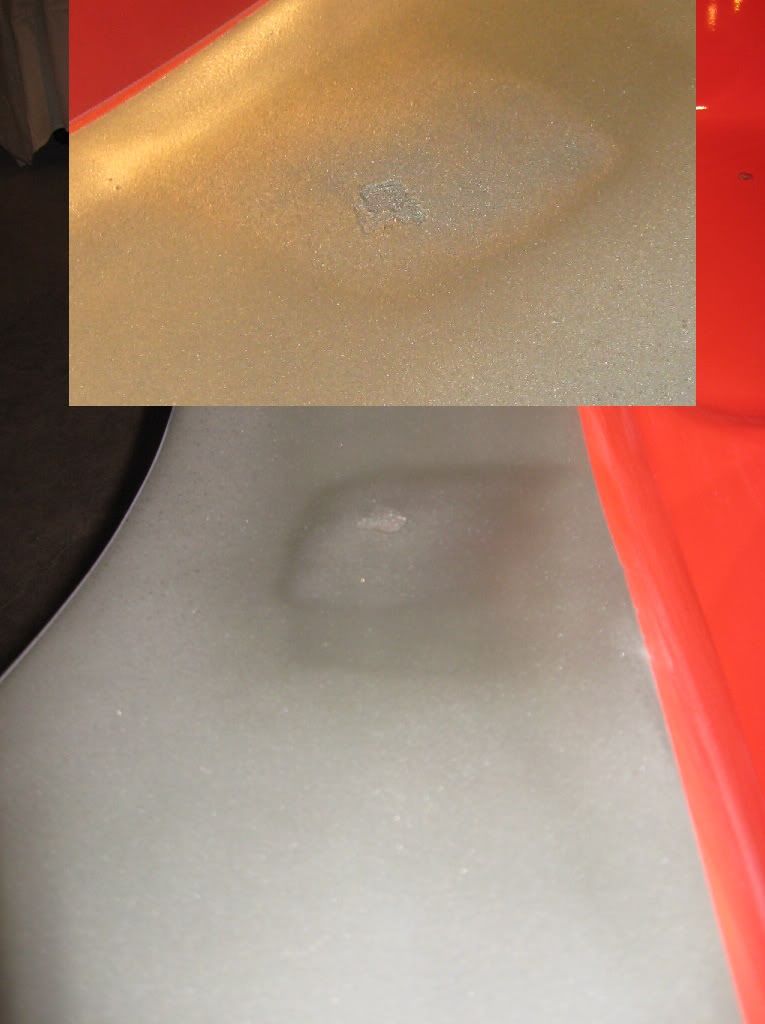
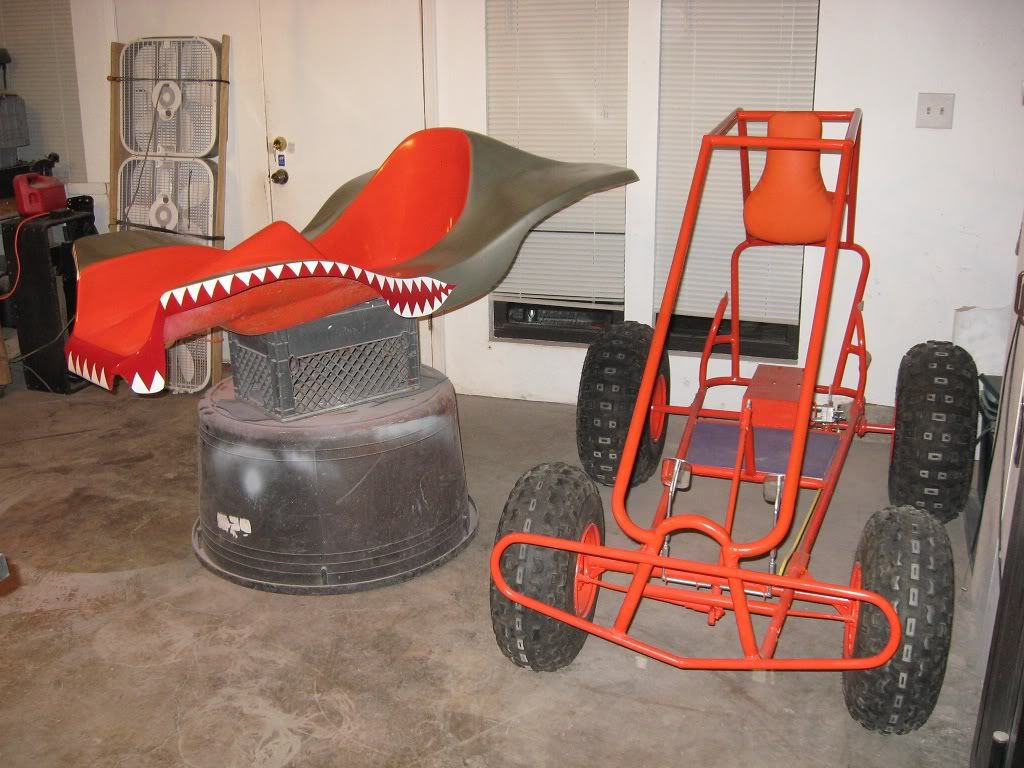
I have 2 complete Dune Cats and one body. The first one I will have complete before Christmas (I hope) is an original orange/tangerine color. I did frame improvements, and the like for it. The next two I do will have new frames that I build from scratch with the improvements I am doing to this one. One of the three has been made from a uniquely different mold than the original Dune Cats. It is stretched about 10 longer than stock, has a 4inch raised seat pan, beefed up areas and other little differences. That is the one I will do for myself! I am currently planning on making a new mold for these bodies with the help of a local glass body maker here in Knoxville TN area. He has a number of bodies and has looked over the bodies I have and says it won't be problem to make them. I plan on selling the bodies bare with plans for the frame so dads like yourself can build new ones.

Just a couple of quick comments that can be helpful for you:
1. bolt stuck in crankshaft - use the easy-outs because they are designed to do that. Just don't strike them with a hammer because they are case hardened and might snap if you really hit them hard. You should drill a pilot hole in the broken bolt, then continue to go a larger size up until you can put the biggest size easy out and remove the bolt. Then chase the threads with a tap.

2. decals - Big Al on the other thread has taken the time to get the artwork put together. He sent me the PDF of this collection, and I will gladly send it to you. Send me a PM with your email addy. I am going to have some made locally at the print shop that does my decals, banners, signs, so if you want me to provide you some off my run that's no problem.

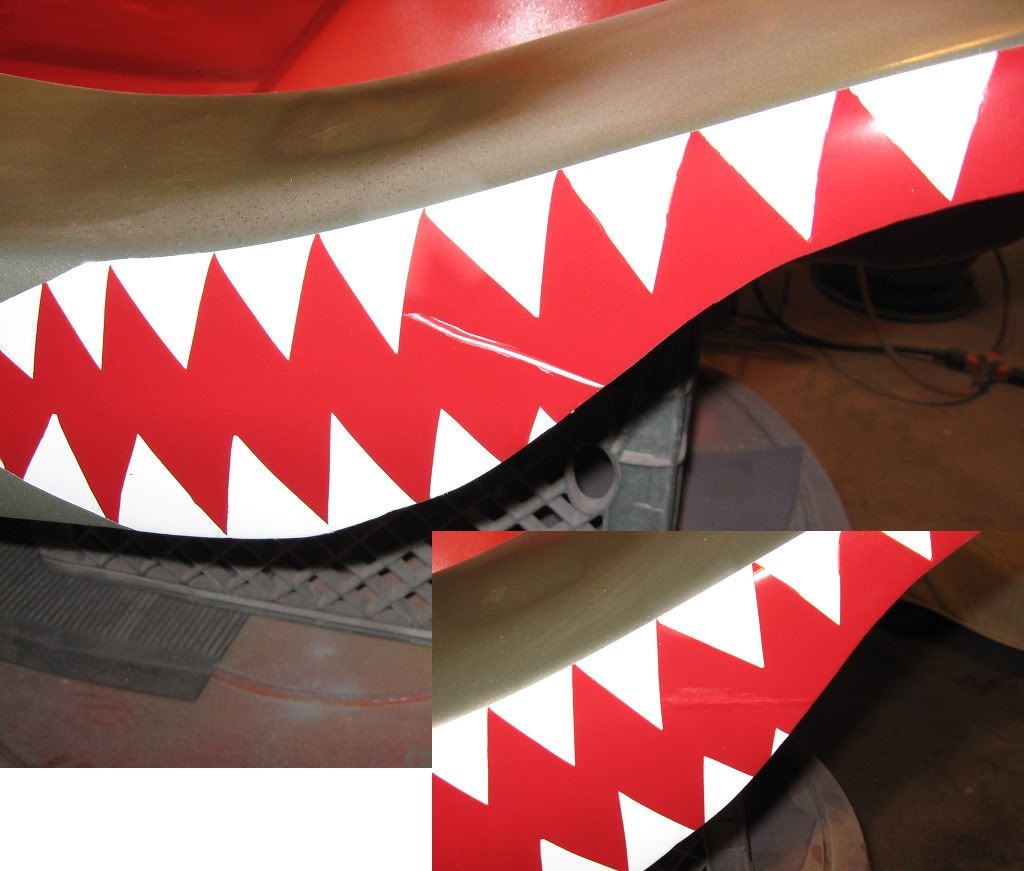
Of interesting note, the blue body I have has completely different decals than any other one I have seen. They are the real deal, and use the HPE Muskin Cat logo/head instead of "Miss Sandy Claws." I suspect this was done near the end of the run. I am going to have these scanned and made for the blue one.

3. engine - I like the B&S motors OK, but I am nearly 100% certain the factory engines were Tecumseh, which I like a lot better. Regardless, it is hard to justify putting any money into either of these heavy, old tech motors when you can buy a new Harbor Freight Predator 7HP for $119 all day long. And for another $109 you can buy a kit that adds electric starter, controls, charging stator, diode and wiring to make the motor more user friendly. Or you can look online and find new 9HP Robin Subaru engines with electric start for around $275-330. These are really high quality engines, made in USA in WI, and have an Overhead Cam design with less weight, fewer parts, quieter operation and designed for the D-I-Y mechanic to completely rebuild with basic tools. They even run forged crankshafts in a lot of the models. Just add a billet connecting rod for $85 and aluminum flywheel for $100, then remove the governor and you have a high revving machine. You can also find lots of used Briggs Animal engines which are a much better design than the old flat head B&S. Briggs discontinued the flat head in the late 90s for good reason.

4. Torque Converter - The Dune Cat, as a fellow owner mentioned above, runs a HoffCo symmetric unit with 7inch driven unit on the jackshaft which is located in the motor mounting frame. HoffCo became Comet, and if you want to run the original stuff just get a 20 series 7inch driven unit, and the correct length belt. I can help you with this if you need some support. I have the manuals and tables.
Comet Industries shutdown, then was bought by Certified Parts, along with Hoffco name products. So you can get any service part, plus brand new Torque Converter units, and the complete assembly called TAV2. The TAV2 is nice, but only available in the overdrive version which uses the 6inch driven unit. This will not give you as much torque multiplication as the 7inch unit, but will allow the kart to go faster on the top end with a 0.9 overdriven final ratio. You can see that I used the older TAV setup, modified with a 7inch driven unit. I did this because the 30 series (asymmetric v belt) stuff is more common, and I have a couple of these laying around from Carter Bros monster jeep projects I am doing. You can use the 20 series (symmetrical V belt) stuff just as well, according to the tech guru at Certified Parts. I used the TAV style unit because I wanted to make room for dual rear hydraulic discs for my kart.
Also, note that there are now chinese knock-offs of the Comet. They run about $169 where as the real deal made in USA Comet runs $199. Run the Comet stuff if you can because you have lots of tuning/adjustment parts available if you choose to use them.

5. Differential - I would ditch that solid axle/sprocket/centrifigal clutch. You lose the high quality engineering that HPE put into the more expensive differential. The diff allows you to turn on a dime, handle much better, whereas the solid axle will push you and not allow as tight a radius and it is harder to push the kart around as well. The Peerless 100 series diff that Northern Tool sells online for $119 is a direct replacement for the original. Peerless must have made the original, as they have been around for a while and they are USA.
If you return back to the diff, the brake must be mounted into a brake disc on the diff, or you can run the sprocket/brake combo like you are now. But don't put the brake disc on just one axle because the control will be lost. You will need to put one on each axle if you go that route. In my opinion, that is the best way to do it because you will stop the kart axles in the event of a diff failure. The diffs are very tough and good for about 16HP rated. I put about 240LB-FT of torque through these on the last Carter Bros Monster Jeep build using a 150cc GY6 engine. They hold up well as long as they are supported inboard by bearings, like the Dune Cat uses. If you only had bearings on the outer, you will fail the diff eventually by cracking the aluminum housing due to flexure.

Well, enough of this techno rambling for now. Enjoy your machine with your son!

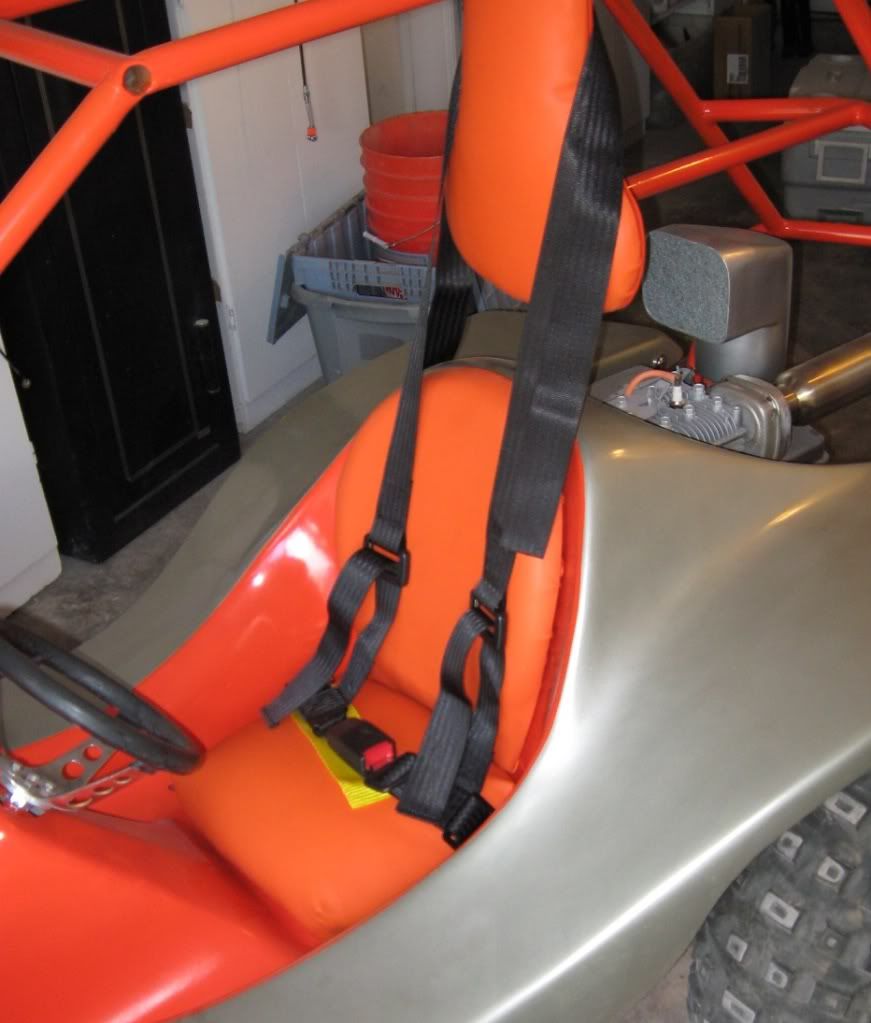
PS - About the roll bar/cage, I like the front bumper idea. And I like the idea of a roll bar behind the seat that is higher than the driver's head in case of a rollover the bar will take the load. As for the rest of it, it is a huge detraction from the kart's beauty, yes. But safety is something we take a lot more seriously than back in the 60s-70s-80s when we grew up. I am going to do a single roll bar hoop tied back to the frame, and a bumper, and a RC wireless remote ignition kill system (runs $70; has 250 ft range). But very simple and along the theme of what was done in the 60s 70s Manx bodied dune buggies.
 
#56
Hello all-

My momentum on this project kinda shut down on October when I broke the bolt off in the motor shaft. Then in November and December I was out-of-service for a good while with whooping cough-(which turned into) pneumonia- (which caused) a severe case of sciatica and I spent the entire month of December, literally, on the couch.

Anyway, I still a little gimpy from the sciatica, but I am back to work, and looking to finish up this project soon.

I was able to remove about 80% of the bolt from inside the motor shaft, then I broke down and took it to a pro- wish I'd of done that in the first place, He cut new threads inside the shaft. I'll have some updated pics when I put this all back together soon.

I've since purchased a Cushman Trailster (similar to a Tote Gote) and plan on rigging it up to store in the shed up at our family cabin, we'll use the bike to haul deer with during hunting season, and for emergencies- I'm planning on building a single wheeled trailer for it, similar to a body basket/gurney. :scooter:
 
#57
Oh and Keisler, can you post a link here, I am not sure how to kind the "main Muskin Dune Cat thread".

I realize that the drive train if this Cat is not ideal, it's what was on it when I got the cart, and I'm not sure at this juncture if I want to go as far as replacing the engine and drive train- I want to see this thing traveling, and I'll deal with things like burned out clutches as they happen.

I also realize that this roll cage is kind of contrary to the overall look and spirit of the original dune cat, but I think the look and spirit of this cart are kinda cool in their own modern way. I was careful in designing the roll cage and bumper so that there was a minimal change to the original frame and fiberglass. My thought is, that it wouldn't take much to cut the cage off and put it back to original if some other owner had a mind to in a decade or so.....
 
#58
That's a cool project.
I rode a brown Dune Cat in northern Wisconsin in the mid 70s. There was a place that had a dirt track in the woods and instead of go karts they had Dune Cats.
 
#59
This is an awesome thread! Love what you did with your cat. It's gonna give me new ideas on my cat that I got not long back. Thanks again for the tutorials too definitely gonna be using those tips.
 
#60
Thanks for that! I have been working on the cat recently (it's been on the backburner for a while) and I expect to have some video of the thing in action in the next few days. I'll have some photos and updates to follow soon-
 
Top