Bringing my Nighthawk back to life.

#21
Bought some new tires to replace the dry rotted originals, along with a set of tire spoons so I could change them myself.

After a good amount of struggling with the irons and a hair dryer the first tire finally came of...... along with a good deal of the beautiful paint from my wheels.:censure::censure::censure::censure::censure::censure::censure:

Now I'm looking at striping the whole stupid wheel back down.

Even though I REALLY don't have the money I'm leaning toward just having them powder coated silver this time. If I do this I'm really worried about jacking up the powder coat when the tires go back on. How difficult is it to get new tires and tubes back on? I assume the old ones were so difficult because they were dry rotted/hardened.

Were I to pay for them to be mounted somewhere by a "professional" would it be safe to they could do so without scratching the crap out of them?
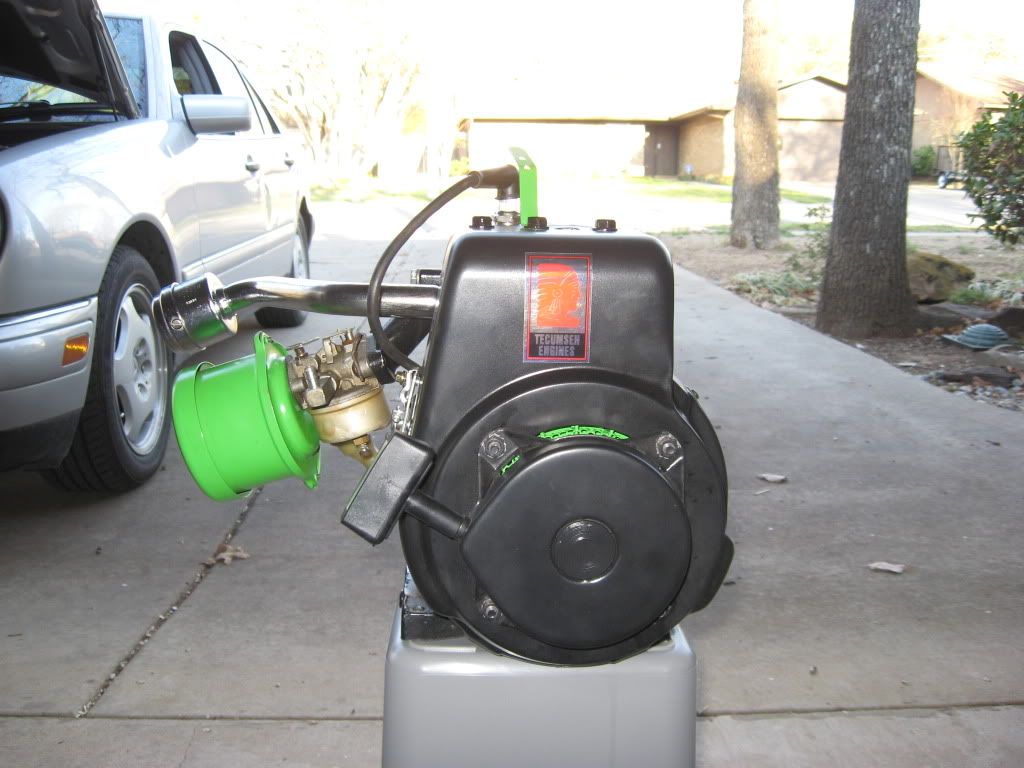
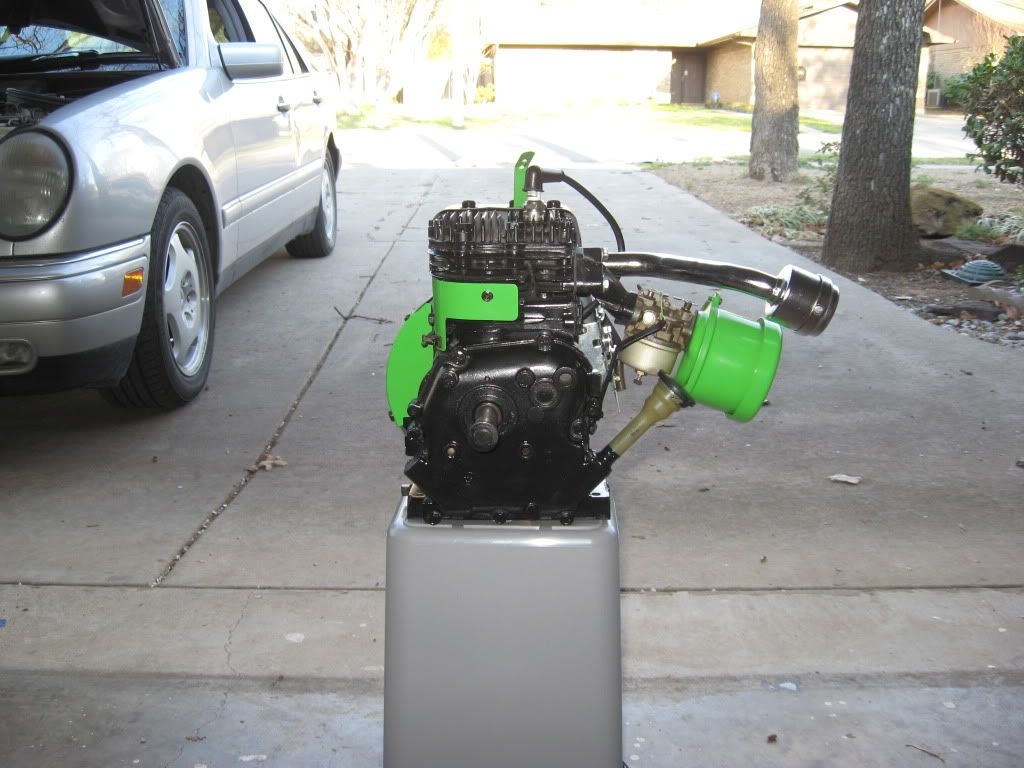
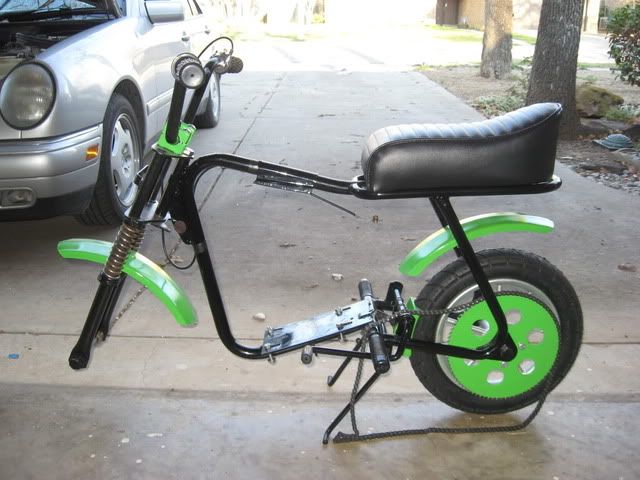
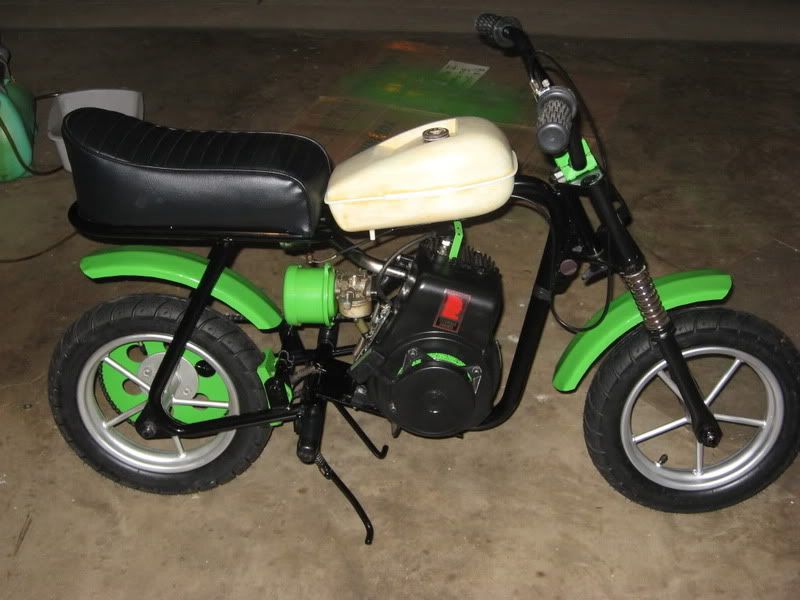
 
#22
Finished up with yet another half assed re-build of the HS40. Put in new valve springs, breather, re-lapped the valves and an intake oil seal off an OH60 in a last ditch effort to curb the smoke. Also took the opportunity to finish the paint job on the motor.


Also got the new tires mounted. You don't see the front tire because I butchered the paint on the wheels using spoons to get the tire off. Its been stripped all the way back down and is currently awaiting paint.... again.

I wised up and just cut the back tire and tube off with a razorblade knife and my Klein Dykes....

Seems like the scrub brake rubs a little more with these tires so I'll have to figure something out there.
 
#23
The tank is off the frame also as I've finally decided to do something about the paint. Until I can find a suitable metal tank, I've just decided to roll with having to paint and repaint the plastic....

Last time I painted it I used no primer, just the Fusion for plastic paint from Krylon, that actually worked pretty well but they don't offer Grabber green.

How would you guys go about painting this tank?

I'm thinking maybe engine primer? Maybe the fusion for plastic as a primer under the grabber Green engine paint? Should I clear coat it?

Any suggestions would be greatly appreciated.
 
#24
Got the front wheel painted up and put back on.


The tank has been stripped back down to bare plastic... trying to figure out the best way to go about painting it. Still open to suggestions.
 
#27
Thanks for the kind words guys. The damn tank still is not painted. I cant seem to get to get all the gas out of it.... Just cant ride the thing without gas in the tank.
 
#28
Thanks for the kind words guys. The damn tank still is not painted. I cant seem to get to get all the gas out of it.... Just cant ride the thing without gas in the tank.
I tried to paint my plastic tank also and had horrible results. The plastic primer worked perfectly, but my over coat cracked like it was old lead paint. The werd part is I grabbed another can of paint and it sprayed fine... May have to get a different brand of paint after I spend hours re-sanding it down :hammer:

Best of luck.

Adam
 

zeeman

Active Member
#29
I read all the posts in your thread. Very nice looking bike you have going there. If you are using the Duplicolor engine paint that is heat resistant, I have had similar difficulties. I find it almost impossible to keep a wet edge, and it does not blend nearly as well as the regular gloss paint. I bought two cans, and one was much worse than the other. I won't use it again unless I have to. I was not too hot when I painted which can make it hard to paint. This paint was just not up to my expectations. The Duplicolor engine paint also looks a little gray to me and is not nearly as glossy as other brands. Just passing on info from my experiences.
 
#30
The tank has been stripped back down to bare plastic... trying to figure out the best way to go about painting it. Still open to suggestions.
I painted my Bird's tank and I don't think I would recommend it. The paint is a rattle-can paint meant for application on plastic surfaces. Even though it still looks good (no bubbles), it doesn't take much to chip it off. Also, I tried to wipe up a drop of gas with a shop rag; it left a dark mark in the paint.

I considered getting a metal tank, similar to this one: Motorized BIKE GAS ENGINE bicycle 2 L fuel tank black | eBay

Or try plastic renew.
 

Jer

New Member
#31
I have a question? NOt to be a copy cat or anything but I want some of those wheels? LOL Are those stock for that bike? What size wheels are they?
 
#32
I have a question? NOt to be a copy cat or anything but I want some of those wheels? LOL Are those stock for that bike? What size wheels are they?
Oops... haven't checked this thread in a good little bit. They're 10 inch wheels and yes they are stock to the bike.
 
#33
Damnit....

Mid 70s on New Years Eve so I decide to crank the old NightHawk up for the first time in a couple months and terrorize the neighborhood. Starts right up 5th pull(awesome) but as I'm making a few laps around the block things just ain't right. Pull into the garage suspecting a vacuum leak and sure enough the intake manifold bolts have worked loose...

The last time I re-assembled the motor I threw it together with the cheapo bolts I had laying around the garage, intending later to replace everything with the proper quality/grade later. Now I've got a cheap-butt bolt broken off a little less than flush with the block.:censure::censure::censure:

Anyone with a good tip for removing a broken off bolt?
 

scootercat

Active Member
#35
You can try to spin the stub with a fine point pick and a small hammer,if its loose it might come out without drilling...Drilling a hole straight n centered is very hard and just the spinning of the bit tends to tighten the bolt even more...and a word of warning...ez outs are very brittle and snap ez....thats why there called that!.....
 
Top