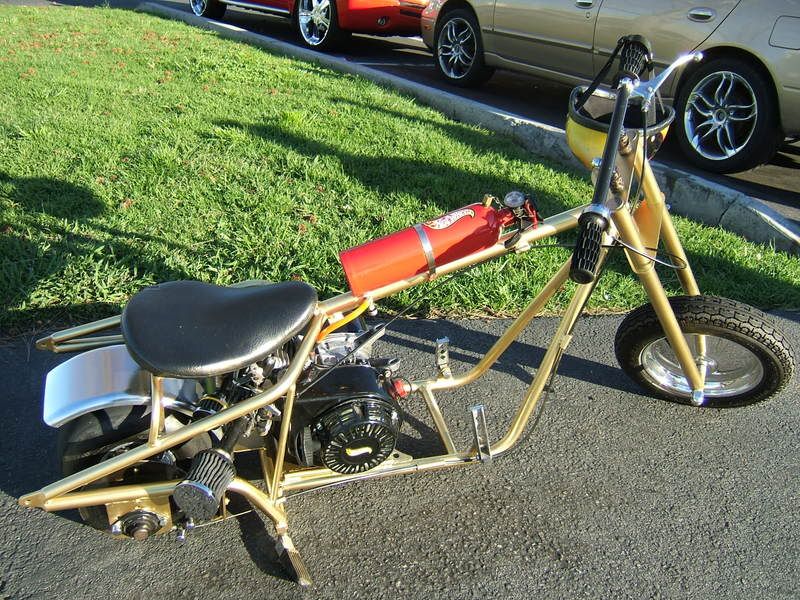
I've always thought fire extinguishers look cool and appropriate when mounted on drag-style bikes.
This project alters the extinguisher to hold fuel, but with alterations to the fittings, it makes a nice oil bag for Harleys.
Pic1- Fire extinguishers of varying sizes and materials are available new or used at numerous places, so it's not difficult to find one the right size for alteration to fit any size bike. This one is steel, from the 50's, half-gallon size, and used...a flea market find.
Pic2- The tank was already empty, so it was disassembled and cleaned, inside and out. The valve assembly on top unscrews to disassemble the tank.
Pic3- The brass siphon tube was cut off near the valve assembly. The tube wasn't crimped shut...it's going to act as a vent for the tank.
Pic4- A small hole was drilled into the handle assembly of the valve to allow a pin to hold the valve in the open position. This allows air to enter the top of the tank as fuel is drawn out the bottom.
Pic5- A brass compression fitting was brazed into a hole drilled into the side of the extinguisher about one inch up from the bottom of the tank. Leaving this space allows any sediment that enters the tank to settle to the bottom, and not be drawn through the fuel line.
The tank has been painted, and will be clearcoated. Since the tank is made of steel, the inside should be coated with a product that prevents rust. I use 'Tank Creme', but there are others available.