FS Burnishing for minibike parts (pics)
- Thread starter cambo61
- Start date
- Tags burnishing minibike pics


Cambo61,
If you have a moment, could you recommend the specific sizes of glass bead blast media you would prefer a customer use before you get 'em?
Long sentence, my apologies. I am guessing the final blast media size varies by the material, finish, and manufacturing process. I am trying to make a good choice for a 50 pound pail.
Thanks,
Steve
SAT. Of course! These are size designations used by Potters (Ballotini).
When I need something more aggressive (which isn't very aggressive at all) I use AD size glass spheres.
For extremely delicate parts I use AQ size glass spheres.
If you're on a budget you can always buy crushed glass, but I'm used to what I'm used to.
I drive about 2hrs to a place near Tampa to get bags of what I want.

sam does great work

Thanks Greg for giving me a shot at your restorations.
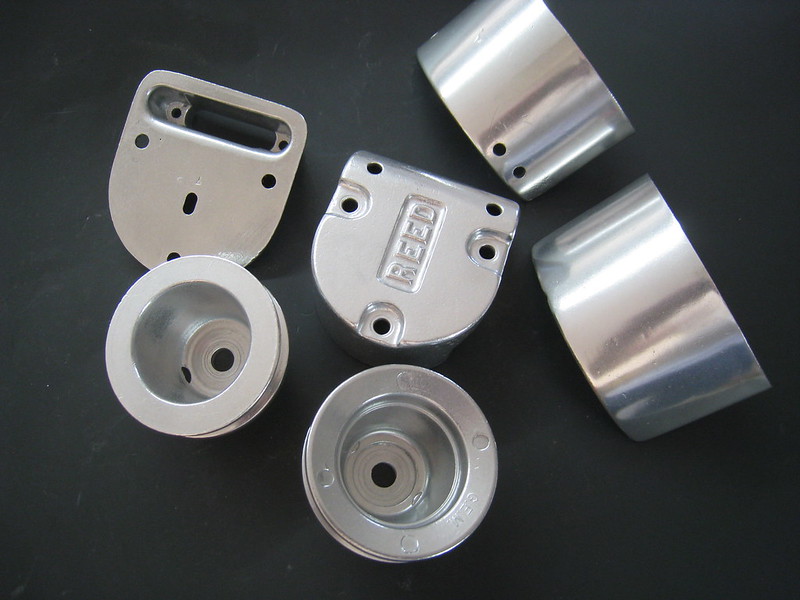
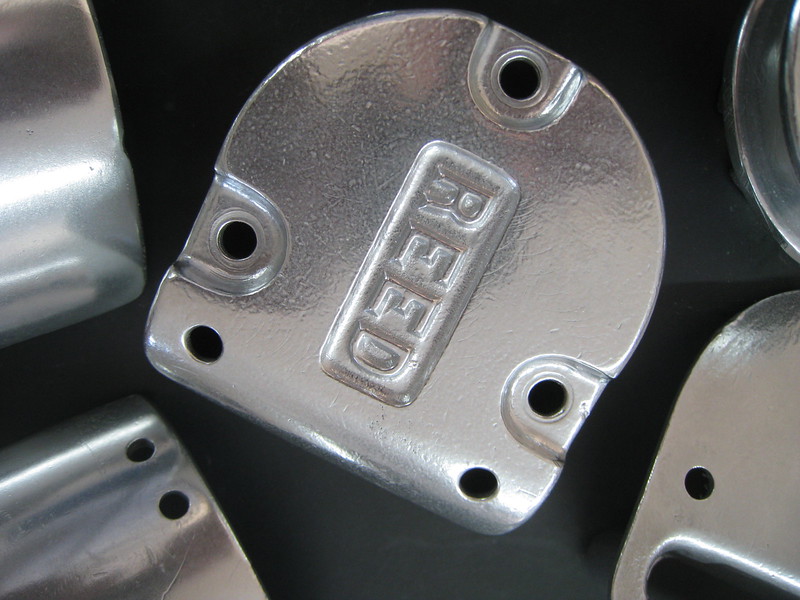
........The ball burnishing is the way to go Sam does great work i have tried to polish and paint or get a big shop to do parts all a no go.....the parts come out super nice.....PREP: after cleaning off 4 layers of paint use blue lighting paint remover its the only stuff that really works it bought the harbor freight ultra sonic cleaner works great!!!! use simple green straight some of the cleaners discolor the aluminum works great on bearings also.....blast with alu oxide then use your battery dremel to clean and get the dings out and brake or carb cleaner spay ....then use glass bead.....GREAT JOB A1 service.....Now if i could find a better way to chrome the Dart kart rims
Thanks Greg for giving me a shot at your restorations.
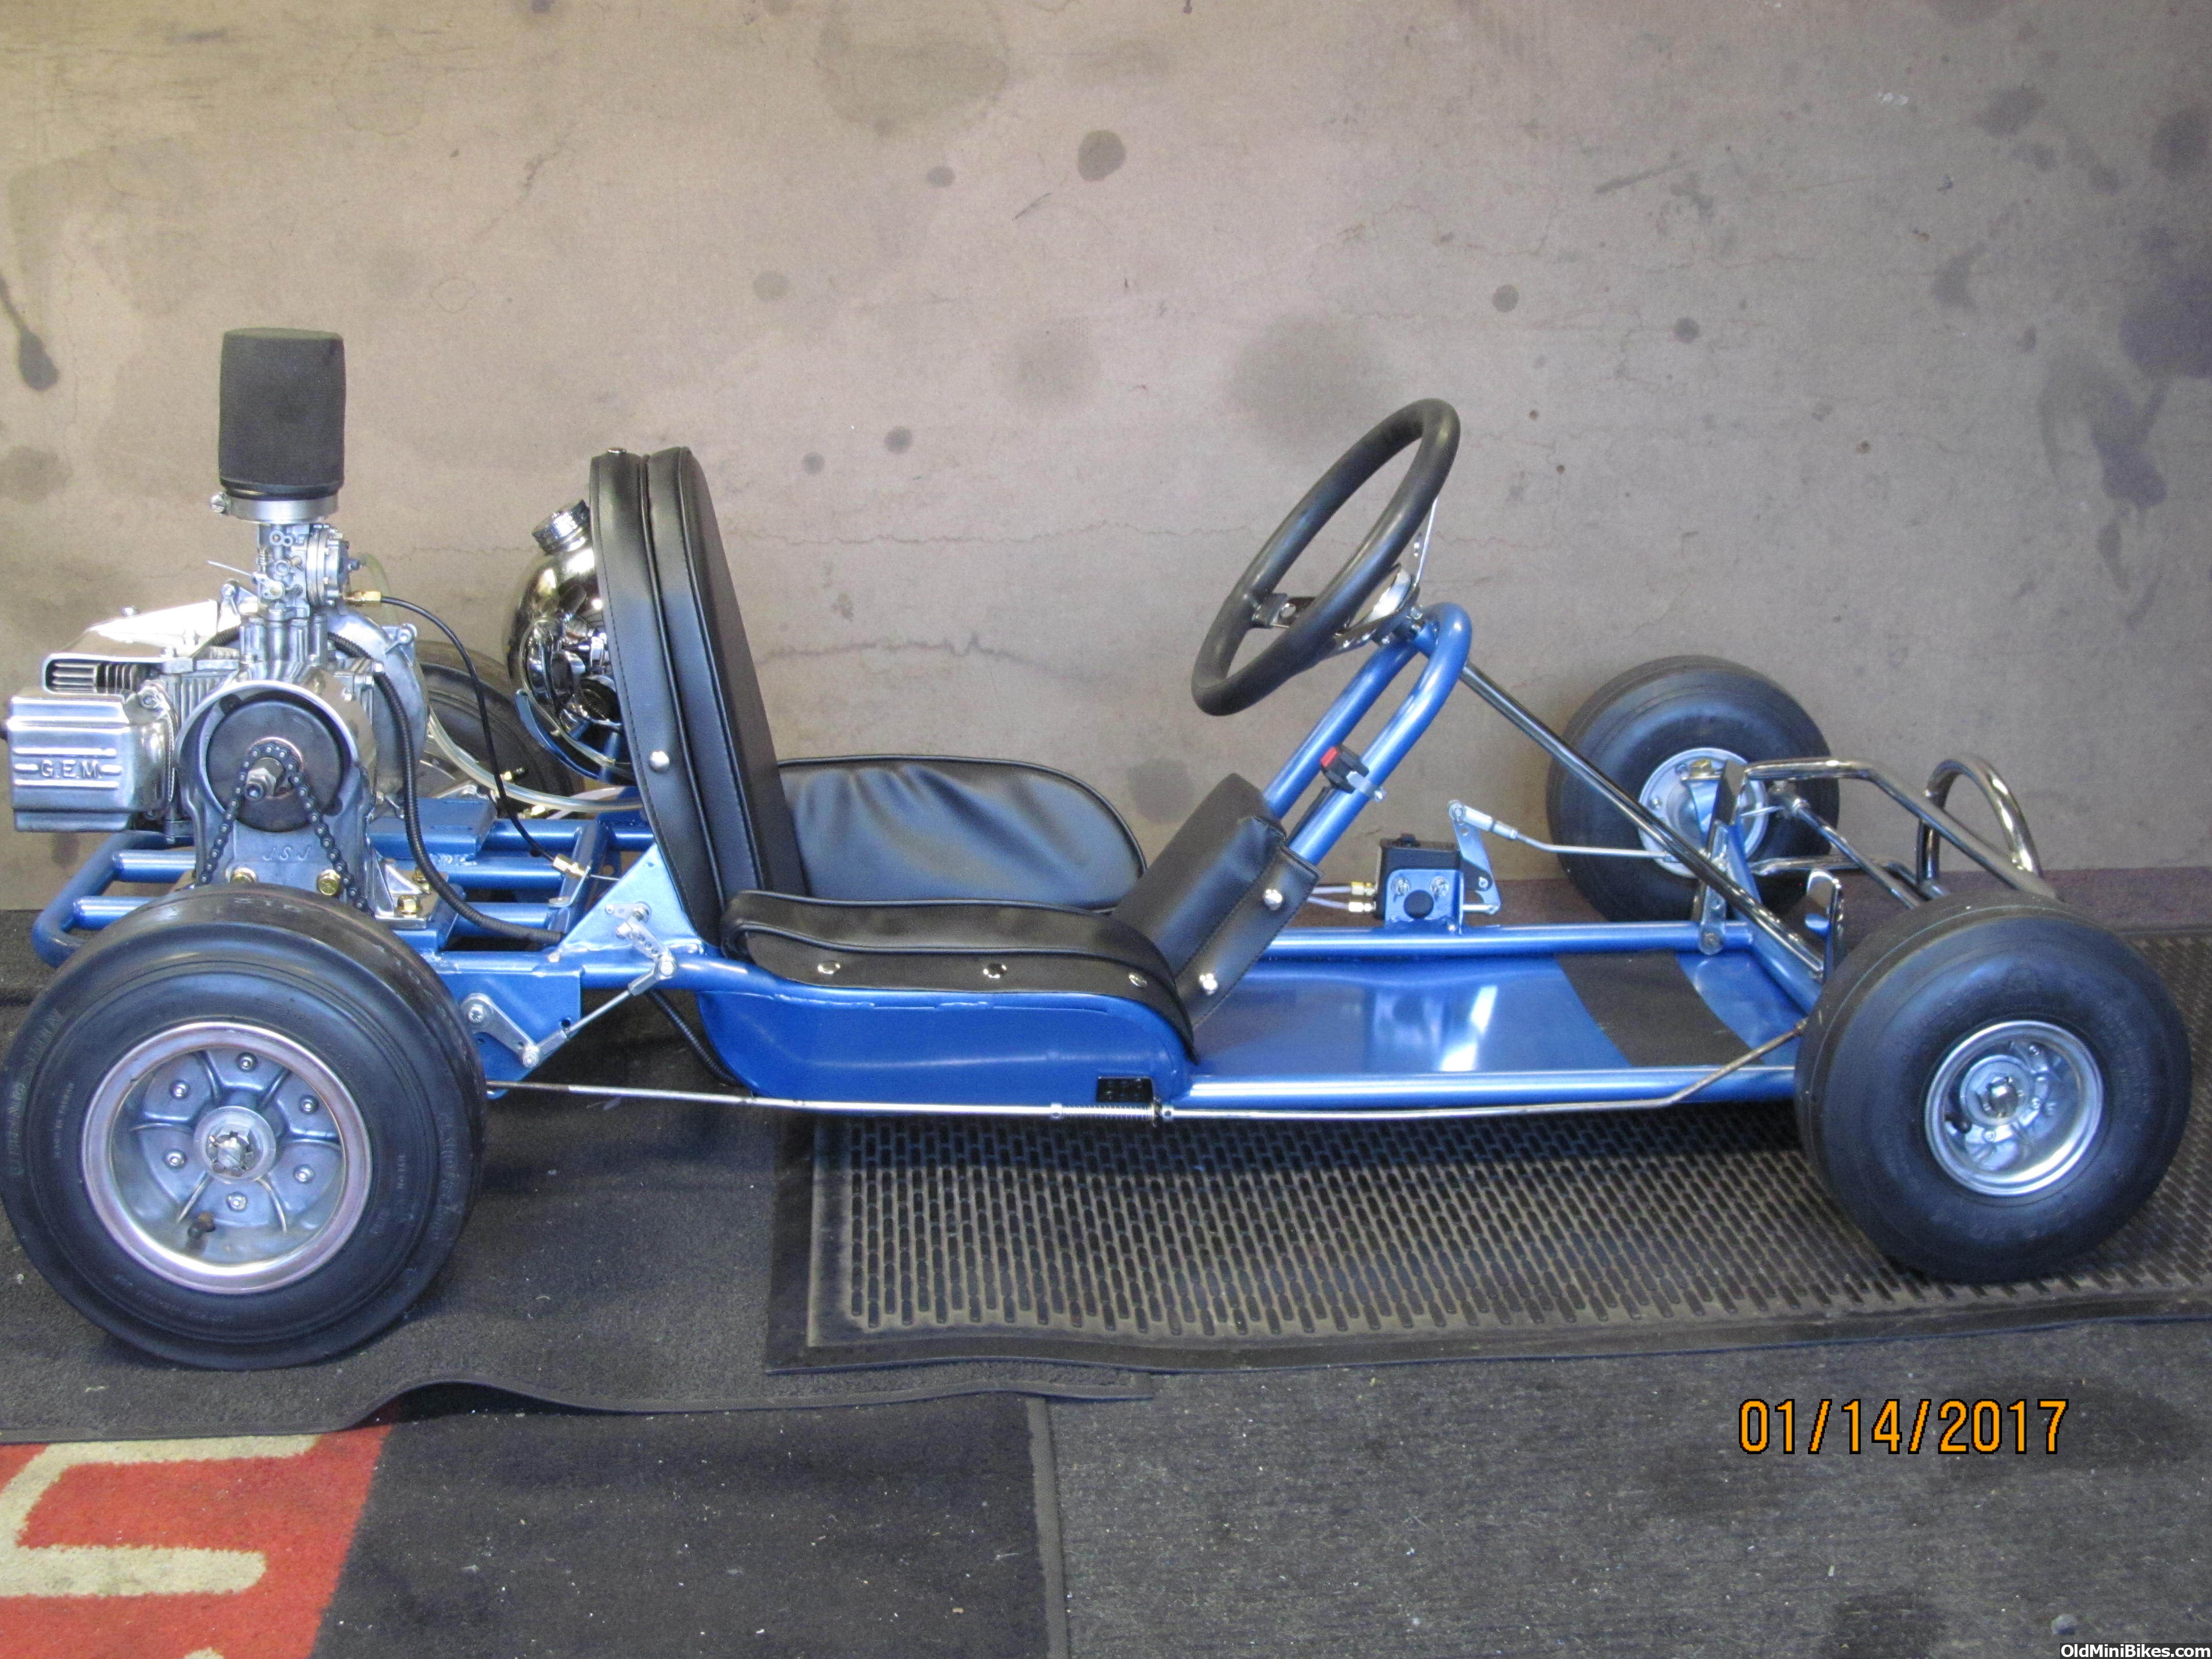
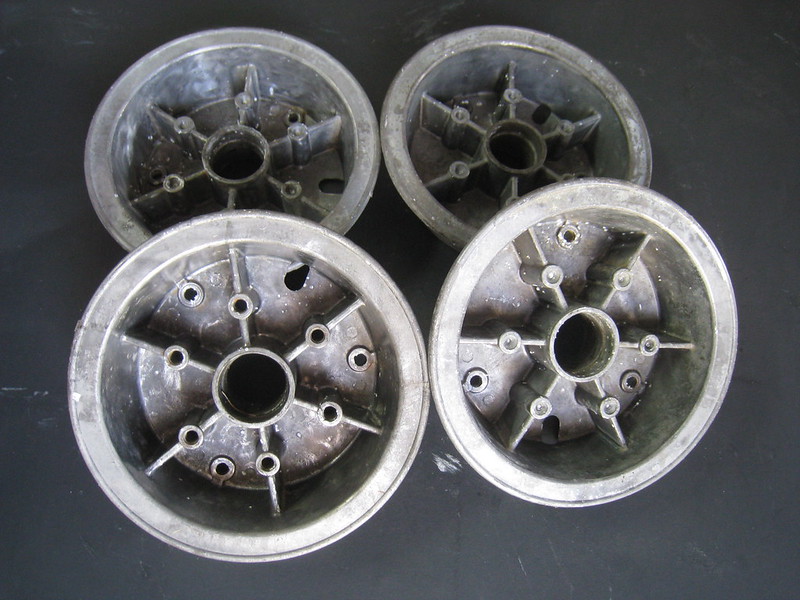
Got some Tacos from MSPTREX today and started on them right away. We had talked on the phone about his goals and entry in the 2018 OldMiniBikes build-off. I'm glad to be a part of 2 of these builds so far.
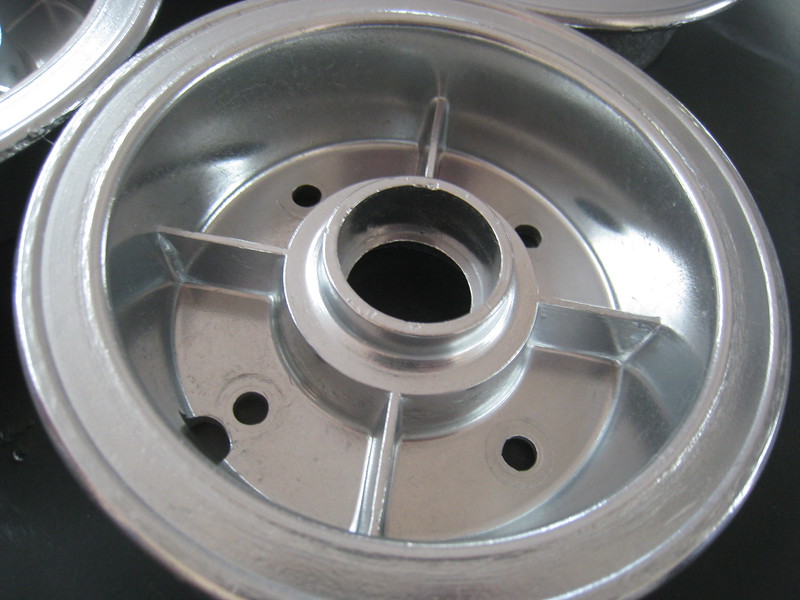
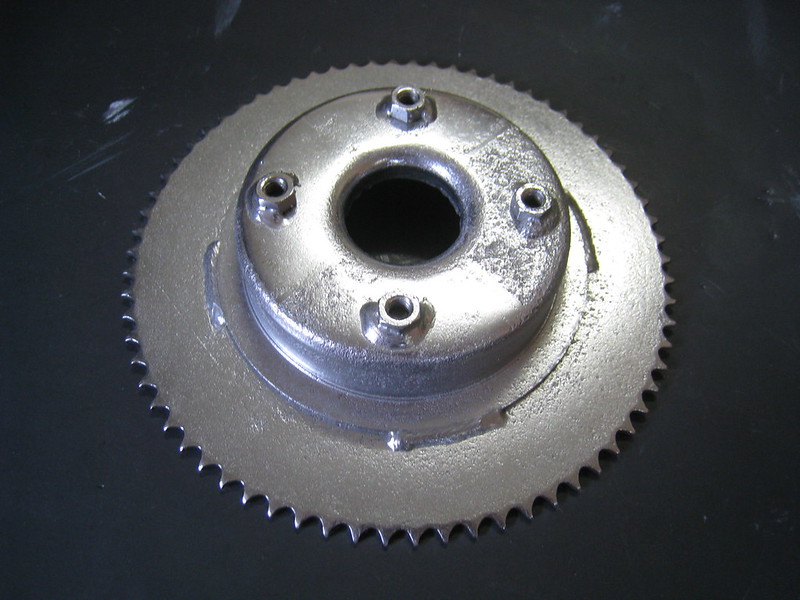
The 2 fronts were going to be easy although the insides were heavily corroded. The rear was going to be the real challenge because I knew I was going to have to figure out a way to get the rear sprocket/drum off the Taco wheel. After all, restorations should make the unseen sides of parts look as good as the seen sides.
I called Mark G up in WI to make sure these actually would indeed come off. I figured some heat cycles in the oven, some oil around the mating surfaces, and a gentle press work would do the trick. After about 45 minutes of messing with it I was rewarded with a pop!
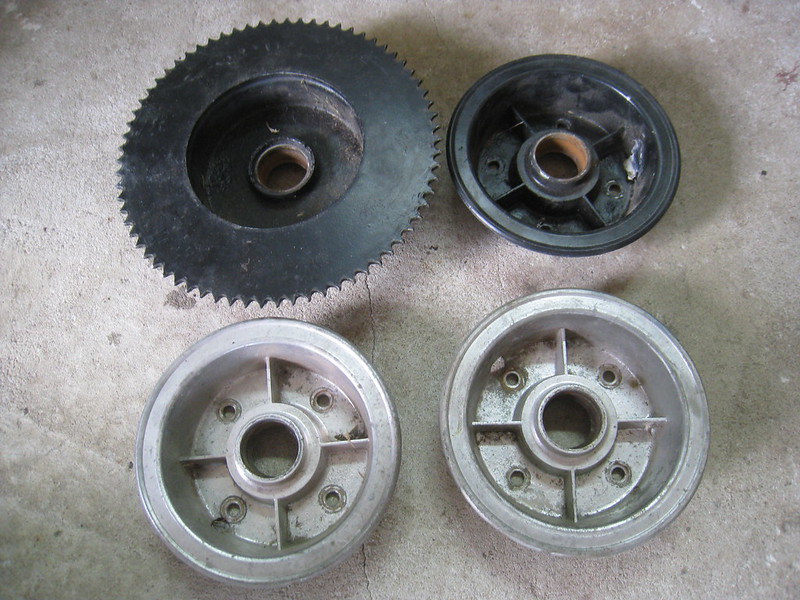
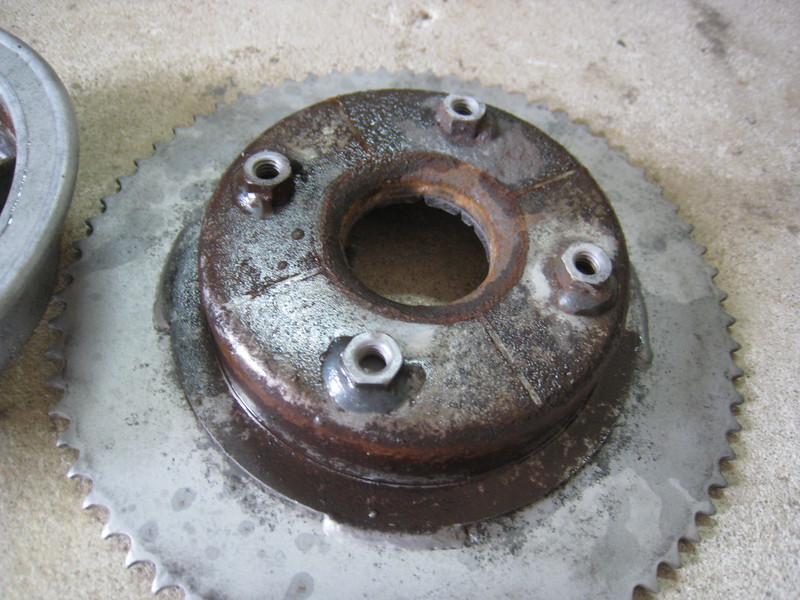
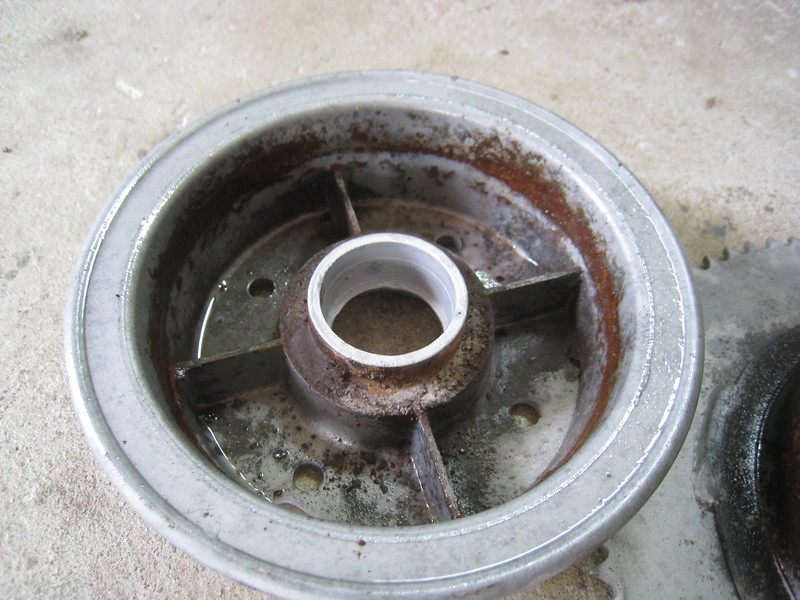
Your work looks very good. A few years back I did a lot of Powder Coating for people on another forum. I regularly had people want to save a few dollars by prepping their own parts. Out of the hundreds of people I did work for zero of them were able to prep and strip the parts properly. Some better than others, most just gave up and sent them half done. I comment this because I see that you also have to do final touch ups on the parts you are receiving too. Your final output of quality looks very nice. Great job. :thumbsup:
Thanks for your comments. I've had the pleasure to work with a good number of you with your projects.
Electrathon. My Dad took me took a car show in 1986 and I remember him (40 at the time) saying, "Son, see those grind marks in the chrome?" I've never forgotten the level of attention some people pay to detail work. Not like I have a firm grasp on it, but I certainly orient my work towards the top 1%. I'd rather lose money/time on a project than have it go out even slightly incomplete. These relationships we build with people we looked up to is critical to maintaining our hobby. I've seen so many here maintain the standard.
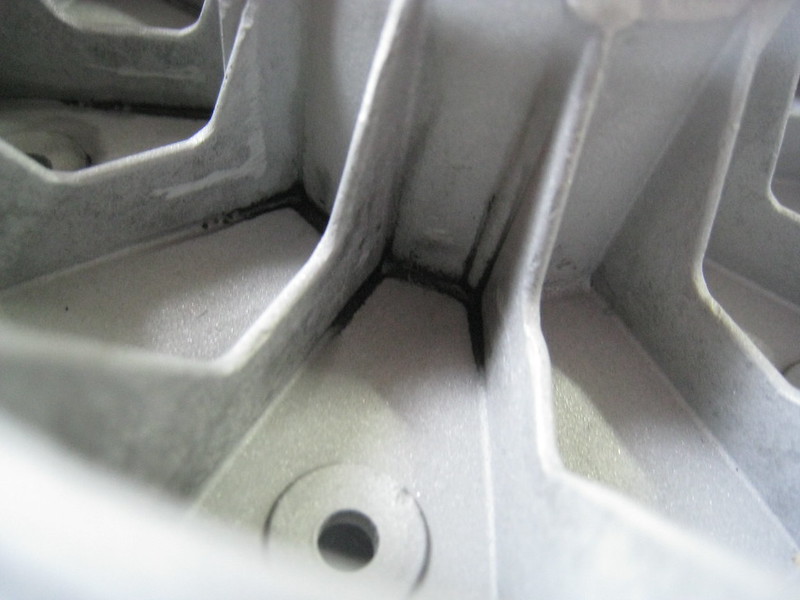
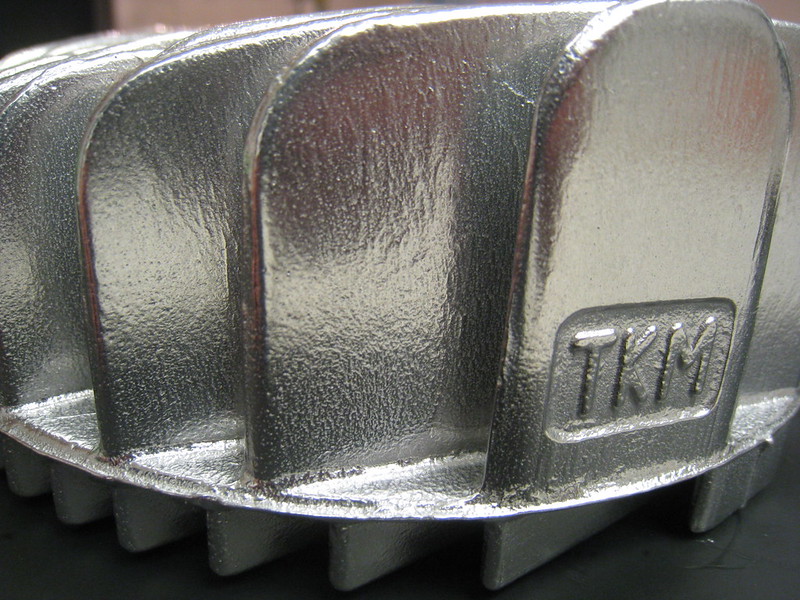
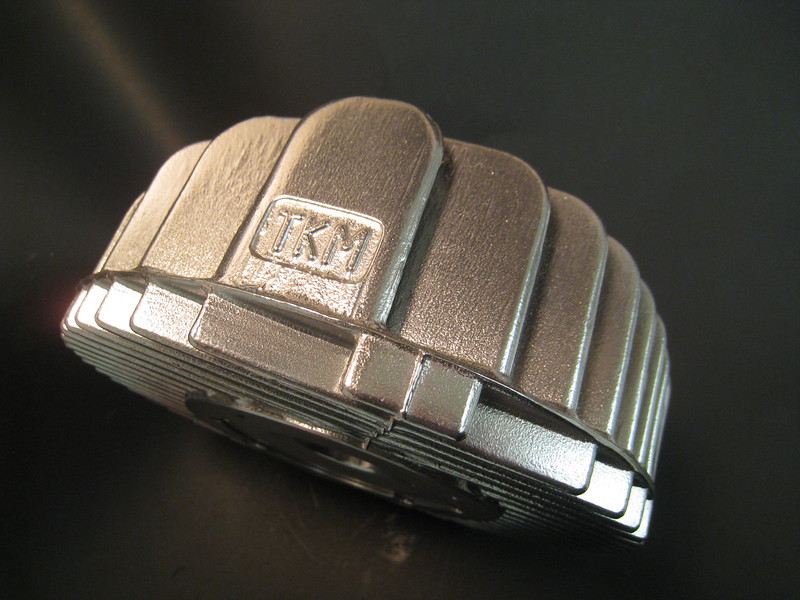
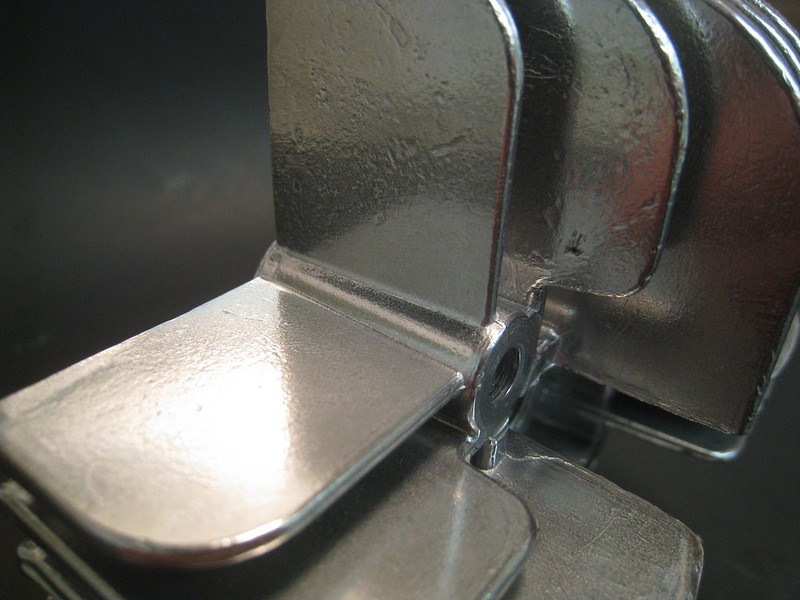
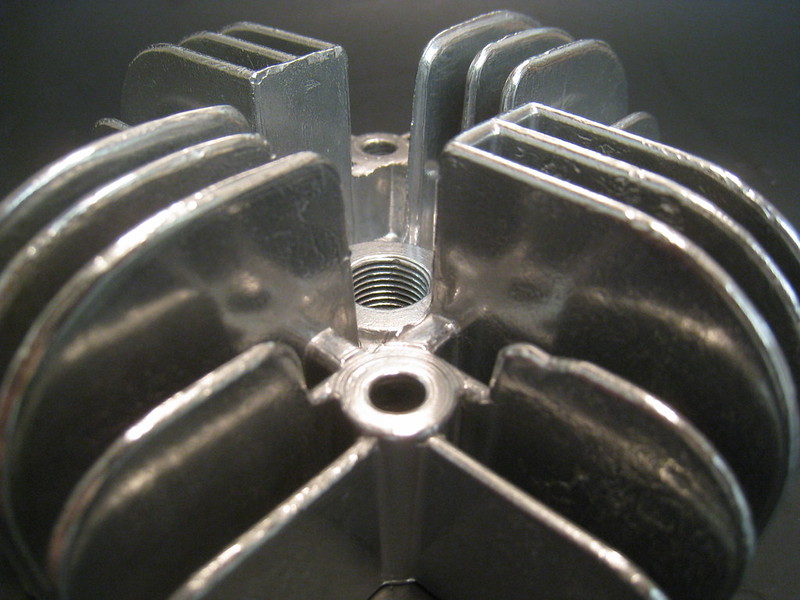
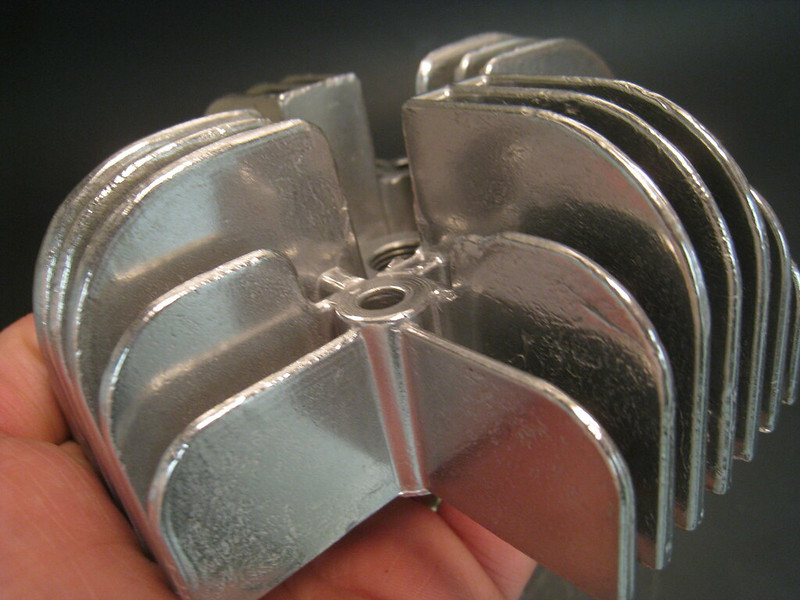
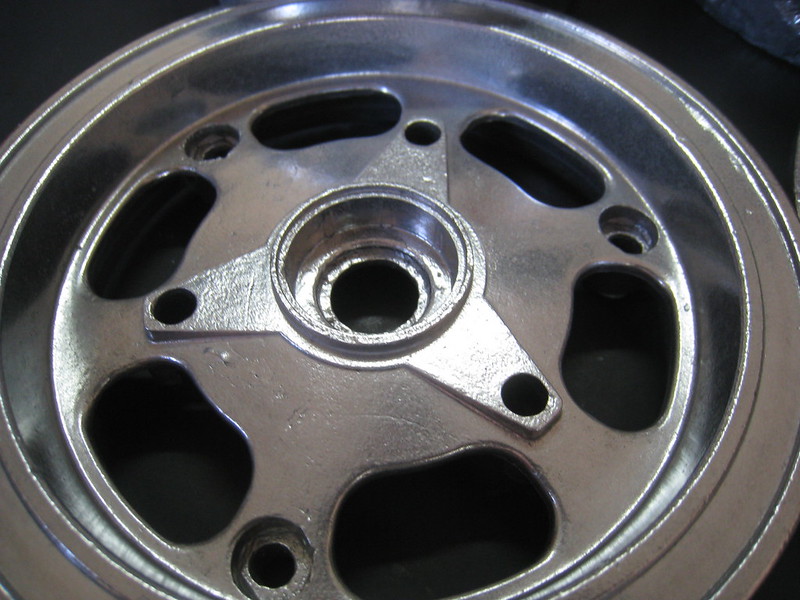
Here is more aluminum "close-ups" we like to see. This was a black anodized TKM head which was reversed into a clean burnish.
Electrathon. My Dad took me took a car show in 1986 and I remember him (40 at the time) saying, "Son, see those grind marks in the chrome?" I've never forgotten the level of attention some people pay to detail work. Not like I have a firm grasp on it, but I certainly orient my work towards the top 1%. I'd rather lose money/time on a project than have it go out even slightly incomplete. These relationships we build with people we looked up to is critical to maintaining our hobby. I've seen so many here maintain the standard.
Here is more aluminum "close-ups" we like to see. This was a black anodized TKM head which was reversed into a clean burnish.
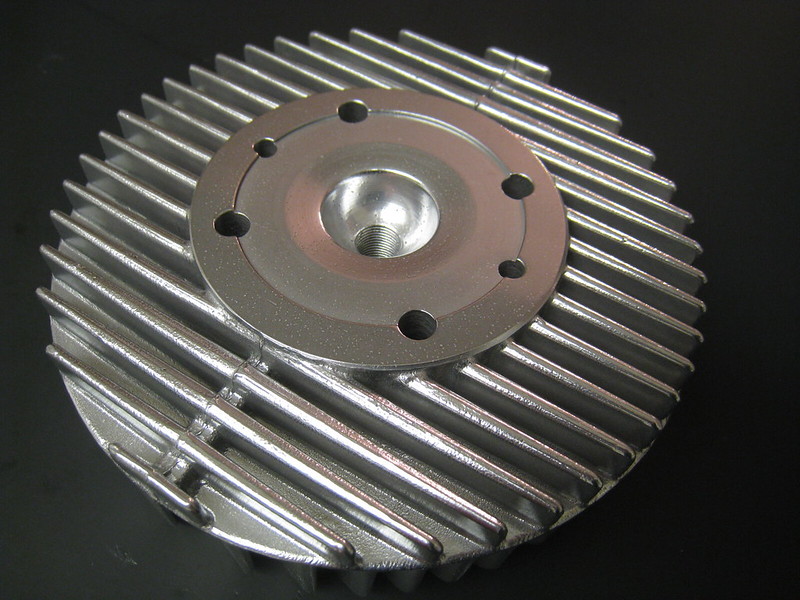
Maverick1 came over yesterday and dropped off a head for me to burnish up. It's great having a neighbor who's also a minibike guy and restorer.
He said, "no hurry take and your time." O.k. I waited 24hrs and that's about as long as I could take.
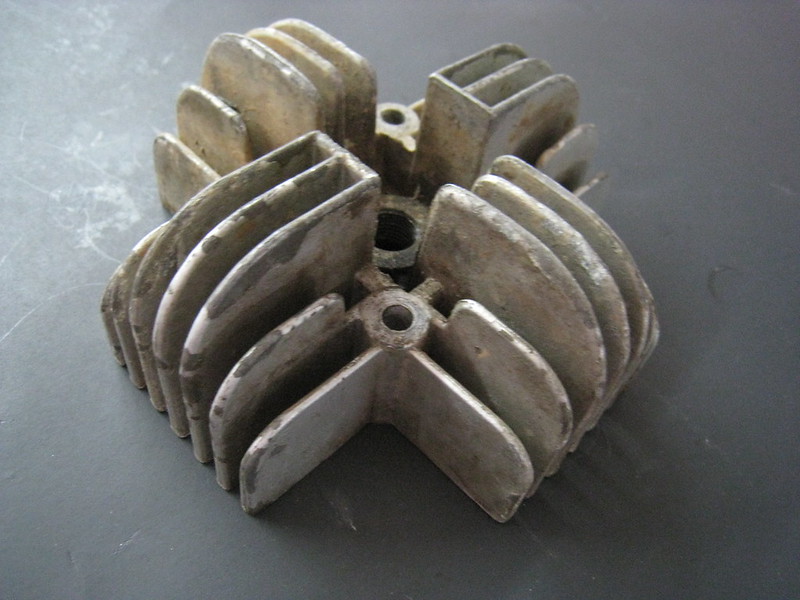
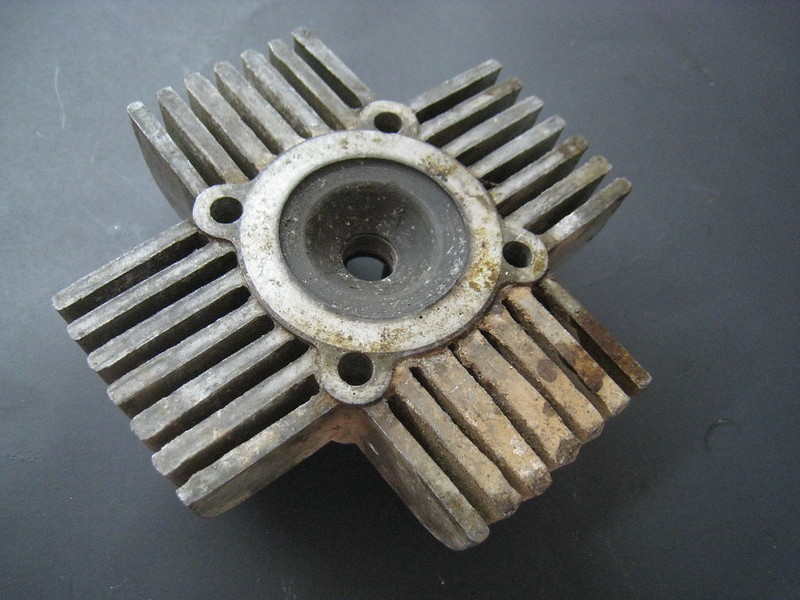
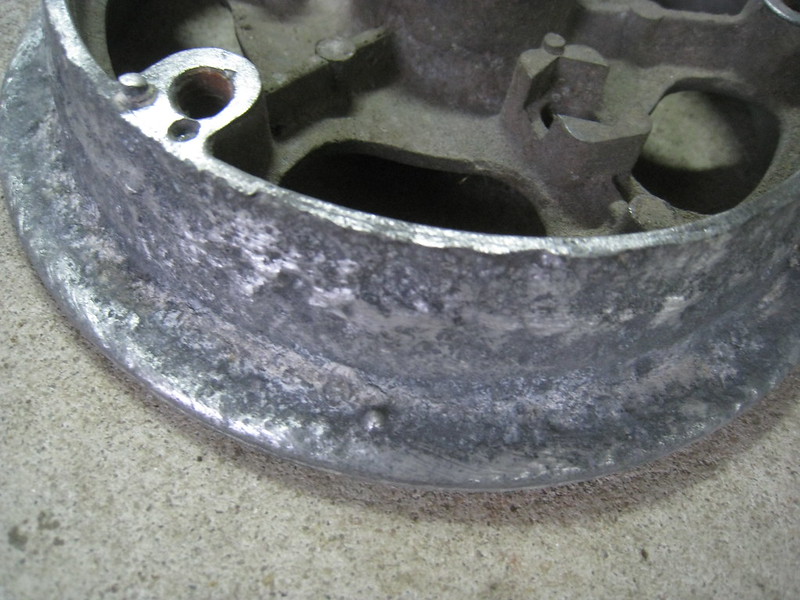
Old silver paint, dirt, carbon, light corrosion.. yes.
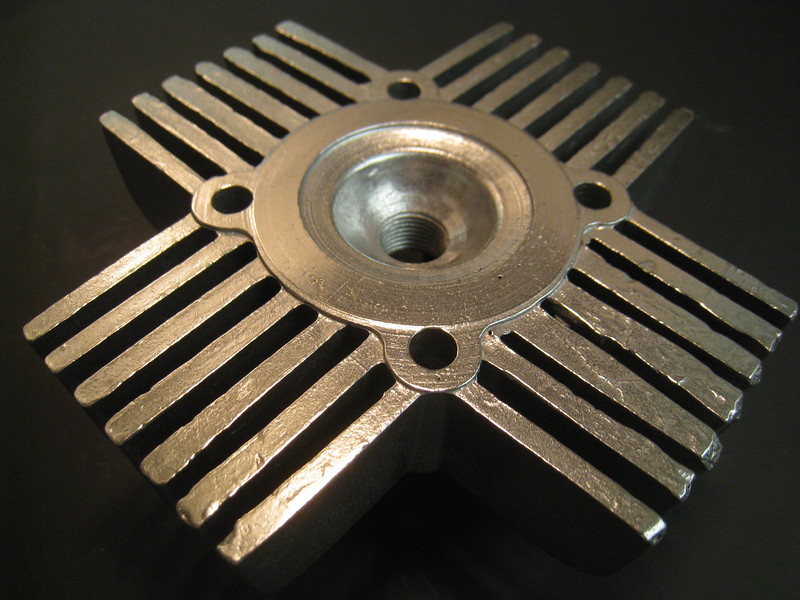
After blast and burnish. Thanks Mav. We will do some more of these!
He said, "no hurry take and your time." O.k. I waited 24hrs and that's about as long as I could take.
Old silver paint, dirt, carbon, light corrosion.. yes.
After blast and burnish. Thanks Mav. We will do some more of these!
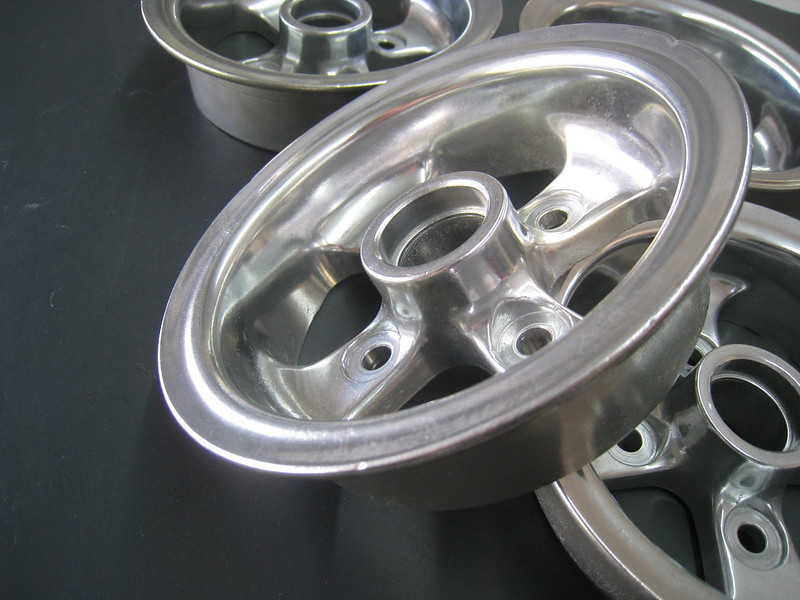
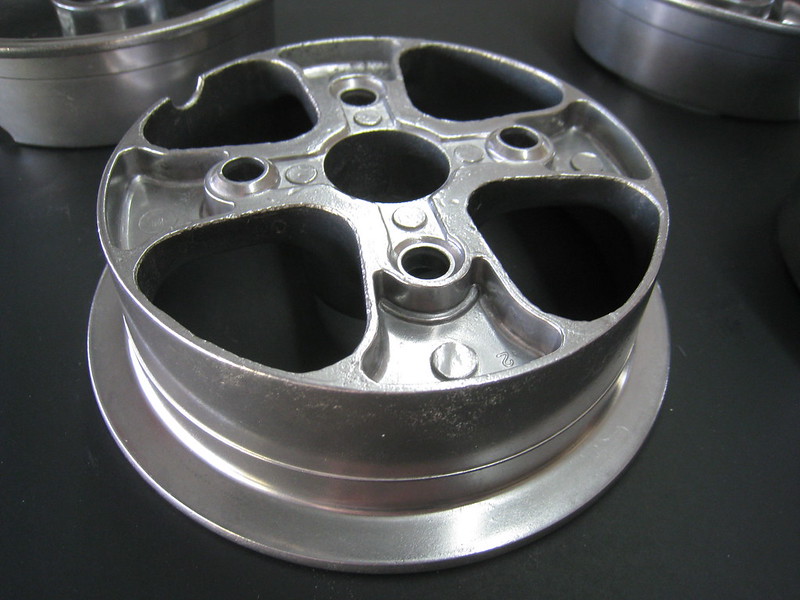
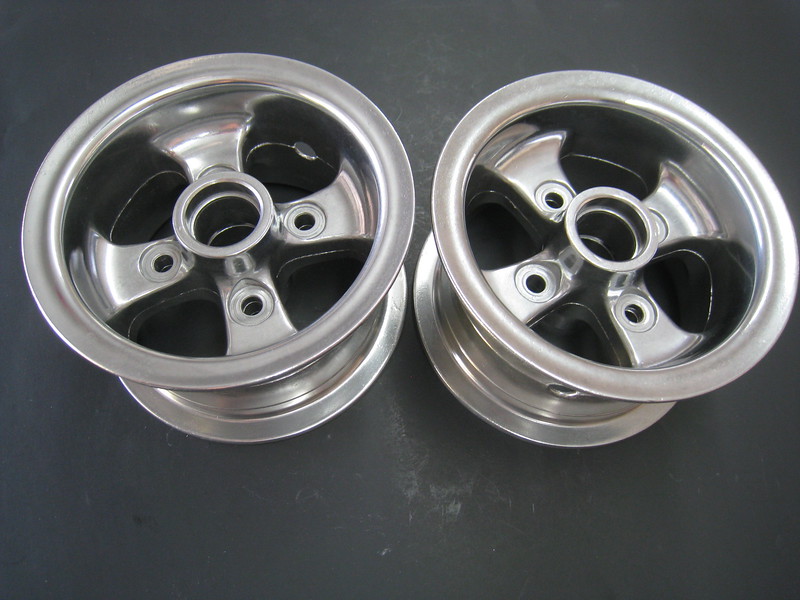
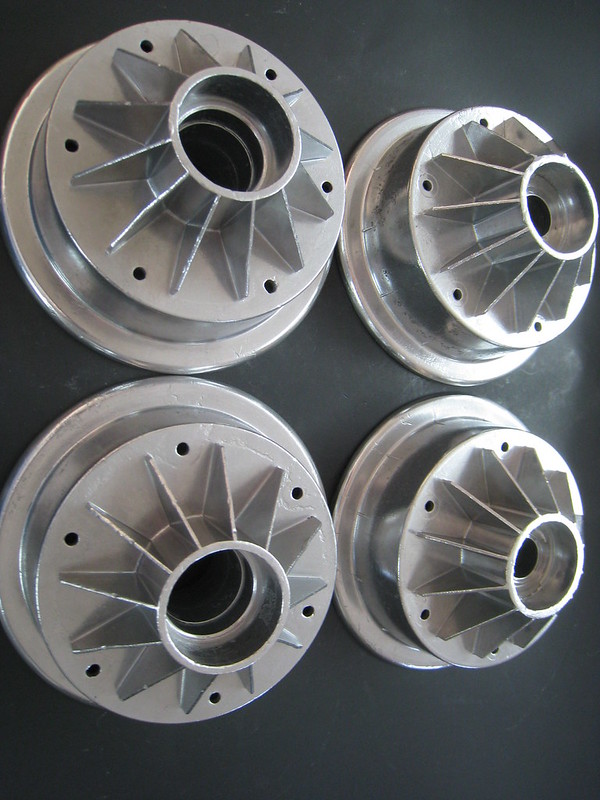
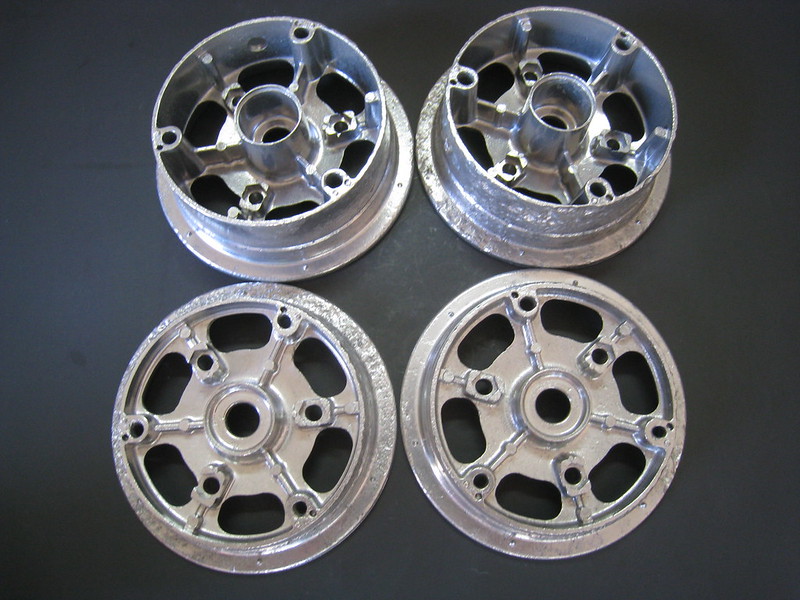
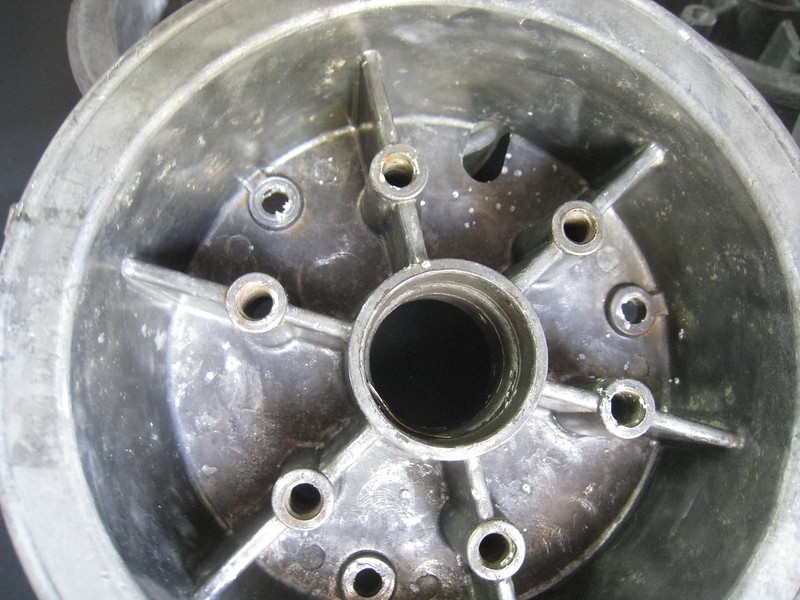
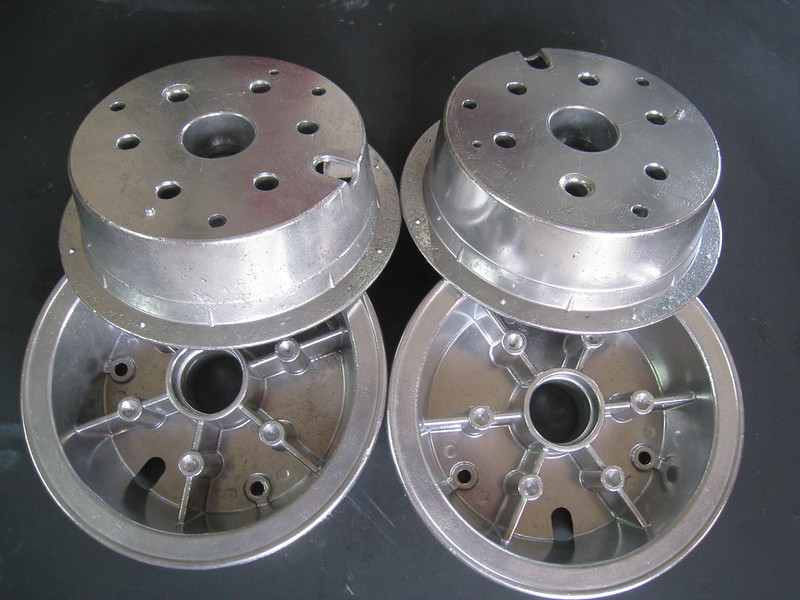
dragracertpp sent me some Bonanzas to give them a second lease on life. Thanks dragracertpp!
They had some pretty serious corrosion. I charge a little extra for blasting and pressing out bearings.
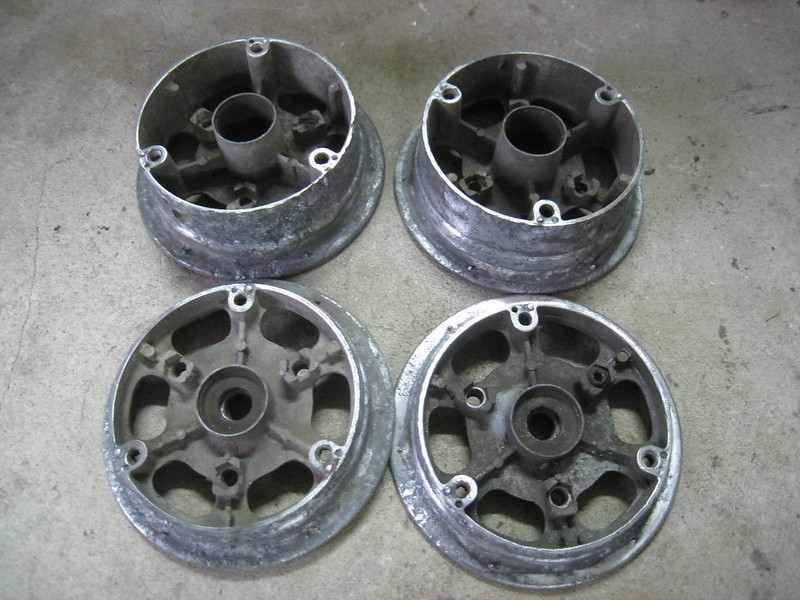
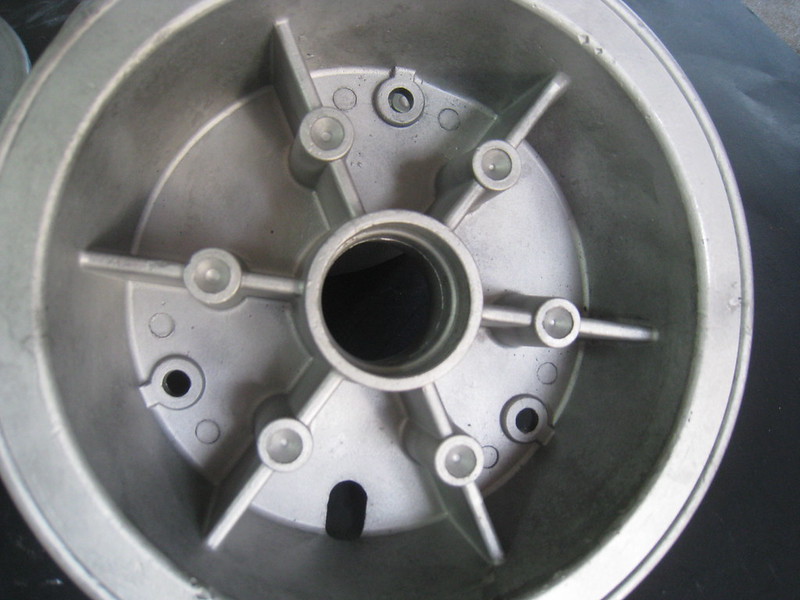
After blasting
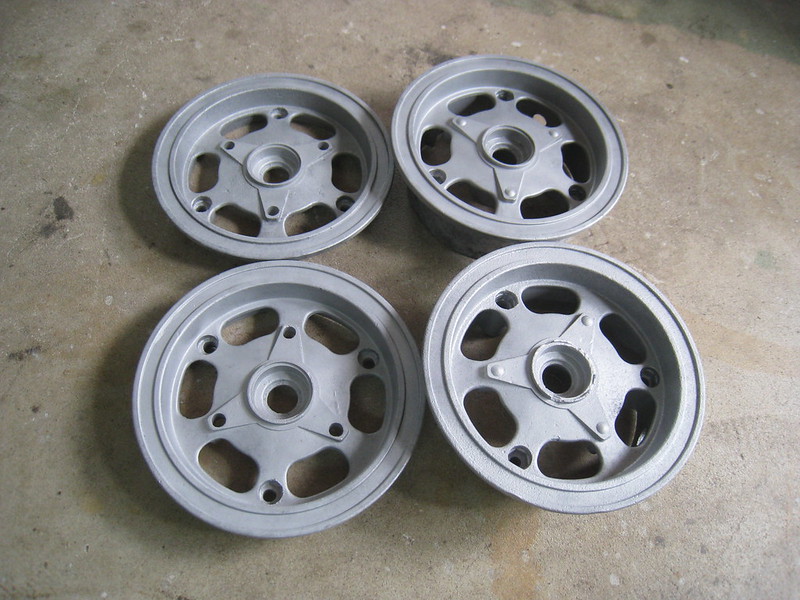
After burnishing!
They had some pretty serious corrosion. I charge a little extra for blasting and pressing out bearings.
After blasting
After burnishing!
Sent from my iPhone using OldMiniBikes mobile app powered by Tapatalk
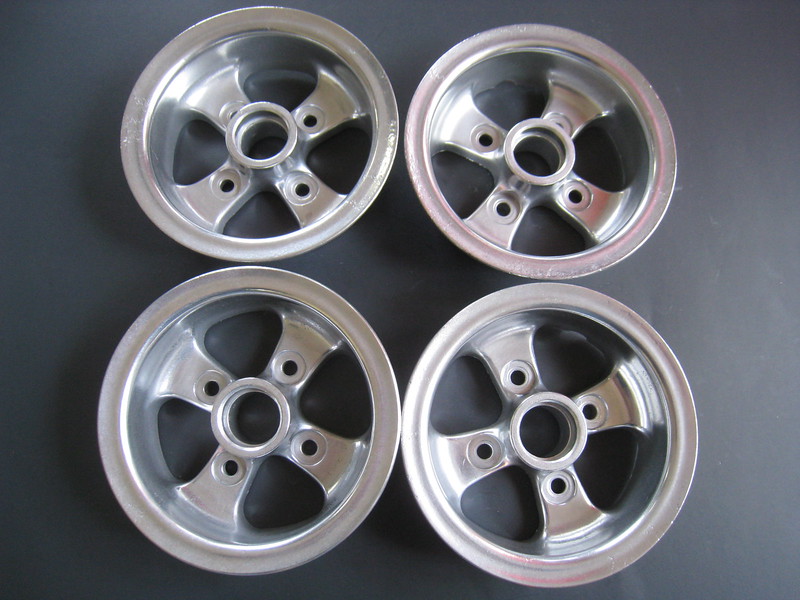
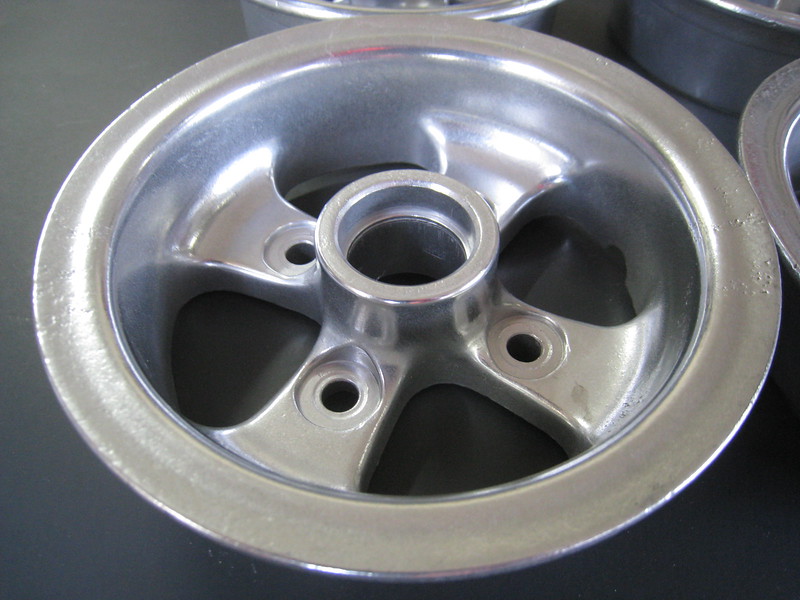
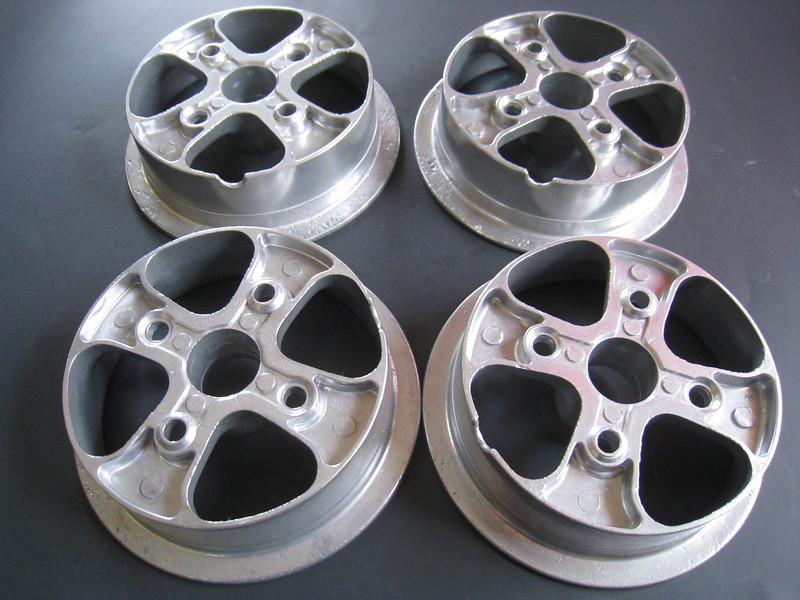
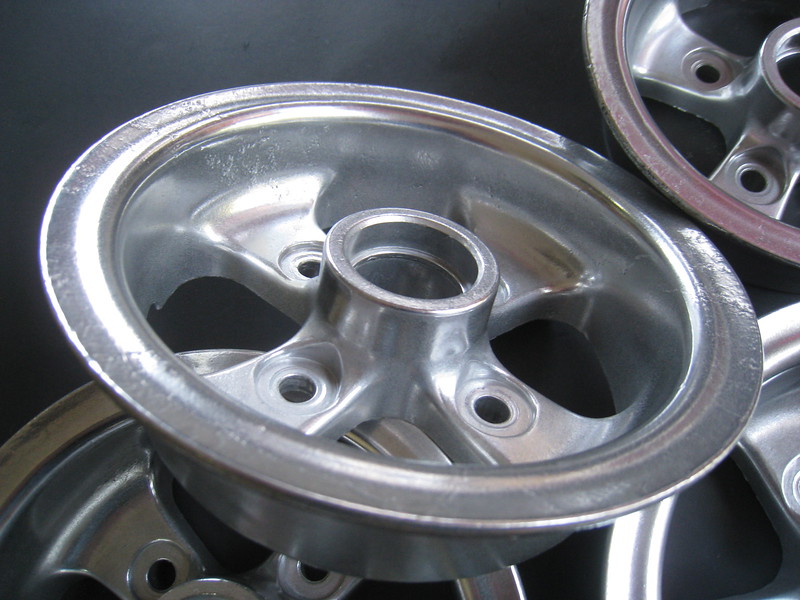
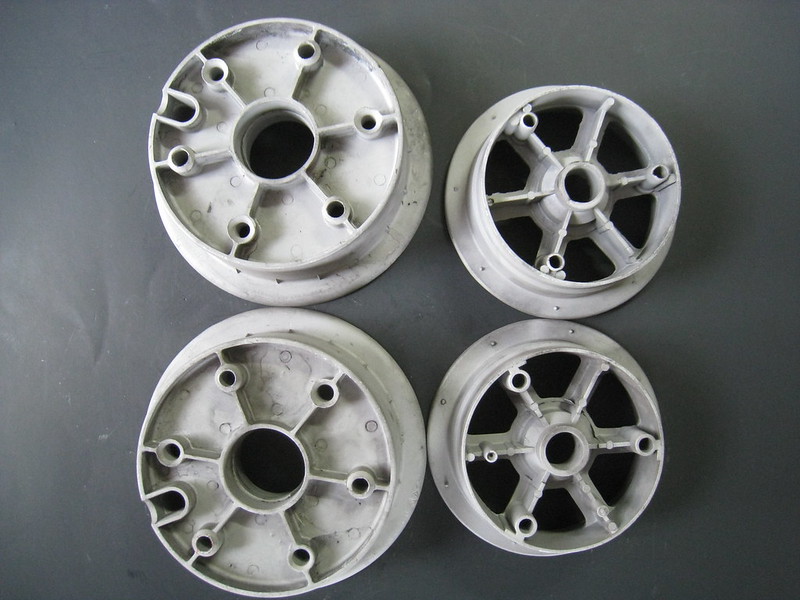
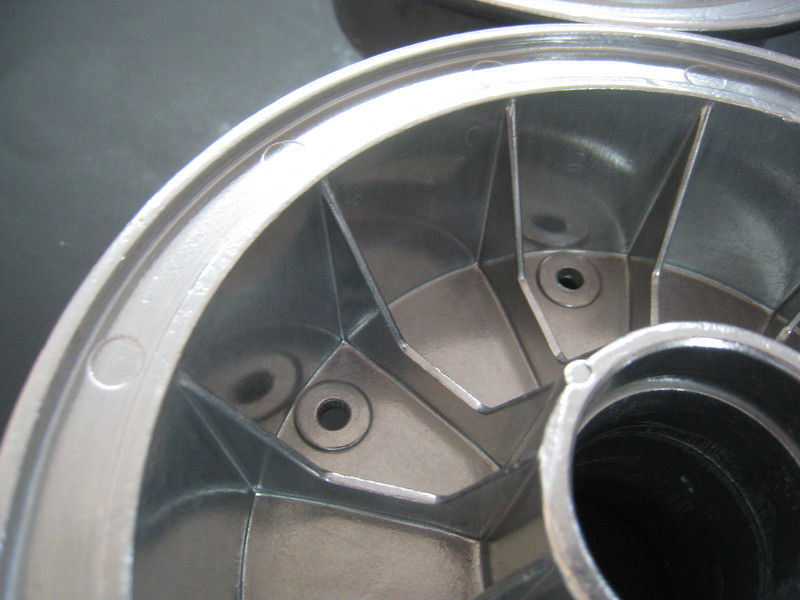
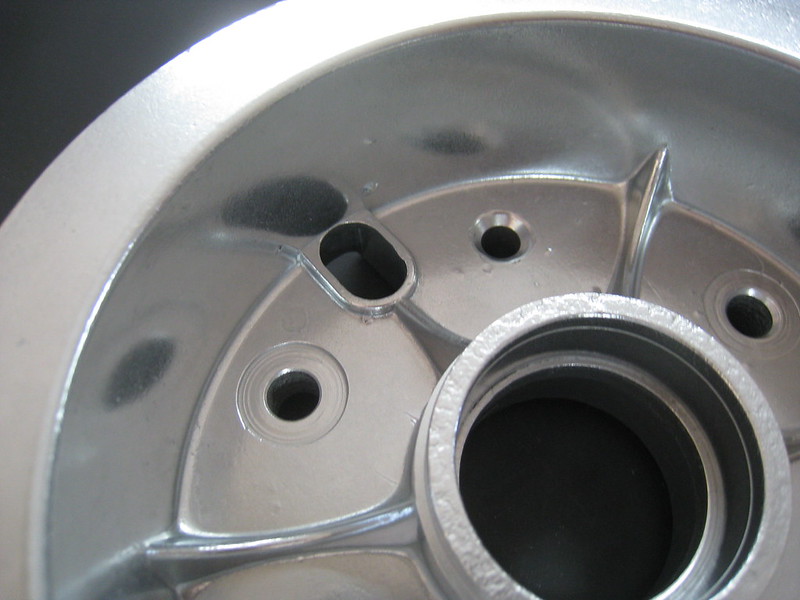
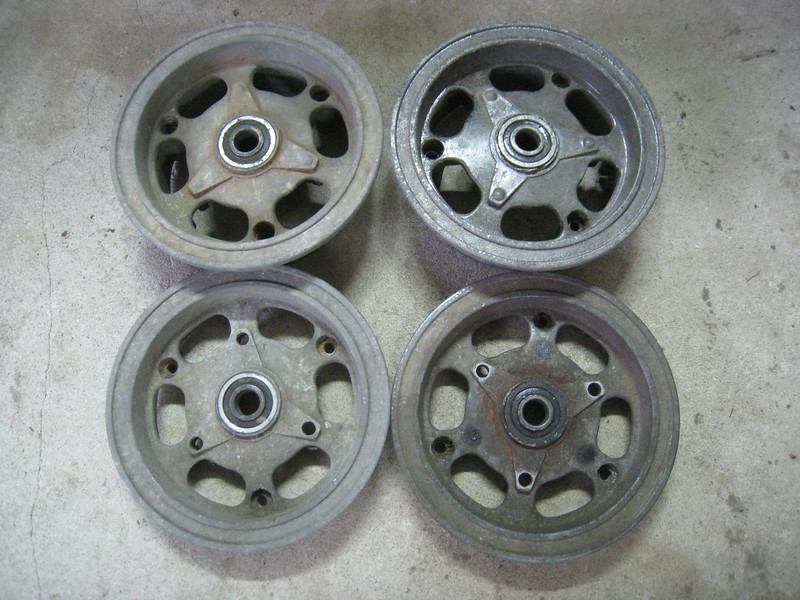
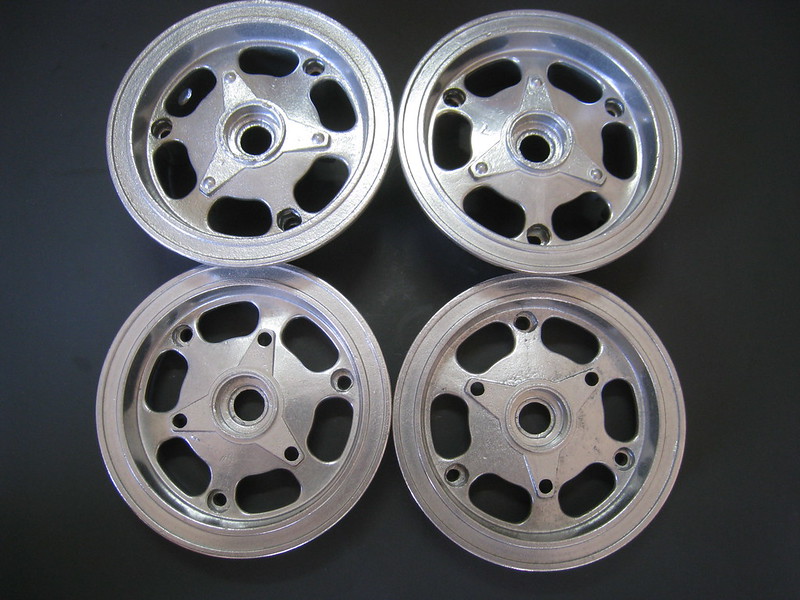
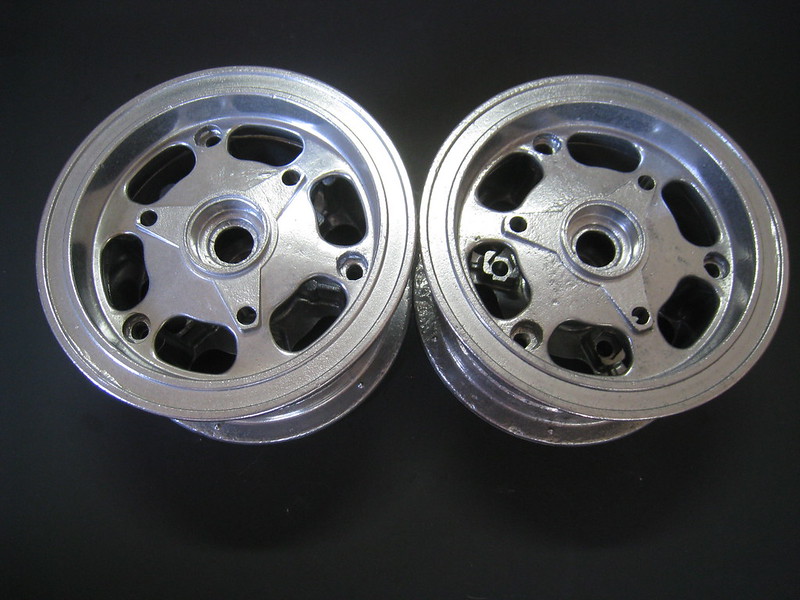
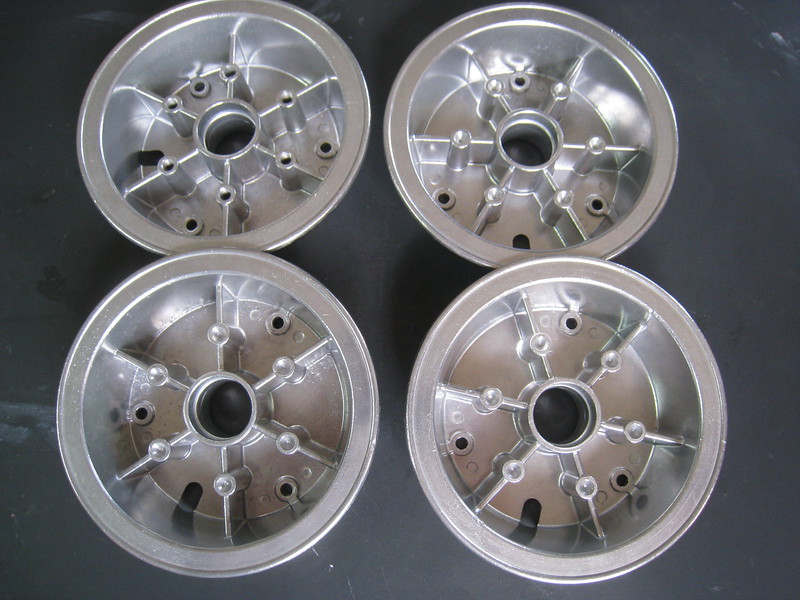
Roadrunner lives nearby and brought by some wheels for his restoration project. The condition was pretty typical with light corrosion. After blasting off the old oxide layer and getting down to some fresh aluminum they went in for about 1.5hrs. Thanks Roadrunner. See you soon!
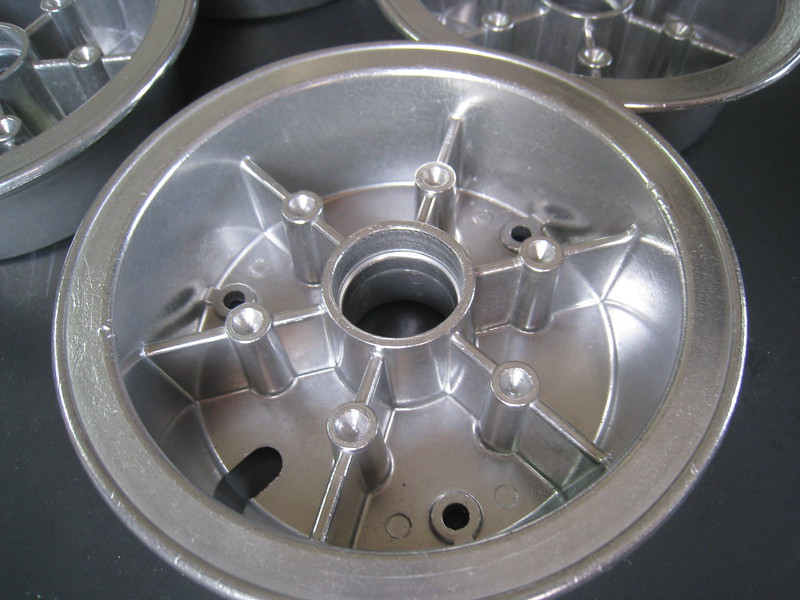
After blasting
After Burnishing
After blasting
After Burnishing