"Gangsta" CAT350SS

#1
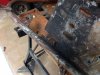
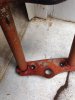
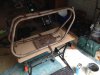
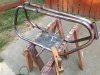
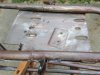
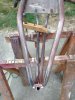
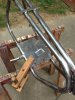
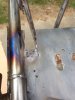
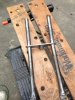
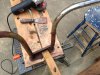
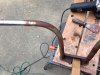
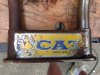
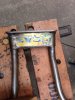
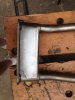
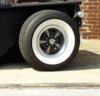
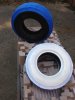
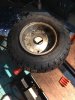
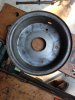
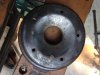
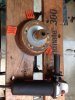
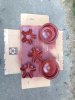
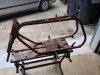
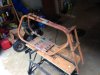
After a busy summer rebuilding the deck and a trip to Florida to try to convince the 90-something in-laws to accept in home help (NOT!), it's time to play again. Picked up a 1970 350SS from Gangster Choppers in Richmond over the weekend for $75. Came with solid wheels with perfect stars, handlebars, kick stand and small console. As always, no fenders, clutch guard or disc brake. Here is the CAT in as is condition:
 

Attachments

#2
Assessing the work...

So, the bike has issues from the get go. The front fork needs to be straightened and re-welded and the fork bolt was rusted solid. The engine plate has three extra holes and the notch for the chain was hacked open and needs to be closed up to proper size. PB Blaster and heat on the bolt got the front fork off (had a nice little torchiere fire going in the spring cup) so I set it aside for now (I have another fork from Furball that is in better shape and should fit).
 

Attachments

#3
A little stripping...A little planning....

Not going hog wild today on prepping the bike. Was able to get the orange, the red and green below and most of the silver off with Aircraft Stripper. Need a couple of good wire wheels for the angle grinder to finish it up before it goes to the welder for patching up (I know, I need to get my own welder).

Since I've amassed a mountain of parts in the garage over the past few months, this will be a bit of a Franken-bike. I've got four Briggs engines to choose from plus a 6hp Honda GC190 or an OHV Tecumseh, so we're not going for the original look. This'll be a fun little bike to mess with. I'll do my signature paint job on the wheels, mod a STENS disc brake assembly and maybe do whitewall tires. The color is up in the air for now....
 

Attachments

#6
Glad to see you back at it.:thumbsup: I thought you lost interest after Windber.:laugh:
Naw, just had too much to get done this summer. Since I last posted I added a Ruttman roller to the to do list and have been gathering parts for the Wards 525 that is waiting in the wings. I think my buddy lost interest in minis after the mudfest, but I enjoyed it!
 
#7
Stripping and Wheelin'

Gangsta Cat is going to take a little bit longer as it has issues as do I--I blew another disk fragment onto a nerve, so standing, walking and getting into contortions working on something isn't the most pleasurable experience. That being said, I got some work done on the bike before I had to stop for the day. Finished stripping the main frame and hit it with a new wire wheel. Picked out most of the paint in hard to get areas.
 

Attachments

#8
Grumbling at the stupidity of people...

Rather than make a new chain guide/tensioner or find a new one, a previous abuser had simply hacked and bent the motor plate to accommodate the chain. I was able to heat up the plate just enough with a propane torch to bend the notch back in place. Then I started stripping the fork. The upper triple-tree, it seems, had been tightened down so tight that the weld broke on the right fork post. I thought about having it repaired and realized that it would be more expensive to patch and re-weld than it would be to cut off the old tree and order a new one off of e-bay. So, I cut off the triple tree and squared it up. There's enough room with the spring assembly, that a slightly shorter set of forks shouldn't pose problems.
 

Attachments

#9
Cleaning up the handlebars

The handlebars had a lot of surface rust on them, but the chrome underneath isn't so bad after 45 years. I removed the CAT 350SS decal and started cleaning them up. It'll take a couple of hours of elbow grease, coke and aluminum foil to get them back in presentable shape. So that's it for the day, ordered parts from OldMiniBikes today and still need to get the disk brake assembly and figure out a color scheme. The color will drive what I do with the seat. Next posts will be tinkering with wheels, tires and figuring out which engine to use.
 

Attachments

#12
Settled on a look for wheels and tires

A google search of Rat Rods led me to this shot of a rim and tire combo. It pains me that I won't bring out the chrome behind the black on the stars, but this look should be really awesome. Going to use a Nissan Metallic Gray on the stars, flat black for the inner wheel and more Nissan Gray on the outer bead edge.
 

Attachments

#13
A little history on Gangster Choppers...

There are so many "pop-up" shops that claim to be custom chopper builders, so I thought this place was just another one of them. Turns out I was wrong. John Dodson, proprietor of Gangster Choppers, has been building customs for a long time and has been featured in several magazines for his work. His first bike was a JC Penny mini! Below are links that you might find interesting; one is to the shop and another is to a blog interview with John.

Interview: The Many Thoughts of HarleyGirl: An Interview with John Dodson, Owner of Gangster Choppers

Web page: Gangster Choppers

You never know what you'll find or whom you'll meet in the never ending quest for the ultimate mini bike!
 

Attachments

#15
White Walls!

I never woulda thought that I would do whitewalls, and I'm still a little unsure if I like the idea completely. I had a set of Carlisle 4.10-3.50 x 6 tires from the Treasure Trove that had a bit of road rash but were certainly usable and only cost me five bucks. So I masked them up and using the mold line on the tire, laid out the perimeter. If they don't look right in the end, then I can toss 'em and put a good set of blackwalls on the bike. If you do this, know that the paint is going to yellow a bit as it dries. I used satin white, and it sucked up some of the juice from the rubber. Now I know why "real" whitewalls yellow so quickly.
 

Attachments

Last edited:
#16
Cuttiin' a tire...

Like the CAT rear wheel assembly I have in my stash, the rear tire was rusted solid to one of the rims (Both tires are dry rotted). I soaked it for an hour with PB Blaster, drilled holes through the tire to stick a screwdriver through to break the bead, tried cutting the tire with my sawzall and was about to cry, "uncle," when I decided to pull out the Dremel saw. Using a carbide blade, I burned my way around the tire to cut the bulk of the tire off the rim so I could get some leverage...still didn't help. So....I used the carbide blade to cut through the bead. Boing! The rust was very thick on the inside of the rim.
 

Attachments

#17
Rim shots...

The wheels separated pretty easily, even the rear rim split right off and I expected the usual rust on inside of the rim. These wheels, though, are much cleaner than those that are on Furball and Son of Furball. 2 of the 3 stars were in very good shape. I wire-wheeled the rims with the angle grinder to get the chunks off and get ready for primer. The visible side of the rims are in such good shape all I needed to do was hand-sand with 120 grit drywall paper (It's a mesh, so it doesn't clog and gets finer as it's used). I scrubbed the stars with an SOS pad and then sanded off the rust by hand. Got one side of the wheels and stars in primer today.
 

Attachments

Top