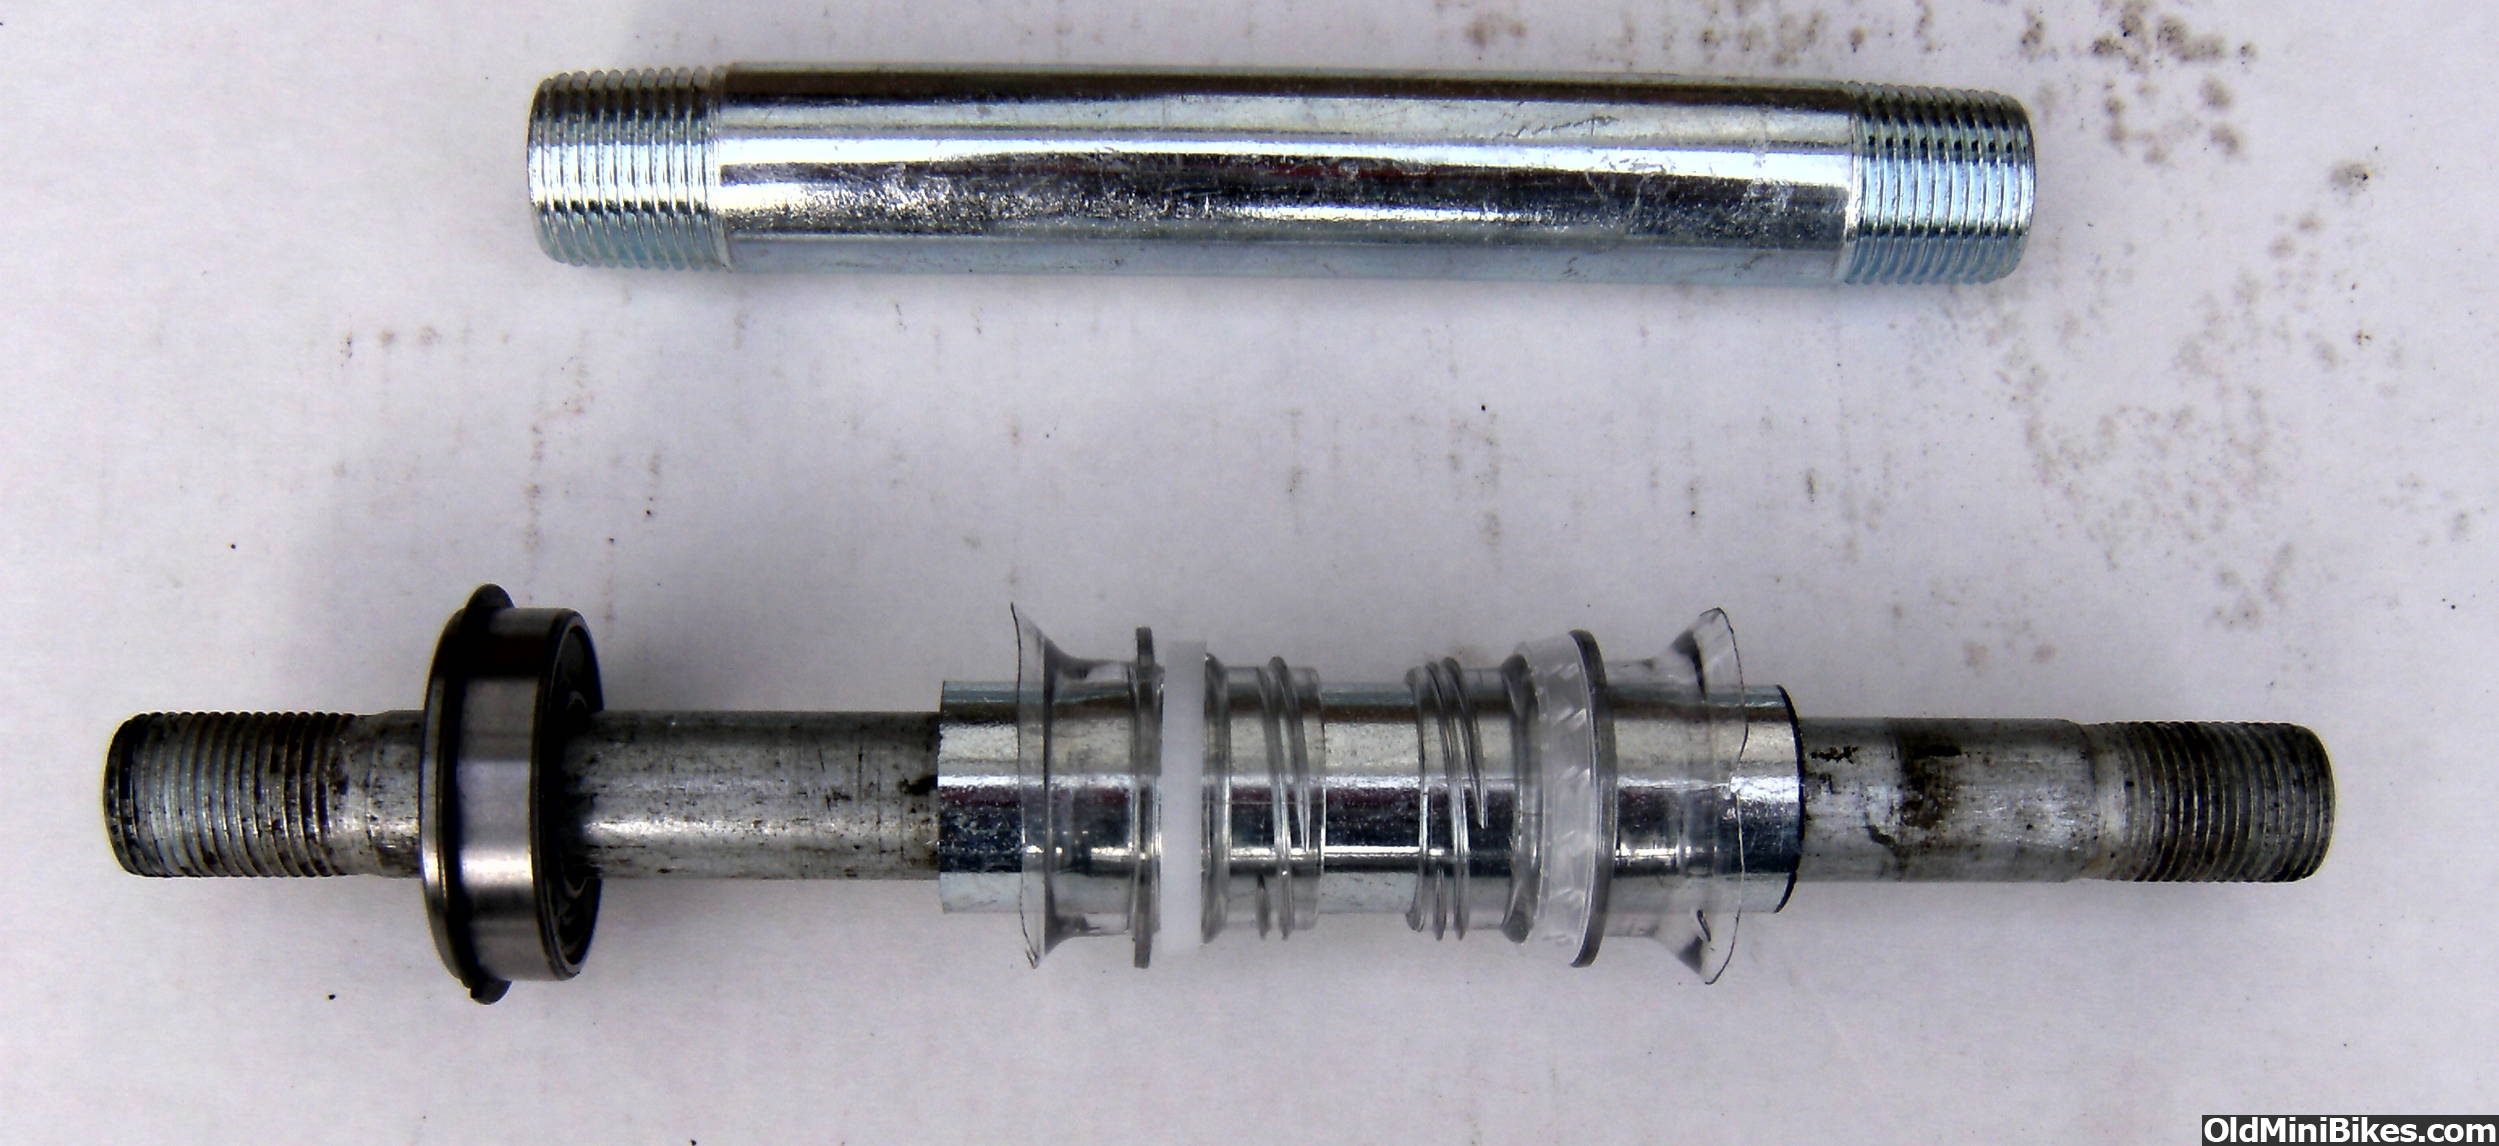
For extended life on wheel bearings I like using a spacer. 3/4" Electrical threaded nipples work great and slide right over the 5/8" Axle. The Electrical threaded pipe has a thinner wall thickness that Plumbing nipples and they make a perfect spacer.
Spacers lock in the inner raceway on the bearings and I usually use a 5/8" x 1/8" thick brass washer on the outer face of the inner raceway between the bearing and the fork to really lock the bearings in place. In other words, fork tube, 5/8 x 1/8" thick brass washer, 5/8" precision snap ring bearing, 3/4" Electrical threaded nipple spacer, 5/8" precision snap ring bearing, 5/8 x 1/8" thick brass washer, and fork tube.
Careful on the outside diameter size of the 5/8" brass washer between the fork tubes and bearings, you want to slightly overlap the inner raceway and no more. If the washers are too large you can lock up the bearings.
I also cut the neck of plastic water bottles to align the 3/4" Electrical threaded nipple spacer inside the wheel hub. Just makes sliding the axle in that much easier.
HPE Muskin CAT Wheel Axle and Spacer