Ever bought a bike just cause it had the original kickstand on it? I have:doah: Ever got excited cause the bike does have the kickstand only to find out its all wore out and flops over and drops the bike? I have :doah:
The kickstand on My ss300 western flyer is like that, and yes the deal breaker for me buying that bike was that it did in fact still have the kickstand on it! the kickstand felt like it worked fine off the bike, I bought the bike in pieces so I didn't know the status of it. I should have totally disassembled it, but like I said I thought it felt ok.
So I put the bike back together on wheels and watched it drop to the floor when the kickstand failed to hold, chipping my fresh paint job:doah:
I took it back off the bike today and took it apart to see if I could fix it. Of course the bright idea to snap some pics came to me about halfway through, but hopefully this may help if you have never had one of these apart.
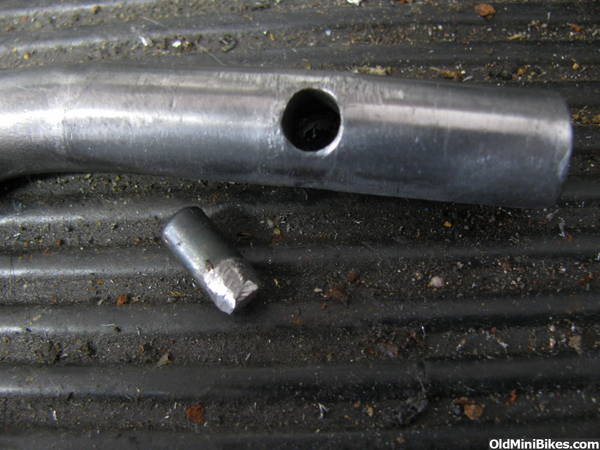
This is the standard style stand that I have found on most mini bikes of the late '60's early '70's. Its not something you can always easily find, and average about $30 and up used at the time of this writing.
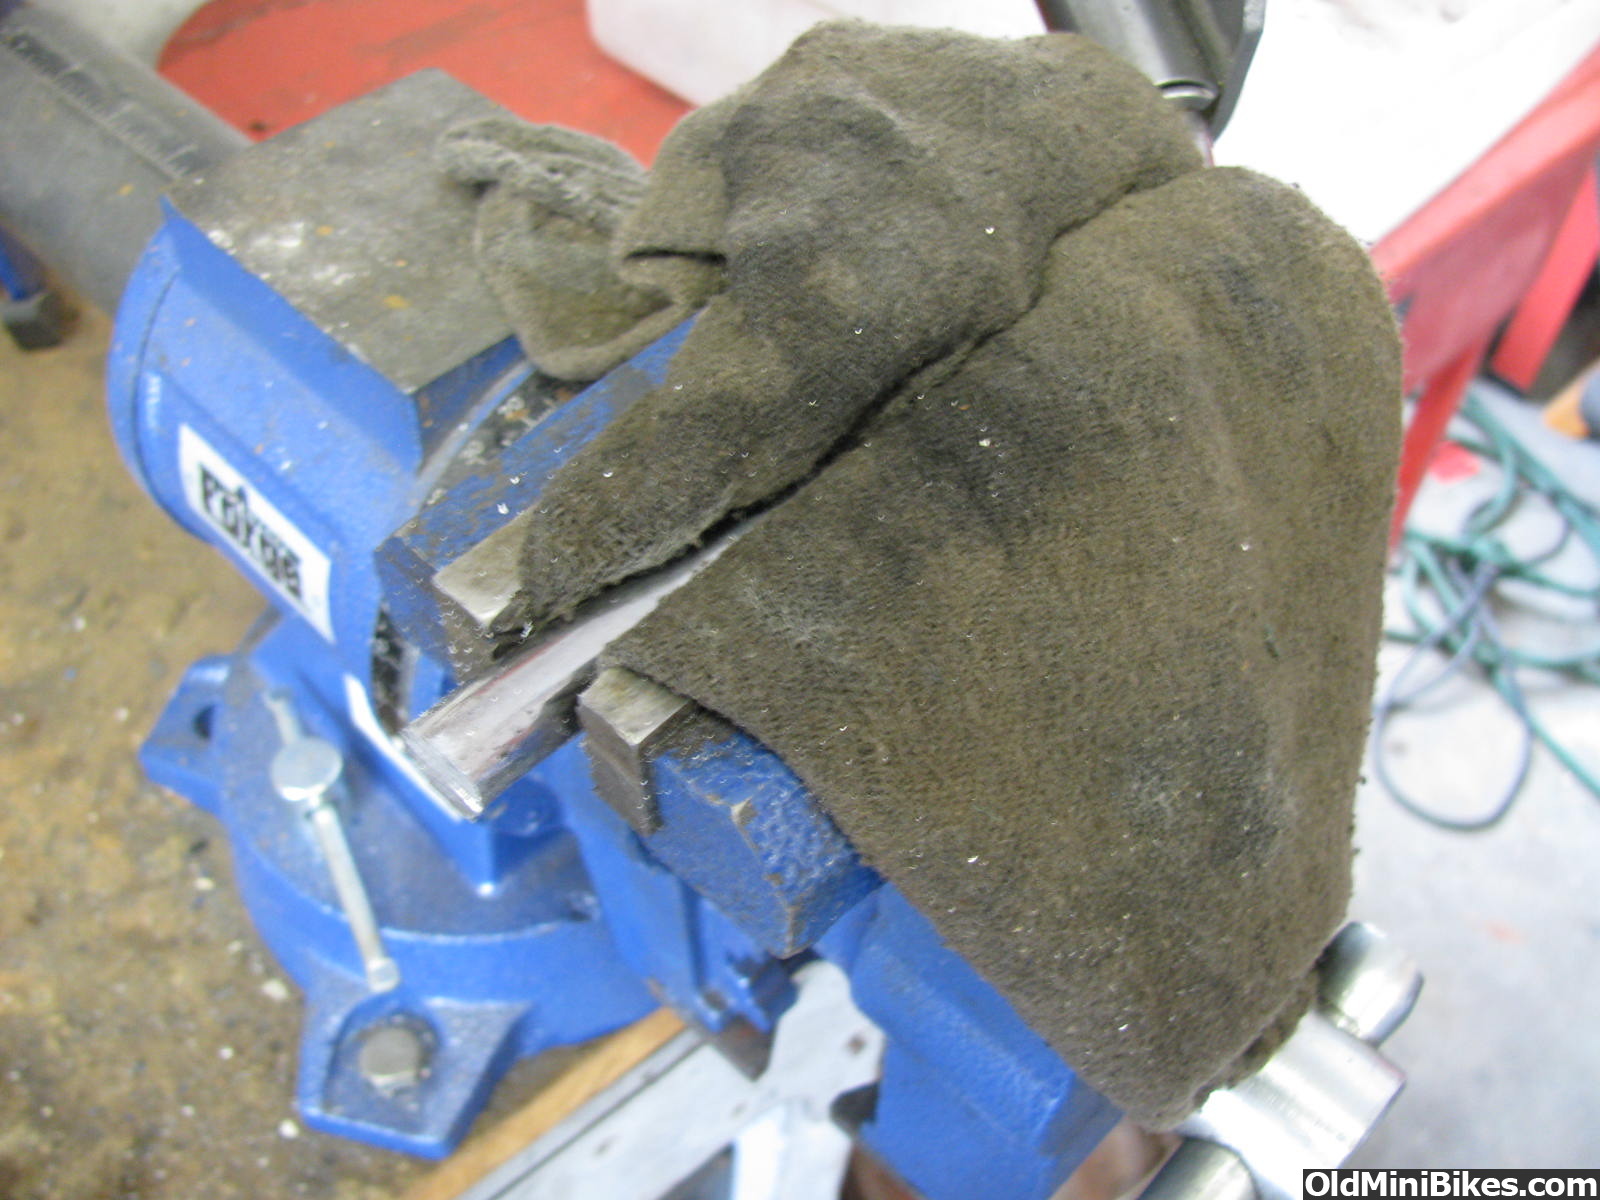
easiest thing I found to do is stick the mount side of the stand in a vise, use a flat drift and tap on the edge of the collar (left side of pic) sliding it off the mount (center of pic). when doing this watch for the long detent pin that locks the stand in upright or full down position as it will fall out. Pull the small lock pin out and the stand will slip out of the mount.
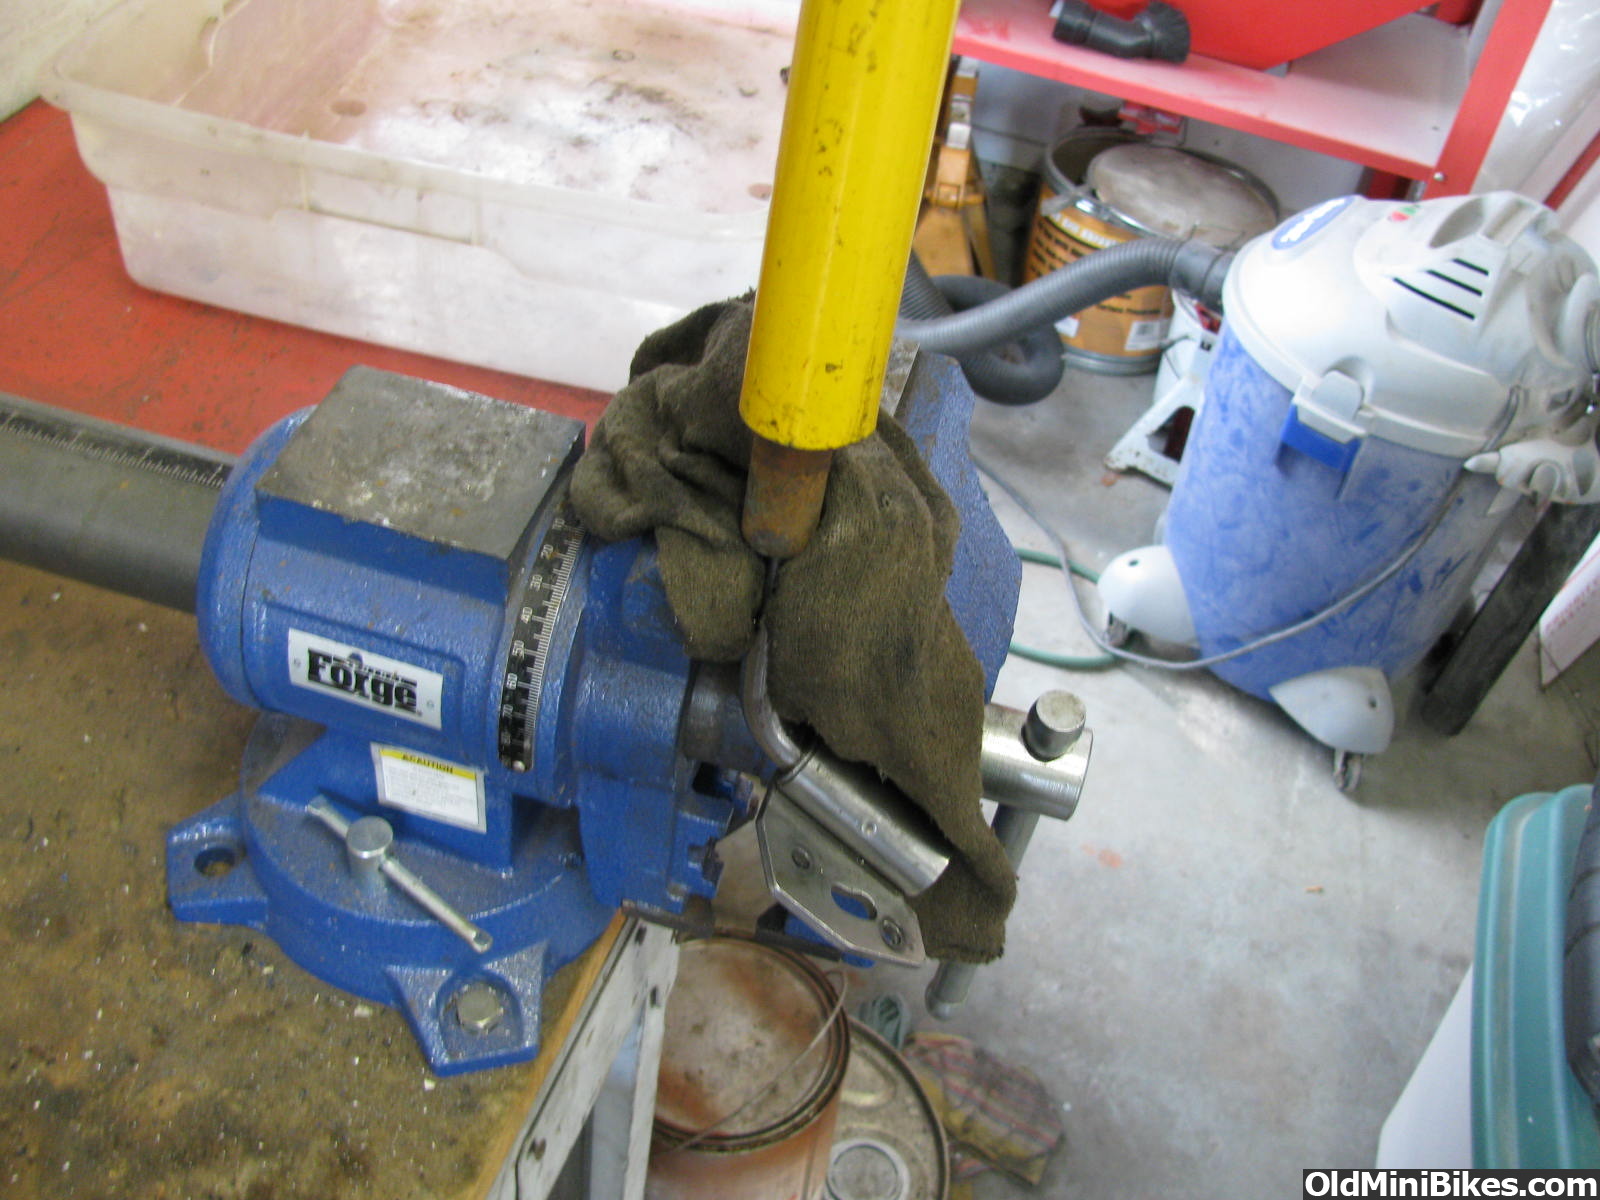
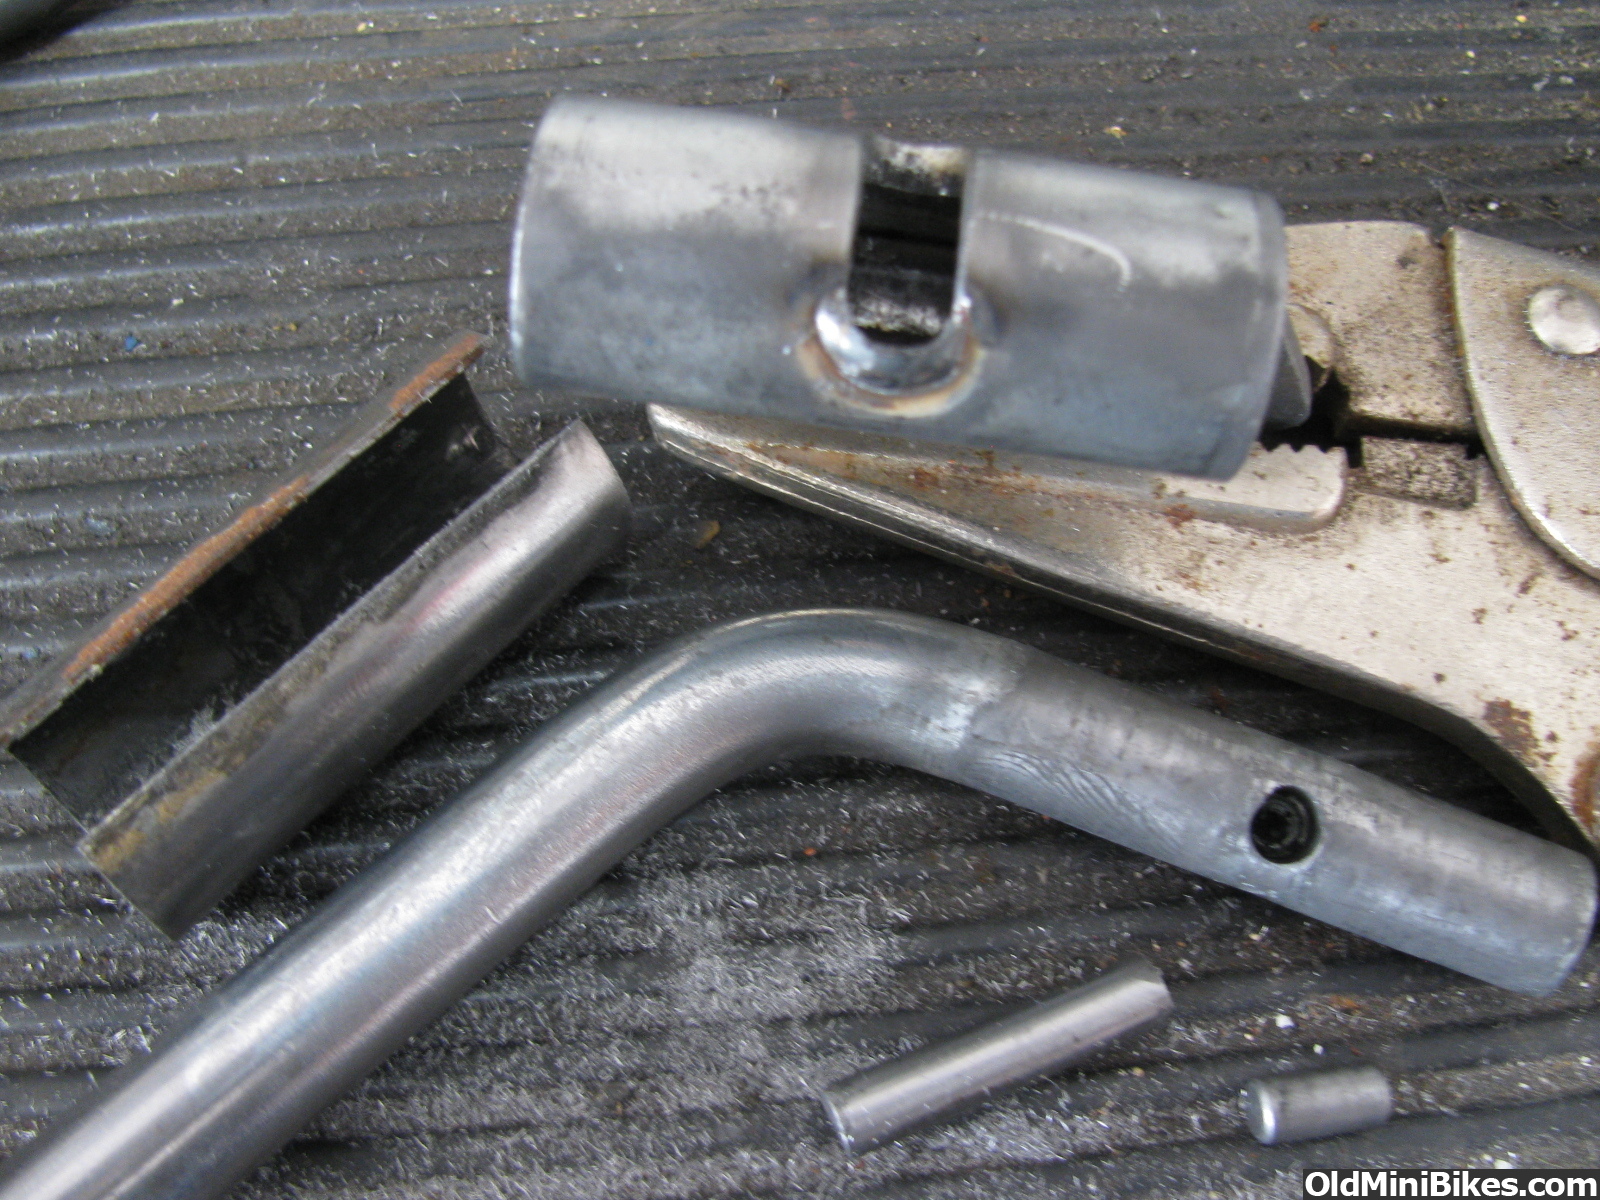
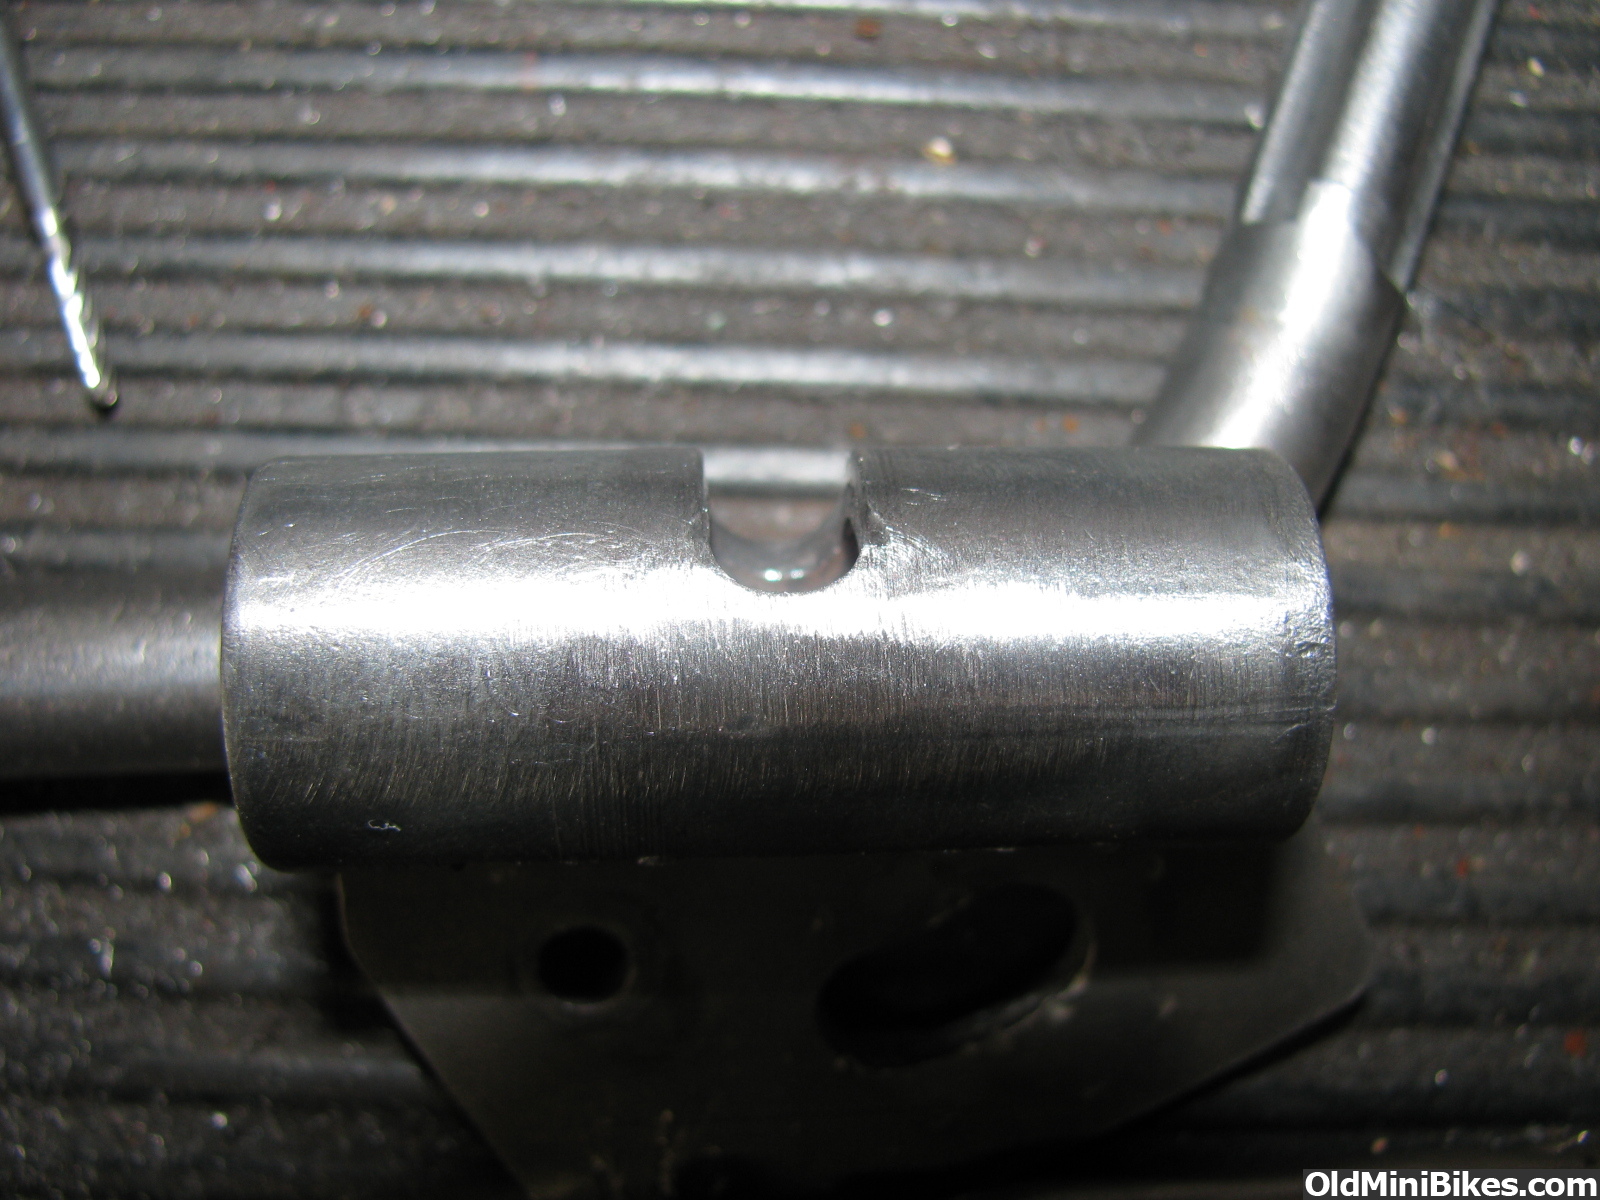
The problem I had was the center pin had wobbled the hole in the stand a little and also wore down on the mount when it is in the down position. It was enough that it would pass the stop point and go farther forward than it should. As you can see from the pic above I welded the wear out of the mount by laying a bead there. Then I used a dremel to work it back down to pretty much the original size.
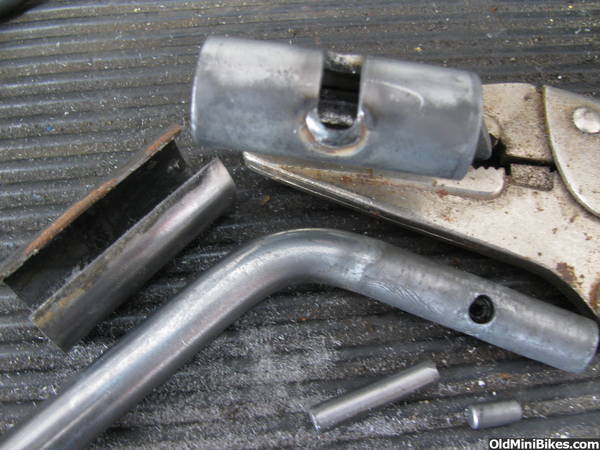
when doing this you have to keep reassembling (less the slip on collar) and checking the fit so you get the detent pin to fit back where it should. After getting it where it needed to be I cleaned and smoothed it all back up:

The other thing I did was drop a little bead on the pin just to give it a touch more length. and then ground it till I got it to fit back in the hole:
That was it, clean everything again real good, I brushed bearing grease in everything and reassembled and thats it. Nothing fancy, nothing anyones ever going to see and took me all of 10 minutes to correct.
The kickstand on My ss300 western flyer is like that, and yes the deal breaker for me buying that bike was that it did in fact still have the kickstand on it! the kickstand felt like it worked fine off the bike, I bought the bike in pieces so I didn't know the status of it. I should have totally disassembled it, but like I said I thought it felt ok.
So I put the bike back together on wheels and watched it drop to the floor when the kickstand failed to hold, chipping my fresh paint job:doah:
I took it back off the bike today and took it apart to see if I could fix it. Of course the bright idea to snap some pics came to me about halfway through, but hopefully this may help if you have never had one of these apart.
This is the standard style stand that I have found on most mini bikes of the late '60's early '70's. Its not something you can always easily find, and average about $30 and up used at the time of this writing.
easiest thing I found to do is stick the mount side of the stand in a vise, use a flat drift and tap on the edge of the collar (left side of pic) sliding it off the mount (center of pic). when doing this watch for the long detent pin that locks the stand in upright or full down position as it will fall out. Pull the small lock pin out and the stand will slip out of the mount.
The problem I had was the center pin had wobbled the hole in the stand a little and also wore down on the mount when it is in the down position. It was enough that it would pass the stop point and go farther forward than it should. As you can see from the pic above I welded the wear out of the mount by laying a bead there. Then I used a dremel to work it back down to pretty much the original size.
when doing this you have to keep reassembling (less the slip on collar) and checking the fit so you get the detent pin to fit back where it should. After getting it where it needed to be I cleaned and smoothed it all back up:
The other thing I did was drop a little bead on the pin just to give it a touch more length. and then ground it till I got it to fit back in the hole:

That was it, clean everything again real good, I brushed bearing grease in everything and reassembled and thats it. Nothing fancy, nothing anyones ever going to see and took me all of 10 minutes to correct.


 hmy:
hmy: