The Firehawk gets a new life

Valocalrep

Active Member
#1
So a few years back we acquired a Firehawk, It was in rough shape and needed a new life. Skip forward 4 years and a bunch of planning back and forth finally i decided to start it and give my self a deadline of before memorial day so we have a 3rd bike for people to ride at our cookout. This frame isnt really ideal for much stuff so ill be trying some things out to see what i think.

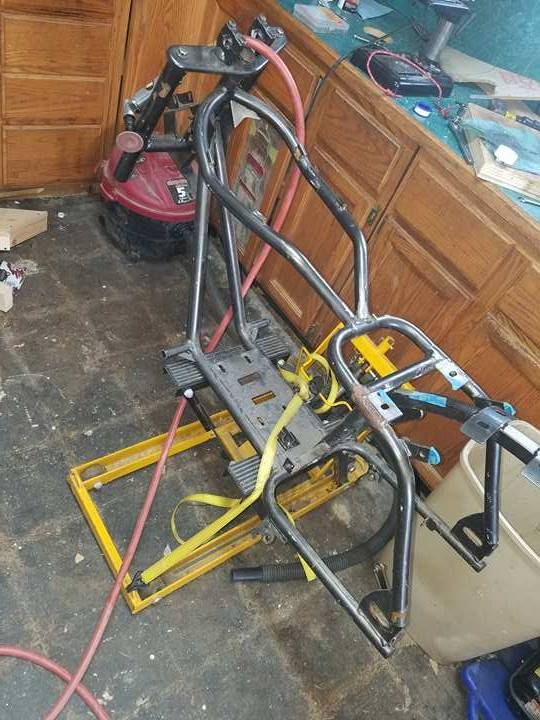
I didnt think far enough ahead to take pictures before i jumped right in. So i started by cutting of the fake tank mount, cable guides, and seat mount just so i had a canvas to mess with. For now i plan to just use the tank on the engine im putting on, i didnt like the cheapo plastic fake tank so i started making a new top plate template. Started with duct tape, then marked it and cut it down then transferred it to card board then to the scrap aluminum plate i had laying around.


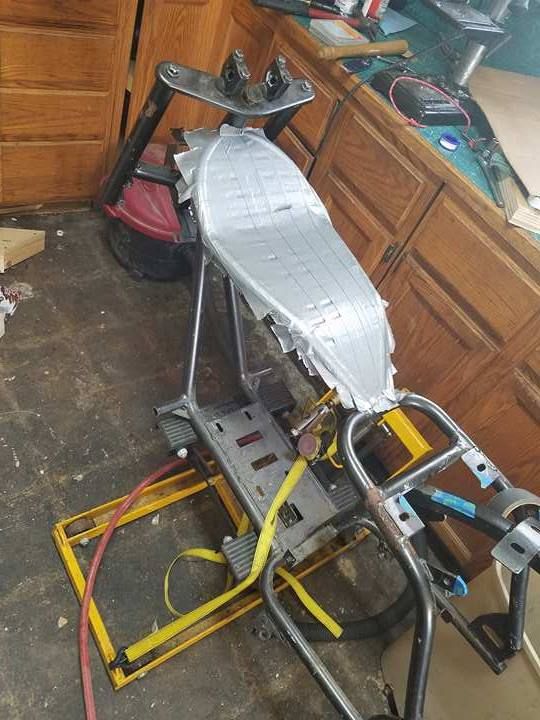
It took a few hours of trimming and bending and bending and trimming but i got it where i wanted it and i like the look. Eventually it will be held in by rivets.
 

Valocalrep

Active Member
#2
Then as i starred at it i decided i needed to work on where i wanna sit my happy butt at because i hate the look of the facorty seat. I took a old bike seat and cut the cover off then beat it flat. After about 2 hour with my hammer i thought i had what i was looking for. I put a slight lip in the rear and bend the front to the shape i wanted and then went for the test fit.

I was happy with it BUTT it wasnt exactly what i had in mind. I took a aluminum cooking tin and mixed a few different templates to get on i like and cut it out for a test fit.

I liked the look and size SOOOOOO i decided to :hack: a old table thing i had up and steal the 14 gauge steel from it and make my own seat template. After the sizing i cut it out and it came out better then i expected.

I still have to clean up the edges some but i like the size and will bend it a little to get the curve i want, I still need to find cheap spring for it before i start doing mount up or anything tho.
 
#4
CT200U-Brake Assembly i have a coleman ct200u..this is what a coleman site drum brake looks like looks like the firehawk does but yours is mounted other side of the tube..maybe fab a mount.you can order parts from here..the site a little weird as far as tracking but people including me have ordered and got the item..freekin third party parts site..but for $10 looks like something you could use..item #13..cheers
 
Last edited:

Valocalrep

Active Member
#7
Got my cable in and finally got some time to set stuff up,

I think the cable is nice and thick and looks great and does the job perfectly.

Next on the chopping block is to get the seat just how i wanted it. I knew about the placement that i wanted it at so it was just going to be some crafting to make it work how i wanted

Took some plate that i had laying around and trimmed it up to just the size i was looking for, fabricated a front hinge system and worked pretty smoothly, Still need to go back and clean the edges up some tho. But im happy with it.

I took 2 Frame shocks from some bikes i had laying around the back yard, I liked the size and look of them so i set them up in there and decided they would look great. Next i had to make 2 sets of shock mount tabs and the underseat rail for it all to bolt in.

So far i think its looking good, This week ill be going back and cleaning up some of the edges and welds then going to light sand the frame and prep for paint, Not going to strip it bare just knock down enough so i know the new flat black paint will stick.
 
#10
Need to find some Carpet pad for the seat, I did pick up a old jacket im going to use for covering the seat with, New tires are on the way. Need to make a clutch guard and possible rear chain guard (we will see). Thanks OND and Raskin i know its not my usual crazy build but im having fun with it
 

Valocalrep

Active Member
#12
Ok everyone i got a bunch done and got it up and running (KINDA) ill do a full update in a little bit when work slows down but im having a issues. The chain is not hitting the clutch when i line everything up, I VERY snugly tighten all the bolts, Chain still doesnt hit the clutch. When i start to ride it as long as i throttle very slow the chain runs fine but the moment i give it any hard throttle or try to accelerate quickly the chain starts to run the clutch and grinds hard. Any suggestions?
 
#13
Are you running straight clutch to sprocket or do you have the jackshaft in place? It should have a jackshaft that would make the chain line up.

Doug
 
#15
Straight clutch to wheel. It lines up pretty spot on
Yes it does if you flip it over. But it should have a jackshaft assembly to add to the gear ratio. Clutch to sprocket is way to high a ratio and will toast the clutch in short order.

In all seriousness your best bet is to put a torque converter on it.

Doug

Jack shaft - https://www.OldMiniBikes.com/mb200-231-baja-oem-jackshaft-assembly.html

Torque Converter - https://www.OldMiniBikes.com/torque-converter-3-4-bore-41-chain.html?category_id=2596
 
#18
Slacked off today and didnt get ovr to take pics but the 5 new ones i have on my phone are from me smoothing out where the stock kill switch was. I ran one to the frame so i didnt need the one on the shroud anymore and i decided it would look better smoothed out.


Its not perfect but looks much better till i get back in there to fill a little more and get it perfect.
Then this picture is from the first "test" ride. Yes i did tighten the chain prior to going around the block a few times. She sits great.

I should be able to get over tomorrow to get more pics and do some work. Fomogo so if i get that Torque Converter i wont have the issue with the chain anymore?
 
Top