"Gangsta" CAT350SS

#62
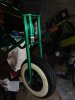
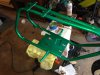
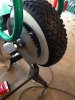
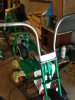
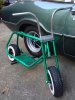
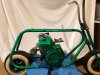
Applying a little color...

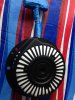
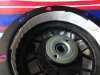
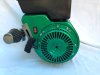
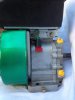
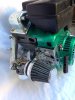
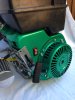
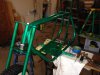
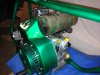
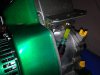
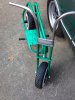
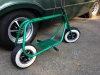
Ordered Duplicolor green metal cast for the bike. I ordered two cans and should have got three, as this is harder to lay on than the red metal cast I used on Son of Furball. So, I'll need to order a couple more cans to finish the chain guard and fenders. The recoil starter was masked with card stock and I used a short piece of clear fuel line to get the handle away from the housing. The blower housing and recoil starter are painted to match the frame. I need to color sand in the morning and then apply Eastwood 2K. So far, so good.
 

Attachments

#63
Cool build goin on. I gotta paint mine soon. Gonna go with an orange, not sure what yet though. Paint the wheels a silver or gray color.
 
#67
Assembled Engine....

I put on Eastwood 2K gloss this morning and cured it using heat lamps. The frame, forks, recoil and blower housing got done today. Fenders and clutch guard have to wait until I get more green metalcast. I used 1/4" steel axle caps to plug the 3/8" holes in the starter. I polished them lightly and clear coated with wheel clear by Duplicolor. The recoil is connected to the blower housing using 10-24 x 1/2 machine screws with nylon lock nuts. I put the nuts out to mimic the wheels. I disassembled the throttle control and polished it as best I could. The POS OH60 came with an aftermarket 50mm air cleaner adapter. I was able to find ATV air filters that fit at 2 for $10 on e-Bay. I had previously removed the casting flash from the intake and polished it. Still to do is the governor linkage and order the exhaust header for Robertson Torque Tubes. I installed a fuel shut off (right angle) to make the universal fuel line work.
 

Attachments

#68
Working toward a roller....

I cleaned the handlebars yesterday and still have more work to do to get them as shiny as I can. The spring was pretty rusty but I was able to use the wire wheel to clean it up then steel wooled it. So, after the engine got buttoned up I got started on assembling the bike. I had to make a spring compressor out of a threaded rod to get the spring compressed enough to put the front fork on. You'll see the the spring is compressed a bit. This took a long time to get done because the nut just fit inside the fork tube--I had to wrench it up. Put a new sprocket from OldMiniBikes along with Rockford Chibi peg rubbers ($15 on e-bay). Still have to clean up the kick stand before it gets installed.
 

Attachments

#71
Looks good! Any idea where I can get foot pegs like those? I'd rather have those than the metal rod style which could throw me off the bike if I corner too low.
 
#75
Handlebar Decal Idea

Came up with this idea while I was suffering through another football game last night. I, by the way, am a football widower. If it's not the Giants or Virginia Tech, I couldn't care less... Let me know what you think.
 

Attachments

#78
Oops! A little engine trouble.

I knew I was going to be close and the engine with the stock tank ended up being 3/8" too high. So, I had a vintage tank laying around that I used to mock up a new fuel tank set up. I adapted a bracket that I picked up at Home Depot, and shaped it a bit so it wasn't so square. I think this is going to be a cool blend of old and new.
 

Attachments

#79
Side View Mock-up

It does look a little sinister. I ordered the torque tube today from Robertson's (they have to make it up), so it'll be next week at the earliest before I can fit the header. Still have the brake to do, kickstand, etc.
 

Attachments

Top